How to Prune Urn plant?
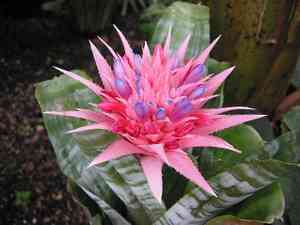
Celebrated for its expansive, silvery-green striped foliage and prominent pink floral structures, the urn plant illuminates interior environments. Remove spent blossoms and lifeless or injured leaves at their origin to foster well-being and visual appeal. Undertake minor trimming at any point, given that the urn plant withstands reduction in all seasons. Trimming after blooming enhances development, and offsets might emerge. Primary advantages encompass preserving form, averting ailments, and stimulating robust new development. Employ sanitized, keen implements to avert contamination and guarantee precise incisions.
What Are the Benefits of Pruning Urn Plant?
What Are the Benefits of Pruning Urn Plant?
Trimming urn plant promotes more abundant flowering, stimulates vigorous development, and preserves its desired urn-like form. This method also helps revitalize the plant, ensuring its beauty and strength.
What Is the Best Time for Pruning Urn Plant?
What Is the Best Time for Pruning Urn Plant?
Trimming urn plant from late winter to early spring coincides with its post-flowering phase, ensuring minimal stress and optimal recovery. This timing lessens the impact on blooming, as urn plant typically flowers in summer. Pruning after flowering allows for the removal of spent blooms and encourages healthy growth in preparation for the next cycle. Trimming at the end of dormancy also gives urn plant time to heal from cuts before its active growth period, enhancing its health and vitality.
What Tools Do I Need to Prune Urn Plant?
Sharp Scissors or Snips
Perfect for making clean cuts on urn plant's leaves without harming the plant. They are precise enough to trim brown or dead leaf tips and remove faded flowers.
Tweezers or Small Tongs
Useful for removing dead or dying leaves from the rosette of urn plant, especially in tight spots, without disturbing the healthy parts of the plant.
Rubbing Alcohol or Disinfectant
Essential for sanitizing cutting tools before and after use to prevent the spread of disease among urn plant or to other plants.
Gloves
Offer protection when handling urn plant, which may have sharp leaf edges that can cause cuts or skin irritation.
How to Prune Urn Plant
Step1: Tool Preparation and Sterilization
Gather the necessary pruning tools, such as sharp, clean scissors or pruning shears. Sanitize the blades with rubbing alcohol to prevent disease transmission between plants.
Step2: Identifying Dead or Dying Leaves
Locate dead or dying leaves on urn plant. These leaves typically appear brown, yellowed, or dried out, and are often found lower on the plant where light is scarce.
Step3: Precision Cutting of Dead Foliage
Carefully choose the spot where you will trim the dead leaves. Make the cut as close as possible to the base of the leaf where it emerges from the central rosette, without harming the healthy surrounding foliage.
Step4: Timing for Flower Stalk Pruning
For withered flowers, wait until the flower stalk is completely dry and brown before pruning. Flowers require significant energy from urn plant, and premature removal may stress the plant.
Step5: Removing Wilted Flower Stalks
Cut the withered flower stalks at their base where they emerge from the central rosette of urn plant, similar to pruning dead leaves. Ensure the cut is clean and minimizes damage to the main plant.
Step6: Shaping Plant by Side Shoot Removal
Shape urn plant by removing any side shoots or pups that are overcrowding the central rosette if you prefer a singular appearance. Note that these pups can be left to grow if you desire a clumped look or wish to propagate new plants.
Step7: Disposal of Pruning Debris
Safely discard all trimmed materials to prevent the spread of pests or diseases that might be present on the dead leaves or withered flowers.
Step8: Post-Pruning Tool Cleaning
Clean the pruning tools again with rubbing alcohol after you have finished pruning urn plant to maintain tool hygiene and readiness for future use.
Step9: Post-Pruning Plant Health Monitoring
Monitor urn plant after pruning for signs of stress or disease, and provide appropriate care including regular watering and indirect light to facilitate a robust recovery and continued growth.
Post-Pruning Care for Urn Plant
Post-Pruning Care for Urn Plant
After trimming urn plant, immediately ensure clean cuts to prevent infection. Place urn plant in indirect but bright light, maintain humidity at 50-60%, and stable temperatures around 60-70°F. Resume fertilization with a balanced, water-soluble fertilizer after one month to aid recovery. Observe urn plant for yellowing leaves or rot, indicative of stress or infection. In such cases, adjust care and consult a horticulturist. Consistent post-pruning attention supports urn plant's health and vitality.
Common Pruning Mistakes with Urn Plant
Avoid Pruning Living Flower Spike During Bloom
Trimming the live central flower spike of urn plant during its blooming cycle can prematurely end the flowering process.
Do Not Overprune Green Foliage
Removing too much of the green foliage, which can stress urn plant and hinder its ability to photosynthesize effectively.
Be Careful Not to Damage Central Tank
Cutting back foliage too close to the central tank may lead to accidental damage to the plant's core, risking rot or disease.
Use Sharp, Clean Pruning Tools
Using dull or dirty pruning tools that can make imprecise cuts or introduce pathogens to urn plant.
Common Pruning Tips for Urn Plant
Remove Dead Flower Spike at Base Post-Bloom
Wait until the flower spike has died before removing it at the base to prevent harming urn plant's future growth.
Prune Dead Leaves at Base, Avoid Healthy Tissue
Trim dead or damaged leaves at their base, but do not cut into the healthy tissue, to maintain urn plant's aesthetic and health.
Sterilize Tools to Prevent Disease Spread
Sanitize cutting tools before and after use to prevent spreading diseases to or from urn plant.
Detach 'Pups' at One-Third Size of Parent Plant
Remove any small offshoots or 'pups' at the base once they are one-third the size of urn plant, to encourage them to grow into new plants.
Wear Gloves, Use Sharp Clean Shears
Wear gloves to protect hands from urn plant's sharp edges and use appropriate tools, such as sharp, clean shears or scissors.


