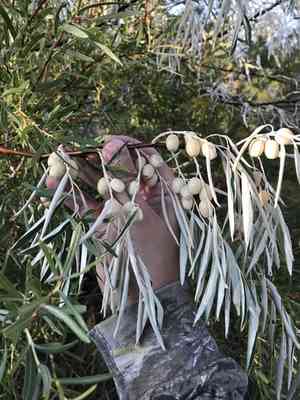
How to Transplant Russian olive?
The most favorable period for relocating russian olive is from the beginning to the middle of summer, as this is when the plant readily takes root. Select a bright spot with soil that drains effectively to ensure a successful transfer. Bear in mind that a delicate approach when managing the root system can enhance the outcome.
What Preparations are Needed Before Transplanting Russian Olive?
What is the Ideal Time for Transplanting Russian Olive?
For russian olive, the optimal period for relocation spans from early summer to mid-season. This timeframe provides ample warmth and extended daylight, crucial for root development. Moving russian olive during this window promotes rapid growth and a higher success rate, giving your garden a head start. A friendly reminder: prepare the new planting site in advance!
How Much Space Should You Leave Between Russian Olive Plants?
When relocating russian olive, ensure ample spacing for these rapidly growing plants. Aim for a distance of 6-10 ft (1.8-3 m) between each specimen. This will guarantee sufficient room for their development and flourishing.
What is the Best Soil Mix for Russian Olive Transplanting?
To facilitate the flourishing of russian olive, prepare a well-draining soil with a light, loamy consistency. For a nutrient-rich foundation, incorporate a slow-release, balanced fertilizer, such as 10-10-10, adhering to the product's instructions.
Where Should You Relocate Your Russian Olive?
For optimal growth outcomes, transplant your russian olive to a location receiving full sun to partial shade. A minimum of 6 hours of daily sunlight will aid in their vigorous development, producing abundant foliage and fragrant blooms.
What Equipments Should You Prepare Before Transplantation Russian Olive?
Gardening Gloves
These will safeguard your hands while handling the plant and soil.
Spade or Shovel
You'll require this for excavating the hole for the russian olive and extracting its root ball from its original spot.
Wheelbarrow
Useful for transporting the russian olive plant from its initial position to the new planting area.
Watering Can or Hose
You need it to maintain the plant's hydration during the transplanting process.
Mulch
This is necessary after transplantation to help retain soil moisture around the plant.
How Do You Remove Russian Olive from the Soil?
How Do You Remove Russian Olive from the Soil?
From Ground: Ensure to hydrate the russian olive plant the day prior to transplanting. This will make the soil moist and easier to manage. Using your shovel or spade, dig a wide trench around the plant. Attempt to extract as much of the root ball as possible, without causing excessive damage. Carefully work the spade beneath the root ball and lift the plant out.From Pot: Begin by watering the russian olive plant in its container. Grasp the base of the plant and invert the pot. Gently tap to dislodge it from the pot. Be cautious to support the root ball throughout this procedure.Seedling Tray: Water the seedling tray before commencing. Push up from the bottom of the seedling cell or gently compress the sides to loosen the soil and plant. Always hold the russian olive plant by its root ball, not by its stem or leaves.
Step-by-Step Guide for Transplanting Russian Olive
Preparation
Submerge the root ball of the russian olive in water while you prepare the planting site. The water will assist in minimizing transplant shock.
Dig a Hole
Utilize your spade or shovel to excavate a hole that is twice the width of the root ball and equally deep.
Placement
Position the russian olive plant in the hole, ensuring it stands perfectly upright. The top of the root ball should be level with the soil surface.
Backfill
Refill the hole with the excavated soil. Do not compact it too tightly; gently press the soil down around the base of the plant.
Water
Thoroughly water the russian olive plant after you've transplanted it. Ensure the water reaches the root zone to properly establish the plant.
Mulch
Apply a 2-3 inch layer of mulch around the russian olive to help retain soil moisture. Leave a small gap without mulch close to the stem to prevent rot.
How Do You Care For Russian Olive After Transplanting?
Check the Moisture
Keep the plant well hydrated, especially during the initial weeks post-transplant. However, avoid overly saturated soil to prevent root rot.
Weeds
Remove any weeds that emerge around the russian olive plant after transplanting, before they can establish themselves. Weeds can compete with the plant for water and nutrients.
Monitor
Closely observe the russian olive plant for the first few weeks. If it exhibits signs of wilting, ensure it receives adequate water and is not suffering from disease or pest infestation.
Pruning
Any branches or leaves that show dieback after transplanting can be trimmed. This allows the plant to redirect its energy towards new growth.
Troubleshooting Common Issues with Russian Olive Transplantation.
What is the best time of the year to transplant my russian olive?
Your russian olive will thrive if you transplant it between the early and middle parts of summer.
How much space is required between russian olive plants during transplantation?
Sufficient space is crucial! Aim for a gap of 6-10 ft (1.8-3.05m), which is ideal for russian olive.
How can I ensure the root structure of the russian olive isn't damaged during transplanting?
When transplanting, be gentle! Try to keep as much of the original soil around the root ball as possible.
What should I do if my transplanted russian olive isn't showing new growth?
Stay calm, it might be adjusting! But always make sure it's getting enough sun and water.
Should I water the russian olive immediately after transplanting it?
Absolutely! Moisture helps the roots establish. Water your russian olive thoroughly right after transplanting it.
Is it necessary to stake the russian olive after transplanting it?
If your russian olive is large or if there are strong winds in your area, staking can help it establish faster.
How can I help my transplanted russian olive adapt to its new habitat quickly?
Just like people, russian olive love care. Pay attention to its sunlight, soil and water needs. It should adapt in no time!
Do I need to condition the soil before transplanting my russian olive?
Definitely! Add a slow-release fertilizer to the planting hole to encourage your russian olive's health and growth.
Why are the leaves of my transplanted russian olive turning yellow?
Your russian olive could be waterlogged or starving for nutrients. Ensure proper drainage and consider using a nutrient-rich fertilizer.
What should the ideal depth be when transplanting my russian olive?
The hole should be just deep enough to cover the root ball completely. Typically, about 10 inches (25 cm) is sufficient.


