How to Prune Russian olive?
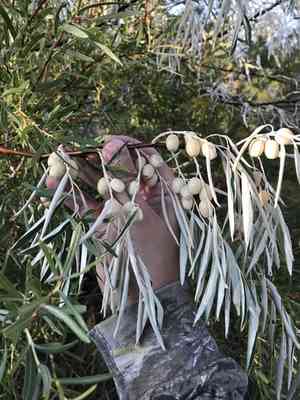
Originating from Eurasia, Elaeagnus angustifolia is recognized for its silver-hued leaves and resilience to arid conditions. Trimming should prioritize the elimination of lifeless or ailing branches, sculpting for visual attractiveness or size regulation, and fostering air circulation. The most suitable period for pruning is early spring, prior to the emergence of new shoots. Given its robust growth, Elaeagnus angustifolia responds favorably to pruning, which also aids in controlling its spread in regions where it is not indigenous. Execute pruning with care to preserve the plant's inherent structure and guarantee its well-being.
What Are the Benefits of Pruning Russian Olive?
What Are the Benefits of Pruning Russian Olive?
Trimming russian olive promotes robust development and helps maintain its desired form. Regular cutting eliminates dead or weak branches, fostering a strong framework and enhancing the plant's aesthetic appeal.
What Is the Best Time for Pruning Russian Olive?
What Is the Best Time for Pruning Russian Olive?
Pruning russian olive in early spring allows it to recover from cuts before its active growth period, reducing disease risk. It also aids in preserving the plant's preferred shape and size without affecting the current year's growth and ensures that pruning doesn't interfere with blooming or fruiting, as russian olive flowers on old wood.
What Tools Do I Need to Prune Russian Olive?
Hand Pruners
Perfect for making accurate cuts on russian olive's smaller branches (up to 3/4 inch in diameter). They assist in maintaining the plant's shape and removing any diseased or damaged wood.
Lopping Shears
Suitable for cutting through thicker branches of russian olive (up to about 1 1/2 inches in diameter). Their extended handles offer leverage for clean cuts without user strain.
Pruning Saw
Essential for removing russian olive's largest branches (over 1 1/2 inches in diameter). A saw with a curved blade will be especially effective for making clean cuts through dense wood.
Hedge Shears
Useful for shaping and managing the growth of russian olive when cultivated as a hedge. These enable quick, uniform trimming of foliage.
Pole Pruner
Crucial for reaching russian olive's higher branches without needing a ladder. This tool can typically cut branches up to 1 1/4 inches in diameter from the ground.
Gloves
Protective gear to prevent injuries from russian olive's thorns or rough bark during the trimming process.
How to Prune Russian Olive
Step1: Timing for Pruning
Determine the optimal time to prune russian olive, which is late winter or early spring before new growth starts. This timing helps prevent disease and allows for clear visibility of the plant's structure due to leafless branches.
Step2: Tool Sterilization
Sanitize your pruning tools with a solution of 1 part bleach to 9 parts water to prevent the spread of diseases among plants.
Step3: Removing Dead Wood
Start by removing any dead wood. Make cuts at a 45-degree angle, approximately 1/4 inch above a healthy bud or branch junction, ensuring not to harm the bud. This allows water to drain and promotes healthy new growth.
Step4: Cutting Diseased Leaves
Next, identify discolored leaves that may indicate disease or damage. Prune these leaves individually, cutting them at their base where they meet the stem or larger branch, to encourage healthy foliage.
Step5: Deadheading Spent Flowers
Locate old flowers on russian olive. To encourage more vigorous growth and blooming next season, carefully remove the spent flowers just above the first set of full, healthy leaves.
Step6: Thinning Branches
While pruning, also thin out some of the live branches to enhance light penetration and air circulation. This is especially vital for russian olive, which can become overly dense and hinder its own growth if not managed.
Step7: Natural Shaping of Plant
When shaping russian olive, aim for a natural-looking form, remembering that this species is known for its loose, sprawling habit. Avoid excessive pruning, as this can stress the plant and result in an unnatural appearance.
Step8: Clean Up Debris
After pruning, clear away all debris from around the base of russian olive to deter pests and diseases.
Step9: Post-Pruning Care
Finally, water the plant thoroughly and apply a layer of mulch around the base to retain moisture and provide nutrients as the russian olive recovers from pruning.
Post-Pruning Care for Russian Olive
Post-Pruning Care for Russian Olive
After trimming russian olive, immediately water the plant deeply to alleviate stress. Position russian olive for optimal light exposure, maintaining moderate humidity, and avoid extreme temperatures. Fertilize with a balanced slow-release formula to encourage growth. Monitor for wilting leaves, die-back, or signs of infection, and apply a fungicide if necessary. Regular inspection aids swift identification of stress, facilitating timely interventions for russian olive's healthy recovery.
Common Pruning Mistakes with Russian Olive
Neglecting Damaged/Diseased Branches
Ignoring diseased or damaged branches, potentially leading to disease spread or further harm to russian olive.
Over-Pruning in a Single Session
Removing too much at once, which can stress russian olive and result in weak growth or poor health.
Using Dull or Dirty Pruning Tools
Employing dull or unclean pruning tools, which can cause jagged cuts more susceptible to disease and pests.
Disregarding Plant's Natural Shape
Pruning without considering the natural form and structure of russian olive, which can lead to an unbalanced and unattractive appearance.
Improper Cut Placement
Making cuts too close to the main stem or too far from the bud, either of which can hinder proper healing and regrowth.
Tearing Branches Instead of Clean Cutting
Ripping or tearing branches instead of making clean cuts, which damages plant tissue and impedes russian olive's recovery.
Common Pruning Tips for Russian Olive
Use Sharp, Clean Tools for Precise Cuts
Always use sharp, clean pruning tools to make precise cuts, thereby minimizing damage and the risk of disease for russian olive.
Prune According to Plant's Natural Form
Follow the natural shape of russian olive when pruning to maintain its aesthetic appearance and structural integrity.
Promptly Remove Unhealthy Branches
Remove diseased, dead, or damaged branches as soon as they are noticed to prevent the spread of disease and pests.
Make Cuts Above Buds for Healthy Growth
Cut just above a leaf node or bud to encourage russian olive to produce new, healthy growth in the desired direction.
Thin to Improve Air and Light Flow
Thin out overcrowded areas to improve air circulation and light penetration, which are essential for the overall health of russian olive.
Adhere to 'One-Third' Pruning Rule
Follow the 'one-third' rule by never removing more than one-third of the living tissue in a pruning session to prevent over-stressing russian olive.


