Boost Growth: How and When to Repot Your Selloum Plant
1
The best periods for repotting Selloum are during spring or fall.
2
Transplanting aids in avoiding root congestion and encourages robust development.
3
Selloum thrives in airy, well-draining soil enriched with organic material.
The Importance of Repotting Selloum
Understanding Selloum's Growth Pattern
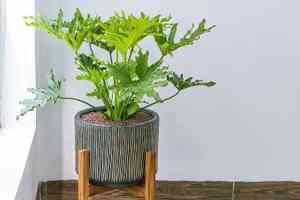
The Selloum, also known as Philodendron bipinnatifidum, is a vibrant, large-leafed plant that grows robustly when conditions are right. As it matures, its root structure can become quite extensive, outgrowing its initial container. Without adequate room, the plant may experience stunted development, making regular repotting crucial to provide sufficient space for root expansion.
Indicators Your Selloum Requires a New Container
Recognizing when to rehouse your Selloum is vital. Common indicators include roots emerging from drainage holes, the plant becoming top-heavy, or diminished growth despite optimal care. Furthermore, if the soil dries out quickly after watering, it might suggest that roots have filled most of the pot, leaving minimal space for soil to retain moisture.
Advantages of Prompt Repotting
Promptly repotting your Selloum offers several benefits. It alleviates root-bound conditions, ensuring your plant has the necessary room to efficiently absorb water and nutrients. Moreover, fresh soil introduced during repotting provides essential nutrients that enhance the plant's health and encourage vigorous growth. Overall, consistent repotting helps maintain a healthy and vibrant Selloum.
Selecting the Right Pot and Growing Medium for Selloum
Choosing the Optimal Pot Size and Material
Selecting the appropriate pot is critical for your Selloum's well-being. Choose a container that is 2 to 5 centimeters (1 to 2 inches) larger in diameter than its current one to prevent the plant from becoming root-bound too quickly. Pots made from materials like terracotta, which allow for good air exchange, are ideal. However, ensure the pot has sufficient drainage holes to prevent water accumulation.
Ideal Soil Blend for Selloum
The Selloum flourishes in loose, well-draining soil rich in organic matter. A mixture consisting of approximately three parts potting soil, one part perlite or sand, and one part peat moss is perfect. This combination ensures proper drainage and aeration while retaining the necessary moisture for the plant.
Key Soil Enhancements for Robust Growth
Incorporating soil amendments such as compost or worm castings can significantly boost your Selloum's growth. These organic materials improve soil fertility and offer a slow-release source of vital nutrients. Additionally, adding a layer of mulch on top can help retain moisture and keep the roots cool, especially during warmer periods.
Detailed Guide to Repotting Selloum
Preparing Your Work Area and Supplies
Before commencing the repotting process, prepare your workspace. Lay down newspapers or a tarp to catch any spilled soil. Gather all required materials, including a new pot, fresh soil mix, and any tools like a trowel or scissors for root trimming. Having everything ready will make the process smoother and less messy.
Extracting Selloum from Its Current Container
Carefully remove your Selloum from its current pot by gently tilting the pot sideways and supporting the plant at its base. If it's firmly lodged, you can run a knife along the pot's inner edge to loosen the soil. Be gentle to avoid damaging the roots.
Evaluating and Trimming the Root System
Once the plant is out, examine its roots. Healthy roots are white or light tan and spread evenly. Trim any black, mushy, or excessively long roots to stimulate new growth. If the roots are densely packed, gently separate them to help them settle into the new soil.
Positioning Selloum in the New Pot
Add a layer of fresh soil mix to the bottom of the new pot. Place the Selloum in the center, ensuring that the top of the root ball is approximately 2.5 centimeters (1 inch) below the pot's rim. Fill in with soil around the sides, pressing down gently to eliminate air pockets.
Concluding Steps: Watering and Placement
After repotting, thoroughly water your Selloum to help settle the soil and minimize transplant shock. Position the pot in a spot with bright, indirect light. Initially, avoid direct sunlight as the plant adapts to its new surroundings. Monitor soil moisture and refrain from overwatering during the first few weeks.
Post-Repotting Care: Ensuring Selloum's Smooth Adjustment
Initial Period After Repotting: What to Expect
In the first few days after repotting, your Selloum might show signs of stress, such as drooping leaves or slower growth. This is normal and usually temporary. Ensure the plant is not exposed to extreme temperatures or direct sunlight. Keep the soil consistently moist but not waterlogged.
Long-Term Care Advice for a Flourishing Selloum
For sustained growth, continue with regular watering, allowing the top layer of soil to dry out between sessions. Fertilize your Selloum monthly during the growing season with a balanced, water-soluble fertilizer. Periodically wipe dust from the leaves to ensure optimal photosynthesis. With proper care, your Selloum will thrive and become a stunning addition to your indoor or outdoor space.



