How to Transplant White deadnettle?
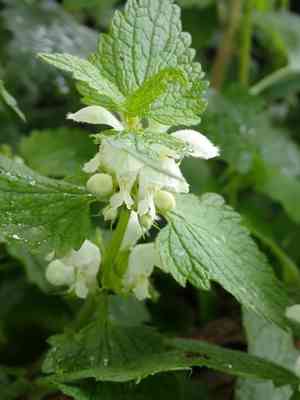
Relocate white deadnettle when the climate is milder, from mid-spring to early summer, as the ground is adequately warm to support root development. Select a location with partial shade and rich, damp earth, mimicking its native forest environment. This period and placement facilitate strong rooting.
What Preparations are Needed Before Transplanting White Deadnettle?
What is the Ideal Time for Transplanting White Deadnettle?
The best times for moving white deadnettle are from late spring's beginning to early summer's warmth. This period offers white deadnettle mild temperatures and ample sunlight, promoting robust root development. Transplanting during this window ensures your white deadnettle avoids the stress of mid-summer heat, while benefiting from the seasonâs growth momentum. Make sure to move white deadnettle when soil moisture levels are optimal for seamless root adaptation to its new environment.
How Much Space Should You Leave Between White Deadnettle Plants?
When relocating your white deadnettle, remember to provide ample room for growth and flourishing! A good guideline is to maintain about 1-2 feet (30-60 cm) between each plant. This will give your white deadnettle sufficient space to expand and thrive.
What is the Best Soil Mix for White Deadnettle Transplanting?
For your white deadnettle, a rich, well-draining soil is most suitable. Always enrich the ground with a foundational fertilizer before planting to give your white deadnettle a nutrient-rich start. Opt for organic compost; it's an excellent choice for supplying your plant with the necessary sustenance.
Where Should You Relocate Your White Deadnettle?
Your white deadnettle appreciates some sun but should be situated in a partially shaded area. Ideally, find a spot where it will receive a mix of sun and shade throughout the day. This will ensure your white deadnettle develops beautifully and continues to grow strong!
What Equipments Should You Prepare Before Transplantation White Deadnettle?
Gardening Gloves
These will protect your hands from injury or dirt while working with soil and plants.
Shovel or Spade
This tool will assist in digging the ground at both the original and new locations.
Garden Trowel
This implement will aid in excavating small holes and making precise adjustments at the base of the planting hole.
Hand Pruner
This will be utilized to trim the white deadnettle before transplanting, if necessary.
Garden Hose or Watering Can
For hydrating the plants before and after their relocation.
Buckets or Garden Cart
For transporting larger plants or numerous young seedlings.
How Do You Remove White Deadnettle from the Soil?
How Do You Remove White Deadnettle from the Soil?
From Ground: To extract white deadnettle from the ground, first thoroughly moisten the plant. This will soften the soil, making it easier to manage. Then, using a garden spade or shovel, dig a wide circle around the plant, being careful not to sever the roots. Gently lift the plant from the hole, retaining as much soil around the roots as possible.From Pot: If white deadnettle is in a pot, water it thoroughly first. Invert the pot and tap the rim on a firm surface to dislodge the plant. If the plant doesn't slide out easily, run a knife along the pot's interior to loosen the soil and roots.From Seedling Tray: To remove white deadnettle from a seedling tray, water the tray first. Then gently push the plant up from the cell's bottom or use a spoon to lift it out, taking care not to harm the roots or stems.
Step-by-Step Guide for Transplanting White Deadnettle
Preparation
Before relocating, ensure the new site is prepared. The hole should be twice as wide and as deep as the root ball of white deadnettle.
Lowering the Plant
Place white deadnettle into the hole, making sure it sits at the same depth as its previous spot. The top of the root ball should be level with the surrounding ground.
Backfilling
Refill the hole, packing soil around the plant. Gently firm the soil with your hands, but avoid excessive compaction.
Watering
Immediately after transplanting, thoroughly water the white deadnettle to settle the soil around its roots and help the plant establish in its new location.
How Do You Care For White Deadnettle After Transplanting?
Monitoring
Inspect the white deadnettle regularly for the initial weeks post-transplant. Look for signs of stress such as wilting or yellowing leaves. If observed, the plant may require more water or shade.
Pruning
If the white deadnettle experienced significant disruption during transplanting, a light trim might be beneficial to reduce its water and energy demands.
Mulching
Applying a layer of mulch around white deadnettle can help regulate soil temperature, retain moisture, and suppress weeds. Select a mulch appropriate for your plant and local conditions.
Troubleshooting Common Issues with White Deadnettle Transplantation.
When is the best time to transplant white deadnettle?
Relocate white deadnettle between late spring and early fall (Season 2 to Season 4). This aids in the plant's strong establishment before the first frost.
What's the appropriate space for white deadnettle when transplanting?
Plan to position white deadnettle approximately 1 to 2 feet (30 to 60 cm) apart. This adequate spacing encourages healthy growth by allowing for proper air circulation.
Why is my white deadnettle not blooming after transplantation?
White deadnettle may need time to recover from the stress of transplantation. Proper watering, sufficient sunlight, and patience will help your plant to flower.
How can I reduce shock to white deadnettle during transplantation?
Minimize transplant shock by keeping a generous amount of soil around the roots during the move. Lightly prune the plant before transplanting and ensure it is well-watered afterward.
What kind of soil is best for transplanting white deadnettle?
White deadnettle thrives in fertile and well-drained soil. It also appreciates some moisture, so incorporating compost or well-rotted manure would be beneficial.
Does white deadnettle need a big container for transplantation?
The container size depends on white deadnettle's current dimensions. Choose a pot that is 2 inches (5 cm) larger than its present one to accommodate growth.
What precautions should I take while transplanting white deadnettle?
During transplantation, avoid pressing the soil too firmly as this can hinder white deadnettle from spreading its roots. Also, do not bury the stem beneath the soil.
Is watering necessary immediately after transplanting white deadnettle?
Absolutely! Water white deadnettle thoroughly right after transplanting. This helps settle the soil around the roots, lessens transplant shock, and aids in faster establishment.
Why do the leaves of my white deadnettle look wilted after transplantation?
Wilting post-transplantation can indicate transplant shock. Keep white deadnettle adequately watered, but prevent waterlogging. If wilting persists, check for root diseases.
Does white deadnettle need direct sunlight after being transplanted?
White deadnettle can tolerate various light conditions. However, a location with partial shade would be ideal after transplanting to prevent sunburn while the plant adjusts.



