How to Prune Red elderberry?
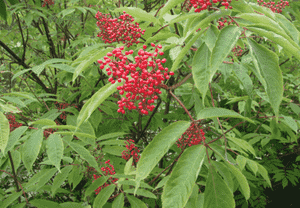
Distinguished by its vibrant crimson berries and cone-shaped floral groupings, red elderberry thrives with appropriate care. Essential trimming methods involve eliminating deceased or fractured limbs, sculpting to foster air circulation, and reducing density to avert congestion. The most effective time for pruning is in early spring, coinciding with red elderberry's developmental phase and before the emergence of new buds. Pruning boosts plant robustness and berry yield, which is vital for supporting local fauna. A particular point to remember: refrain from over-trimming to preserve its inherent shape and well-being.
What Are the Benefits of Pruning Red Elderberry?
What Are the Benefits of Pruning Red Elderberry?
Trimming red elderberry promotes robust development and helps maintain its desired form. By cutting back overgrown branches, gardeners can foster a more vigorous plant with a neat, visually appealing shape.
What Is the Best Time for Pruning Red Elderberry?
What Is the Best Time for Pruning Red Elderberry?
Trimming red elderberry in early spring is beneficial as it allows gardeners to remove any dead or damaged branches before the plant enters its active growth phase. This timing encourages healthier growth and ensures that the plant's energy is directed towards producing new, viable shoots. Furthermore, pruning before leaf-out offers better visibility, making it simpler to shape the plant and execute precise cuts. It also prevents cutting off flower buds, which develop on old wood, ensuring that the flowering and fruiting potential is not compromised for the upcoming season. This careful timing aligns with red elderberry's growth cycle and helps sustain its health and vigor.
What Tools Do I Need to Prune Red Elderberry?
Hand Pruners
For the smaller branches and stems of red elderberry, hand pruners are ideal. They allow for precise cuts and can handle stems up to 3/4 inches in diameter, which is suitable for red elderberry's relatively thin woody branches.
Loppers
Red elderberry can sometimes develop thicker stems that require tools with more leverage. Loppers, with their long handles, can give that necessary leverage and can cut branches of up to 1 1/2 inches in diameter.
Pruning Saw
When red elderberry has mature stems thicker than what hand pruners and loppers can handle, a pruning saw is the next tool to reach for. They are designed to cut branches over 1 1/2 inches thick with ease.
Pole Pruner
Due to the height that red elderberry can achieve, pole pruners may be used for cutting higher branches without the use of a ladder. This adds a level of safety to the pruning process.
Pruning Shears
For shaping red elderberry and managing its foliage, pruning shears are appropriate. They provide the dexterity necessary for thinning out clusters of small stems and leaves.
How to Prune Red Elderberry
Step1: Assessing Plant for Pruning
Examine red elderberry for any lifeless, diseased, or compromised branches that require trimming. This is best done in late winter to early spring before new growth begins, as red elderberry is a deciduous shrub and easier to work with when leafless.
Step2: Sterilizing Pruning Tools
Sanitize pruning tools before starting and between cuts if working on diseased material to prevent spreading pathogens. Use a 10% bleach solution or alcohol to sterilize the blades.
Step3: Removing Dead Branches
Begin by removing any dead branches. Make clean cuts just above a healthy bud or set of buds, angled away from the bud to allow water to run off and not puddle by the cut, which could lead to rot.
Step4: Pruning Diseased Branches
Identify and remove diseased branches next, cutting well below the affected areas to ensure all diseased tissue is removed. Dispose of these appropriately to avoid contamination. Do not compost these parts.
Step5: Cutting Back Damaged Branches
Trim damaged branches, cutting back to a healthy section. If the damage is at the end of a branch, prune back to a lateral branch or bud. Ensuring clean cuts here can prevent pests and diseases from entering.
Step6: Shaping for Air Circulation
After addressing the 3 D's - dead, diseased, and damaged - evaluate red elderberry for its shape. Prune for an open center to promote air circulation and light penetration, making angled cuts to encourage outward growth.
Step7: Thinning Overcrowded Branches
Thin out over-crowded areas to ensure adequate room for branches to grow. This helps reduce the risk of disease and improves the overall health and aesthetic of red elderberry.
Step8: Finalize with Clean Cuts
Review your work and clean up any jagged or stub cuts that could harm red elderberry. The goal is to have all cuts clean and smooth to promote rapid healing.
Step9: Cleanup Pruning Debris
Clear away all pruning debris from around red elderberry to discourage pests and diseases. Properly dispose of or compost the plant material as long as it's not diseased.
Step10: Post-Pruning Care
Water red elderberry thoroughly after pruning to reduce stress and aid recovery, and apply a layer of mulch around the base without touching the trunk to retain moisture and regulate soil temperature.
Post-Pruning Care for Red Elderberry
Post-Pruning Care for Red Elderberry
After trimming red elderberry, immediately water the plant to reduce stress and aid recovery. Maintain consistent soil moisture without waterlogging. Place red elderberry in partial to full sunlight, ensuring adequate light without excessive heat. Regulate humidity and protect from extreme temperatures. Apply a balanced, slow-release fertilizer to replenish nutrients. Regularly inspect for signs of distress, such as discoloration or wilting. If symptoms of infection occur, promptly apply appropriate fungicides or insecticides. Monitor growth closely, adjusting care as necessary to promote healthy regrowth.
Common Pruning Mistakes with Red Elderberry
Over-pruning leading to plant stress
Excessive pruning, which involves removing too much of red elderberry's growth, can lead to weak and sparse development. Trimming more than one-third of the plant can stress red elderberry and hinder its ability to thrive.
Damaging plants using dull or dirty tools
Using dull or unclean tools can damage red elderberry's stems, leading to jagged cuts that are more susceptible to disease and pests. Proper tool maintenance is essential to ensure clean cuts that heal properly.
Ignoring dead or diseased wood removal
Neglecting to remove dead, diseased, or damaged wood as a part of the pruning process can leave red elderberry vulnerable to further decline and inhibit its vigor and bloom potential.
Common Pruning Tips for Red Elderberry
Angle cuts for healthy growth and rot prevention
Make pruning cuts at a 45-degree angle about 1/4 inch above a bud that faces the outside of the plant. This encourages outward growth and prevents water from collecting on the cut surface, which can lead to rot.
Thinning for better light and air circulation
Thin out the center of red elderberry to allow light and air circulation, which promotes healthy foliage and reduces the risk of fungal infections. Remove any crossing branches that may rub together and cause wounds.
Post-bloom shaping to preserve future flowers
Focus on shaping red elderberry immediately after flowering to prevent cutting off next season's buds. Since red elderberry blooms on old wood, selective pruning right after bloom ensures that you preserve as many of the following year's flowers as possible.



