How to Propagate Red elderberry?
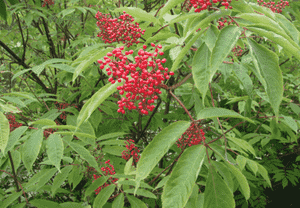
Red elderberry is most effectively propagated in the fall or winter months through the use of cuttings and layering methods. This plant presents a moderate challenge for propagation, with successful outcomes evidenced by the emergence of new shoots. During the propagation process, it is crucial to maintain ideal soil dampness and temperature to achieve superior results.
Optimal Time for Red Elderberry Propagation
Propagation Type
Cutting
Propagation Season
Autumn,Winter
Tools for Red Elderberry Propagation
Sharp Pruning Shears
Crucial for taking cuttings, sharp shears ensure clean cuts that don't crush the stem tissue of red elderberry. This promotes healthy callus formation and lowers infection risk.
Rooting Hormone Powder or Gel
Facilitates root development when red elderberry cuttings are planted. The correct concentration encourages root initiation at the cut end, boosting propagation success.
Sterilizing Agent (e.g., Isopropyl Alcohol)
Used to sanitize pruning shears and other tools, sterilizing agents help prevent disease spread during propagation. Sterile tools are vital for red elderberry health.
Propagating Tray
Offers an ideal environment for cuttings to root. The tray maintains consistent moisture and proper aeration, both essential for red elderberry root growth.
Misting System or Spray Bottle
Ensures red elderberry cuttings maintain adequate humidity during root formation. Sufficient humidity minimizes water loss from leaves and stems, aiding successful root growth.
Soilless Potting Mix
A soilless blend provides a sterile, well-draining medium that supports new root growth without the threat of soil-borne pathogens affecting red elderberry.
Heat Mat
Provides gentle, consistent bottom warmth that encourages root growth for red elderberry cuttings. Stable temperatures contribute to faster root initiation.
Caring for Newly Propagated Red Elderberry
Caring for Newly Propagated Red Elderberry
After successful propagation, gradually acclimate red elderberry by reducing humidity over a week before moving them outdoors. Keep soil consistently moist (but not waterlogged). Select a location with partial shade to full sun and well-draining soil. Prune red elderberry to encourage branching and remove any dead or overcrowded stems. Monitor for pests and diseases, treating as needed. Mulch the base to retain soil moisture and regulate temperature. Fertilize lightly in spring with a balanced, slow-release fertilizer.
Common Mistakes to Avoid When Propagating Red Elderberry
Overwatering
Excessive watering can lead to root rot and fungal diseases. High moisture levels are detrimental to red elderberry's roots, which need well-draining soil to prevent water accumulation.
Ignoring suckers
Overlooking red elderberry's natural propagation via suckers can result in missed opportunities for easy propagation. Suckers are a reliable source for new plants, and dismissing this method could complicate the process.
Poor cutting selection
Using old or diseased stem cuttings can impede rooting and growth. Always choose healthy and vigorous parts of red elderberry for cuttings to ensure better propagation outcomes.
Tips For Propagating Red Elderberry
Semi-hardwood cuttings
Take semi-hardwood cuttings from red elderberry in late summer. These are mature enough to withstand cutting stress yet young enough to root effectively.
Soil preparation
Prepare a well-draining but moisture-retentive soil mix, such as peat and perlite, for red elderberry cuttings. This provides the right balance for root development.
Rooting hormone
Using rooting hormone can stimulate root growth for red elderberry cuttings. This promotes quicker establishment and healthier root systems.



