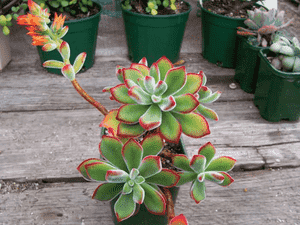
Boost Growth: How and When to Repot Your Chenille plant Plant
1
Repotting a Chenille plant is best done in the spring or winter months.
2
Make sure the new container allows for proper water drainage to avoid excessive moisture.
3
Utilize a potting medium formulated for succulents to encourage healthy development.
Knowing When to Replant Your Chenille Plant
Indicators your Chenille plant requires a new container
Like any indoor plant, your Chenille plant will eventually outgrow its current container. Common indicators for repotting include roots emerging from drainage holes or circling the pot, yellowing foliage, and soil that quickly dries post-watering. If these signs appear, consider relocating your plant.
Optimal periods for transplanting
The best times to transplant your Chenille plant are during spring or winter. These periods offer a less stressful environment for the plant to acclimate to a new pot. Spring is particularly advantageous as the plant will be entering its active growth phase.
Selecting the Appropriate Container and Growing Medium for Your Chenille Plant
Pot materials and drainage: Key features for a new container
When choosing a new container for your Chenille plant, ensure it's slightly larger than its current one. Terracotta or clay pots are excellent due to their porous nature. Crucially, the pot must have a drainage hole to prevent water accumulation, which can lead to root rot.
Soil needs: Choosing the ideal potting mix
The Chenille plant thrives in well-draining soil. A cactus or succulent potting mix, often found at garden centers, is most suitable. Alternatively, you can create your own by blending standard potting soil with perlite or coarse sand to enhance drainage.
Detailed Instructions for Repotting Your Chenille Plant
Preparing your workspace and necessary tools
Before starting, gather all required tools such as gardening gloves, a small trowel, and the new pot. Lay down newspaper or a protective sheet to manage any soil spillage. Prepare the new pot by adding a layer of fresh soil mix to the bottom.
Carefully extracting your Chenille plant from its original pot
To remove your Chenille plant, gently compress the sides of the current pot to loosen the soil. Carefully tilt the pot sideways and slide the plant out, supporting its base. If the plant resists, use a small trowel to gently loosen the soil around the edges.
Planting in the new container: Methods and advice
Position the plant in the center of the new pot, ensuring it's at the same soil level as before. Fill the pot with the remaining soil mix, gently pressing it down around the plant's base to eliminate air pockets. Water lightly to help the soil settle.
Post-Repotting Care: Ensuring Robust Growth
Adjustments to your watering routine
After repotting, water your Chenille plant sparingly. Allow the soil to dry out between waterings to prevent waterlogging, which is especially vital for succulents. Gradually return to your usual watering schedule after a few weeks.
Placement and light considerations
Place your newly repotted plant in an area with bright, indirect light. Initially, avoid direct sunlight, as this can stress the plant. After about a week, you can move it to a sunnier spot to encourage stronger growth.
Monitoring for signs of stress and development
Observe your Chenille plant for indicators of stress such as wilting or discoloration. These can suggest the plant is adapting to its new pot. Also, look for new growth as a positive sign of successful establishment. Regularly check root health and ensure your plant is flourishing.


