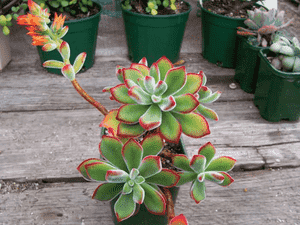
How to Propagate Chenille plant?
The chenille plant thrives when propagated via cuttings in the warmer periods of spring and summer. This propagation method is quite straightforward, with successful rooting indicated by the emergence of new shoots. Refrain from excessive watering to avert decay during the root development phase.
Optimal Period for Chenille Plant Propagation
Propagation Method
Cuttings
Propagation Period
Spring, Summer
Essential Tools for Chenille Plant Propagation
Sharp pruning shears or scissors
Crucial for obtaining clean sections from the parent chenille plant, sharp pruning shears or scissors reduce tissue damage, which aids in preventing disease and promoting faster recovery. A precise cut is less stressful for both the new growth and the original plant, increasing propagation success.
Sterilizing agent (e.g., isopropyl alcohol)
Utilized to sanitize cutting implements before and after use, preventing the transmission of diseases between plants. Maintaining clean tools ensures that pathogens are not introduced to cut surfaces, vital for chenille plant health during the vulnerable rooting phase.
Rooting hormone
This compound stimulates root formation when applied to the severed end of a chenille plant cutting. While chenille plant often roots without it, rooting hormone can accelerate the process and enhance the likelihood of successful propagation, especially for cuttings that are harder to root.
Perlite or vermiculite
When mixed with potting soil, perlite or vermiculite improves drainage and aeration. This prevents chenille plant cuttings from sitting in excessively damp soil, which could lead to decay. Adequate air circulation also encourages the development of robust root systems.
Clean pots or propagation trays
Containers for planting chenille plant cuttings must be clean and possess drainage holes. This allows excess water to escape, minimizing the risk of waterlogging and root rot during the delicate rooting stage.
Plastic bags or a propagation dome
These create a humid environment around chenille plant cuttings, helping to prevent moisture loss from leaves and stems while the cuttings establish their root systems. Humidity is essential for cuttings that lack roots to absorb water from the soil.
Tweezers
They can be useful for handling small or delicate chenille plant cuttings without causing harm by reducing the chance of accidentally crushing the tissue with fingers. This tool is particularly handy for arranging cuttings in confined spaces or among other chenille plant vegetation.
How to Propagate Chenille Plant?
Propagation Method
Cuttings
Difficulty Level
Easy
How to Care for Your Newly Propagated Chenille Plant?
How to Care for Your Newly Propagated Chenille Plant?
After propagation, ensure young chenille plant are placed in a bright spot with indirect light. Gradually introduce them to direct sunlight to prevent scorching. Water when the soil has fully dried, being careful not to overwater. Maintain well-draining soil and use a pot with drainage holes to reduce root rot risk. Fertilize sparingly during the growing season with a diluted succulent fertilizer to encourage growth.
Common Mistakes to Avoid When Propagating Chenille Plant
Overwatering
Supplying too much water during chenille plant propagation can cause leaves and stems to rot. Excessive moisture is harmful, especially before roots form, as it reduces oxygen to plant tissues, increasing fungal infections and decay.
Using dull tools
Cutting chenille plant with blunt instruments can damage tissues, making healing difficult and increasing susceptibility to infections. These imprecise cuts may also impede new root development.
Incorrect soil medium
Planting chenille plant cuttings in an unsuitable soil mix can result in poor root development or rot. A medium that is too dense or retains too much moisture can suffocate cuttings and promote fungal growth.
Neglecting aftercare
Ignoring cuttings post-planting can lead to failure. Chenille plant requires specific care, such as proper light and occasional watering, to ensure successful root formation.
Immediate exposure to intense light
Placing chenille plant cuttings in direct sunlight immediately can cause scorching and dehydration. They need time to acclimate and develop roots before tolerating bright, direct light.
Tips For Propagating Chenille Plant
Proper cutting technique
Make precise cuts with sterilized, sharp tools to minimize damage and prevent infections. Cutting at a 45-degree angle increases the surface area for root growth and helps cuttings absorb more water.
Appropriate moisture levels
Maintain a balanced moisture level when propagating chenille plant. Allow the soil to dry slightly between waterings to ensure optimal conditions for root development without risking rot.
Suitable soil mix
Utilize a well-draining soil mix, such as a blend of potting soil and perlite or sand, to prevent water retention around the cutting and encourage robust root growth.
Proper healing time
Allow the severed end of chenille plant cuttings to form a callus for a few days before planting to reduce the risk of rotting. This hardened area helps protect the cutting from infections.
Indirect lighting conditions
Keep chenille plant cuttings in a bright location with indirect sunlight while they are rooting. Once roots have established, gradually acclimate them to brighter light to avoid shock and burning.


