How to Transplant Arrowleaf elephant's ear?
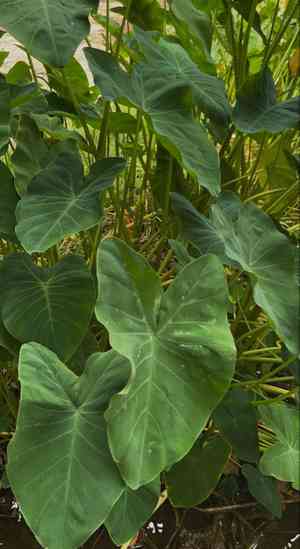
The optimal period for relocating arrowleaf elephant's ear spans from the end of spring to the close of summer, or from mid-winter to late winter, enabling the plant to acclimate and flourish in its new setting. To ensure a successful transfer, select a site featuring fertile, adequately draining soil and partial sunlight. Exercise caution throughout the procedure, guaranteeing minimal disruption to the root system of arrowleaf elephant's ear.
What Preparations are Needed Before Transplanting Arrowleaf Elephant's Ear?
What is the Ideal Time for Transplanting Arrowleaf Elephant's Ear?
The optimal period to move arrowleaf elephant's ear spans from the pleasant days of late spring through late summer. Alternatively, mid-winter to late winter also works well for relocating arrowleaf elephant's ear. Shifting arrowleaf elephant's ear during these recommended times boosts its growth potential, as temperatures are perfect for its development. The cooler weather minimizes stress on arrowleaf elephant's ear, ensuring a smooth transition. Indeed, transplanting arrowleaf elephant's ear in these seasons aids its rapid establishment, setting the stage for robust future growth.
How Much Space Should You Leave Between Arrowleaf Elephant's Ear Plants?
For arrowleaf elephant's ear, it's beneficial to allow ample room between each plant for optimal growth. We suggest positioning them about 18-24 inches (45-60 cm) apart when relocating.
What is the Best Soil Mix for Arrowleaf Elephant's Ear Transplanting?
Arrowleaf elephant's ear thrives in rich, well-draining soil, so aim for a blend of organic matter and loamy soil. Incorporating a balanced base fertilizer will also provide an excellent start!
Where Should You Relocate Your Arrowleaf Elephant's Ear?
Ensure arrowleaf elephant's ear receives plenty of sunlight by selecting a location that gets partial to full sun daily. This will encourage healthy development and help them flourish in your garden.
What Equipments Should You Prepare Before Transplantation Arrowleaf Elephant's Ear?
Gardening Gloves
To safeguard your hands while handling soil and plants.
Shovel or Spade
For excavating a new hole and extracting the root ball of the arrowleaf elephant's ear plant.
Pruning Shears
To trim any damaged or overgrown roots.
Trowel
For adjusting the planting hole and clearing any weeds or debris from the new spot.
Watering Can or Hose
To thoroughly water the plant after relocation.
How Do You Remove Arrowleaf Elephant's Ear from the Soil?
How Do You Remove Arrowleaf Elephant's Ear from the Soil?
From Ground: First, hydrate the arrowleaf elephant's ear plant to moisten the soil. Next, dig a wide trench around the plant with a shovel or spade, ensuring the root ball remains intact. Carefully work the spade beneath the root ball to lift the plant from its original position.From a Pot: If your arrowleaf elephant's ear plant is in a container, water it thoroughly to dampen the soil. Gently invert the pot and tap its sides to help release the plant and its root ball without causing damage to the roots. If the plant is root-bound or stuck, carefully use a trowel to loosen the soil around the pot's edges before removal.From a Seedling Tray: Once your arrowleaf elephant's ear seedlings have reached an appropriate size and developed a few true leaves, use a small trowel or spoon to carefully scoop them out, supporting the root ball during the process.
Step-by-Step Guide for Transplanting Arrowleaf Elephant's Ear
Site Preparation
Dig a hole at the planting site that is twice as wide and as deep as the arrowleaf elephant's ear plant's root ball. Clear any weeds, rocks, or debris from the area.
Hydrate Roots
Thoroughly water the arrowleaf elephant's ear plant's roots before transplanting to prevent dehydration.
Root Pruning
Trim off any damaged, dead, or excessively long roots of the arrowleaf elephant's ear plant using pruning shears to encourage healthy root development.
Planting
Gently place the arrowleaf elephant's ear plant into the prepared hole, ensuring the top of the root ball is level with the soil surface. Backfill the hole with soil, and gently firm it down around the arrowleaf elephant's ear plant to eliminate any air pockets.
Watering
Thoroughly water the arrowleaf elephant's ear plant after transplanting. This will help settle the soil around the root ball and promote root growth.
How Do You Care For Arrowleaf Elephant's Ear After Transplanting?
Watering
Keep the soil around the arrowleaf elephant's ear consistently moist, but not waterlogged, for the initial weeks post-transplant to aid in strong root establishment. However, avoid letting the plant sit in standing water.
Mulching
Apply a layer of organic mulch around the arrowleaf elephant's ear plant to help retain soil moisture and maintain a stable temperature.
Monitoring
Regularly inspect the arrowleaf elephant's ear plant for signs of stress, such as wilting or yellowing leaves, and adjust your care as needed. Be patient, as the plant may take some time to fully adapt to its new environment.
Pest Management
Examine the arrowleaf elephant's ear plant for any insect pests and remove them promptly to prevent harm to the plant's growth.
Fertilizing
Wait a few weeks after transplanting before applying any fertilizer to prevent burning the arrowleaf elephant's ear plant's delicate roots.
Troubleshooting Common Issues with Arrowleaf Elephant's Ear Transplantation.
When's the best time to transplant arrowleaf elephant's ear?
The optimal period for relocating arrowleaf elephant's ear is from late spring through late summer, or from mid-winter to the end of winter.
How far apart should I space arrowleaf elephant's ear when transplanting?
Aim to maintain a suitable distance of approximately 18-24 inches (45-60 cm) between each arrowleaf elephant's ear when you are transplanting them.
Should I water arrowleaf elephant's ear immediately after transplanting?
Yes, it is recommended. Watering arrowleaf elephant's ear right after transplanting helps settle the soil and lessens transplant shock.
Is there any special soil requirement for transplanting arrowleaf elephant's ear?
Arrowleaf elephant's ear prefers well-drained soil, rich in organic matter. It does not thrive in clay or sandy soils.
Should arrowleaf elephant's ear be out in direct sunlight or shade after transplanting?
Arrowleaf elephant's ear will grow best in full to partial shade after transplantation. Shield the plant from intense sunlight.
What should be the depth of the hole for transplanting arrowleaf elephant's ear?
The depth of the hole for transplanting arrowleaf elephant's ear should be roughly twice the size of its root ball.
Why are the leaves of my transplanted arrowleaf elephant's ear turning yellow?
Yellowing leaves can indicate overwatering or inadequate drainage. Check moisture levels and adjust watering accordingly.
What do I do if the transplanted arrowleaf elephant's ear is wilting?
Wilting after transplanting might be due to transplant shock. Keep the plant well-watered and in a shaded spot to aid recovery.
Can I transplant arrowleaf elephant's ear in a pot?
Certainly, you can! Ensure the pot is sufficiently large and has proper drainage holes. Remember to follow the same spacing guidelines.
How should I care for arrowleaf elephant's ear after transplanting?
Regularly water arrowleaf elephant's ear but avoid saturating the soil. Ensure it receives adequate shaded light and monitor its growth progress.



