How to Propagate Arrowleaf elephant's ear?
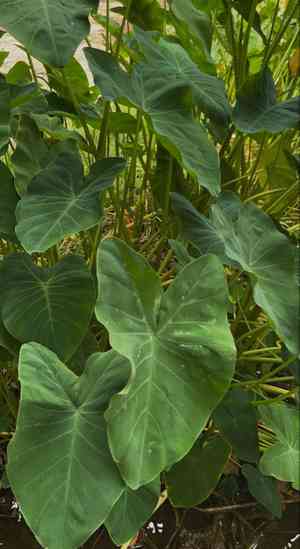
Arrowleaf elephant's ear is best multiplied in Spring through the use of its tubers. The process of propagation presents a moderate challenge, and the emergence of new foliage signifies successful establishment. Promote the development of roots by ensuring consistent humidity and elevated temperatures.
When Is the Optimal Time to Propagate Arrowleaf Elephant's Ear?
Propagation Method
Utilize The Tubers
Propagation Period
Spring
What Implements Are Employed in Arrowleaf Elephant's Ear Propagation?
Sharp Knife or Pruning Shears
These instruments are crucial for precisely dividing arrowleaf elephant's ear tubers into segments for propagation. A keen, sanitized blade helps avert damage and illness, ensuring a clean incision that will mend swiftly and lessen infection risk.
Disinfectant Solution
Prior to cutting arrowleaf elephant's ear tubers, tools should be sanitized to minimize pathogen introduction. A solution like alcohol or diluted bleach can be used to sterilize cutting implements, thereby safeguarding the health of the plant starts.
Potting Mix
A well-draining, nutrient-rich potting medium offers the ideal setting for arrowleaf elephant's ear tubers to develop roots. The mix should be loose and aerated to support robust root growth and prevent decay.
Containers or Pots
Suitable for holding individual arrowleaf elephant's ear starts, pots enable control over the growing environment, including soil composition, moisture, and root space. They should feature drainage holes to prevent waterlogging.
Misting Bottle
During the initial phases of propagation, maintaining elevated humidity around arrowleaf elephant's ear cuttings is vital. A misting bottle can be used to gently moisten the leaves and soil surface without disturbing the rooting tubers.
Rooting Hormone
While not always required, applying rooting hormone to the cut surface of arrowleaf elephant's ear tubers can boost root development by stimulating root growth at the application site, thus increasing the likelihood of successful propagation.
Gloves
Wearing gloves is advisable when handling arrowleaf elephant's ear to shield skin from potential irritation, and to keep tubers clean, avoiding the transfer of oils and potentially harmful microorganisms that could impact plant health.
Label and Marker
Labels are important for tracking the propagation process. A waterproof marker can be used to record the cutting date and any other pertinent information regarding the care of arrowleaf elephant's ear offspring.
How to Propagate Arrowleaf Elephant's Ear?
Propagation Method
Utilize The Tubers
Difficulty Level
Easy
How to Nurture Your Newly Propagated Arrowleaf Elephant's Ear?
How to Nurture Your Newly Propagated Arrowleaf Elephant's Ear?
Post-propagation, continue to care for your young arrowleaf elephant's ear plants by keeping them in a warm environment with high humidity. Water them when the top inch of the soil feels dry, but never let them sit in water. Fertilize them with a balanced liquid feed every 4-6 weeks during the active growth period. As arrowleaf elephant's ear can grow quite large, ensure they have ample space for growth, both in terms of pot size and room for the foliage. Finally, shield arrowleaf elephant's ear from cold drafts and temperatures below 60°F (15°C), as they are not cold-tolerant.
Common Errors to Avoid When Propagating Arrowleaf Elephant's Ear
Overwatering cuttings
Excessive moisture can cause the base of arrowleaf elephant's ear's cuttings to rot, impeding root development and potentially killing the young plants.
Using dull cutting tools
Blunt instruments can crush or tear the stems of arrowleaf elephant's ear, leading to damaged cuttings that may not root properly and be more vulnerable to infection.
Ignoring hygiene
Failing to sterilize tools or work surfaces can introduce pathogens to arrowleaf elephant's ear cuttings, resulting in disease and poor propagation outcomes.
Inadequate cutting size
Taking cuttings that are too small may lack sufficient energy reserves for arrowleaf elephant's ear to develop roots, while overly large cuttings can struggle to sustain themselves before rooting.
Incorrect soil mixture
Using an unsuitable soil mix that doesn't drain well or provide enough support can cause arrowleaf elephant's ear's cuttings to rot or fail to root.
Neglecting humidity
Cuttings of arrowleaf elephant's ear require high humidity to root successfully; an overly dry environment may cause them to wither before they can establish.
Tips For Propagating Arrowleaf Elephant's Ear
Adequate cut length
Prepare cuttings of arrowleaf elephant's ear that are 4-6 inches long, ensuring there are 2-3 nodes present as potential rooting sites.
Sterilize equipment
Use sterile cutting tools and containers to prevent disease introduction during the propagation process of arrowleaf elephant's ear.
Rooting hormone usage
Apply rooting hormone to the base of arrowleaf elephant's ear's cuttings to stimulate root growth and increase the chances of successful propagation.
Proper soil mix
Plant arrowleaf elephant's ear's cuttings in a well-draining soil mix, such as a combination of peat, perlite, and vermiculite, to provide support and air circulation for new roots.
Maintain high humidity
Enclose the cutting environment with a plastic bag or cover to maintain high humidity, mimicking the conditions that arrowleaf elephant's ear's cuttings need for effective rooting.
Adequate light
Provide indirect light to arrowleaf elephant's ear's cuttingsâtoo much direct sunlight can scorch them, while too little can slow the rooting process.



