How to Transplant Stokes' aster?
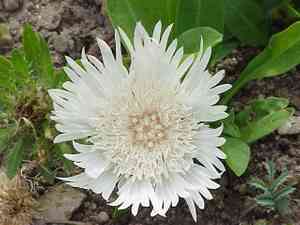
To achieve optimal outcomes, relocate stokes' aster in the revitalizing period of early spring, a perfect moment for encouraging vigorous development. Select a site featuring adequately drained earth and exposure to partial or full sunlight. Bear in mind, careful management of the root structure is crucial for a prosperous transplantation. Delight in enhancing your garden with this magnificent selection!
Preparations Required Before Relocating Stokes' Aster
Optimal Period for Relocating Stokes' Aster?
The best time to move stokes' aster is at the start of spring when the weather begins to warm. This allows stokes' aster to settle in before the peak summer heat. By transplanting in early spring, stokes' aster gains a strong head start, enabling it to establish roots and strengthen. This way, they develop resistance to summer heat, ensuring abundant blooms during the season. Thus, your garden will not only look beautiful, but stokes' aster will reward you with a season full of flowers! Also, remember, the satisfaction of seeing your cherished stokes' aster flourish due to your wise decision is truly invaluable.
Recommended Spacing Between Stokes' Aster Plants?
When relocating stokes' aster, it's crucial to provide ample room for them to flourish. Ideally, position them 12-18 inches (30-45 cm) apart. This will prevent their development from being hindered by overcrowding.
Best Soil Blend for Stokes' Aster Relocation?
For optimal outcomes when moving stokes' aster, utilize well-drained, moderately fertile soil. It's advisable to enrich the soil with a foundational fertilizer (such as a balanced slow-release granular fertilizer) prior to planting. This will supply essential nutrients to your precious stokes' aster.
Ideal Location for Your Stokes' Aster?
Select a site where stokes' aster will receive at least 6 hours of direct sunlight daily. A location with bright, direct sun will help your stokes' aster grow robust and vibrant. If the area is prone to strong winds, consider offering some protection or support for your plant.
Equipment to Prepare Before Relocating Stokes' Aster?
Gardening Gloves
Crucial for safeguarding your hands from soil and potential cuts.
Shovel or Trowel
This tool will be used to excavate the hole in your new planting area and extract the plant from its current spot.
Pruning Shears
These will assist you in removing any unhealthy portions of the stokes' aster before relocation.
Watering Can
For hydrating the plant once the relocation process is finished.
Mulch
This will help maintain cool roots for stokes' aster and retain moisture around the plant after relocation.
Compost
Used to enhance soil structure and provide nutrients for your stokes' aster plant.
How to Extract Stokes' Aster from the Ground?
How to Extract Stokes' Aster from the Ground?
From Ground: Gently moisten the stokes' aster plant to soften the soil, take your Trowel or Shovel and carefully dig around the plant, considering the full extent of the root system, and then beneath the plant, being careful not to damage the roots. Lift the plant with the spade from the bottom, keeping the roots and surrounding soil intact.From Pot: For containerized plants, water the stokes' aster beforehand to dampen the soil. Invert the pot and gently tap the base. The plant should slide out along with its surrounding soil. If it doesn't, use a trowel to loosen the soil and facilitate the process.From Seedling Tray: Once the stokes' aster is well-established with at least a couple of leaf sets, it's ready for relocation. Gently slide a spatula or butter knife down the side of the cell and lift the seedling out, preserving as much of the root system as possible.
Step-by-Step Guide for Relocating Stokes' Aster
Assess Health
Before relocating your stokes' aster, evaluate the plant's overall condition. Remove any dead, damaged, or diseased parts of the plant with pruning shears; this will help the plant direct energy towards new growth after being moved.
Prepare the Hole
At the new site, excavate a hole twice as wide and as deep as the root ball using your shovel or trowel. Loosen the soil at the bottom of the hole by breaking it up with the tool.
Plant
Position the stokes' aster in the hole, ensuring the top of the root ball is level with the ground. Backfill the hole with soil, pressing down gently to eliminate air pockets.
Water
Water the plant immediately after relocation, using a watering can. The soil should be damp, but not saturated.
Apply Mulch
Spread a layer of mulch around the stokes' aster plant, being careful not to pile it against the stem. This helps to keep the roots cool and retain moisture.
Compost
Apply compost after the plant is in place and watered; this provides essential nutrients to your plant for its development.
Post-Relocation Care for Stokes' Aster
Watering
After relocation, the stokes' aster plant needs to remain consistently moist but not waterlogged. Excessive watering can lead to root rot, which severely harms the plant's health.
Trimming
Keep an eye on your stokes' aster plant and trim off any parts that appear unhealthy. This allows the plant to redirect energy to producing new, healthy growth.
Monitoring
Watch for any indications of relocation shock, such as yellowing leaves or wilting. If this occurs, ensure you're watering sufficiently, not excessively, and the plant is not exposed to harsh weather conditions.
Fertilizing
Initiate a regular fertilizing schedule two weeks after the relocation process. This ensures stokes' aster receives all the necessary nutrients for optimal growth and a successful transition.
Resolving Common Issues with Stokes' Aster Relocation.
When is the ideal time to relocate stokes' aster?
The best relocation period is at the onset of spring, a time of fresh starts. This grants stokes' aster sufficient time to root and adapt before warmer seasons.
Does stokes' aster have a specific soil preference during relocation?
Indeed, stokes' aster favors well-drained soil. A loamy or sandy texture can significantly boost growth and help roots establish in their new home.
What is the optimal spacing required for relocating stokes' aster?
Allow approximately 12-18 in (30-45 cm) of space between each stokes' aster. This provides ample room for their growth and development, while promoting good air circulation.
What depth should stokes' aster be planted after its relocation?
Stokes' aster should be planted so that the top of the root ball is at (or slightly above) the soil surface level. Never bury the plant's crown.
How do I address stokes' aster's relocation shock?
Water stokes' aster thoroughly after relocation. Keep the soil consistently moist, but not saturated. Use a balanced plant food to support recovery as well.
How should I water stokes' aster after relocating it?
Your stokes' aster prefers soil that is moist but not waterlogged. Water deeply to encourage root growth post-relocation, but allow the soil to dry between waterings.
Should stokes' aster be pruned after relocation?
No, you should not prune stokes' aster immediately after relocation. Let it establish and begin new growth, after which, you may consider occasional pruning for shape.
Is the use of fertilizers necessary when relocating stokes' aster?
Yes, a slow-release balanced fertilizer can be highly beneficial. It strengthens stokes' aster growth and aids recovery from relocation stresses.
Can stokes' aster withstand relocation during intense summer heat?
Relocation in summer can stress stokes' aster. Early spring is safer! The milder temperatures allow for smoother adjustment to the new location.
Is there a risk of pests when relocating stokes' aster?
While stokes' aster is generally pest-resistant, keep an eye out for signs of aphids or white flies in the new location, and address it promptly if detected.



