How to Transplant Rose spirea?
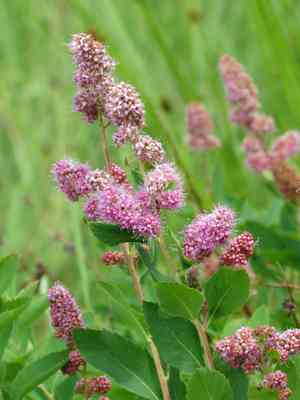
The optimal period for relocating rose spirea is during the vigorous growth phase of late to mid-spring, capitalizing on strong root formation before summer. Select a bright, adequately drained location and amend the soil with compost for superior integration.
What Preparations are Needed Before Transplanting Rose Spirea?
What is the Ideal Time for Transplanting Rose Spirea?
The best time to move rose spirea is in mid-spring. During this period, mild temperatures and consistent moisture greatly aid root establishment. Relocating rose spirea now ensures they will be strong and prepared for summer growth. The gentle weather conditions of this season offer a perfect chance for rose spirea to recover from the move, promising a vibrant display. Trust this helpful tip: a spring transplant sets rose spirea up for success, allowing it to flourish in its new spot!
How Much Space Should You Leave Between Rose Spirea Plants?
When transplanting rose spirea, space them approximately 2-3 feet (60-90 cm) apart. This guarantees each plant ample room to develop without competing for nutrients and space. It's straightforward; just follow this guideline, and your rose spirea will thrive!
What is the Best Soil Mix for Rose Spirea Transplanting?
Select a soil rich in organic matter for rose spirea. Incorporating a base fertilizer high in phosphorus and potassium will be advantageous. Remember, your soil preparation significantly impacts your plant's health!
Where Should You Relocate Your Rose Spirea?
Choose a location where rose spirea will receive full to partial sunlight. These beautiful plants love abundant light, and a sun-drenched spot in your garden will be ideal. Just ensure it's not excessively hot!
What Equipments Should You Prepare Before Transplantation Rose Spirea?
Gardening Gloves
To safeguard your hands while handling the plant and working with the earth.
Shovel or Spade
Necessary for excavating the plant from its original spot and preparing the new planting site.
Gardening Fork
To loosen and aerate the soil around the plant without harming its roots.
Hose or Watering Can
To hydrate before and after transplanting and to moisten the ground.
Organic Compost
To supply adequate nutrients to the plant once it has been relocated.
Mulch
To help retain moisture in the soil following transplantation.
Stake and String (if needed)
To offer support to the plant after it has been moved.
How Do You Remove Rose Spirea from the Soil?
How Do You Remove Rose Spirea from the Soil?
From Ground: Start by saturating the rose spirea plant's soil with water to facilitate the digging process. Using a spade or shovel, begin to dig a wide circle around the plant, being careful not to get too close to avoid root damage. Once a trench is formed, dig beneath the root ball and gently lift the plant up and out.From a Pot: Water the rose spirea plant before beginning the removal process. Turn the pot sideways, hold it carefully, and tap the bottom to slide the plant out. Avoid pulling the plant by its stem. If the plant doesn't come out easily, breaking the pot can be a last resort.From Seedling Tray: Water the rose spirea seedlings in the tray. Then, tilt the tray slightly to its side and gently ease the seedlings out, trying not to damage the roots. For single-cell trays, you can use a spoon or similar tool to lift the soil and plant together.
Step-by-Step Guide for Transplanting Rose Spirea
Digging Hole
Begin by excavating a hole in the new location that is twice as wide but the same depth as the rose spirea root ball. This ensures ample space for roots to spread and establish.
Filling Hole
Add a few inches of compost or organic material into the hole to provide initial nutrients for the plant's development.
Placing Plant
Position the rose spirea in the hole at the identical depth it was in its previous spot. Adjust the soil level at the bottom of the hole as necessary before placing the plant.
Filling In
Backfill the hole with soil, gently patting around the base of rose spirea to ensure contact with the roots while preventing any air pockets.
Watering
Immediately after planting, water thoroughly to settle the soil and reduce stress on the plant.
Mulching
Apply a layer of mulch around the plant, avoiding direct contact with the stem; this will help conserve moisture and suppress weeds.
How Do You Care For Rose Spirea After Transplanting?
Watering
Water the rose spirea thoroughly and frequently for the initial couple of weeks post-transplant, until the plant is well-established. Be cautious not to overwater, as this can be as detrimental as insufficient watering.
Feeding
After two weeks, begin feeding rose spirea lightly with a balanced, slow-release fertilizer to ensure it receives the necessary nutrients to thrive, but avoid excessive fertilization.
Pruning
Following transplantation, rose spirea may benefit from a slight trim to reduce water loss and to direct the plantâs energy and resources towards developing strong roots.
Monitoring
Observe for any indications of transplant shock, such as yellowing leaves or wilting, and adjust care as needed. Consult local extension services or online gardening communities if required.
Troubleshooting Common Issues with Rose Spirea Transplantation.
When's the best time to transplant rose spirea?
The optimal period to transplant rose spirea is during late spring to early summer (S2-S3). The plant will establish roots more quickly in warmer weather.
What's the ideal distance to space rose spirea when transplanting?
Ideally, rose spirea should be spaced approximately 2-3 feet (60-90 cm) apart when transplanting. This provides ample room for growth and healthy root development.
How deeply should rose spirea be planted when transplanting?
You should plant rose spirea at the same depth it was growing in its previous location. This aids the plant in adapting better to its new environment.
What type of soil does rose spirea prefer when transplanting?
Rose spirea thrives in well-drained, fertile soil with a neutral to slightly acidic pH. Incorporate organic matter to enrich the soil before transplanting.
What if the leaves of rose spirea start wilting after transplanting?
Wilting after transplanting might indicate root shock. Keep rose spirea adequately watered but avoid overwatering. Ensure it receives sufficient, but not excessive, sunlight.
How can I ensure successful root development for rose spirea after transplanting?
Water rose spirea thoroughly immediately after transplanting and regularly thereafter. Mulch around the base to retain moisture and regulate soil temperature, fostering root development.
How can one handle rose spirea safely during transplanting to avoid damage?
Handle rose spirea gently during transplantation, especially the roots. Keep the root ball intact and disturb it as little as possible throughout the process.
Why are the leaves of my transplanted rose spirea turning yellow?
Yellowing leaves could signal overwatering or poor drainage. Ensure the soil is well-drained, and adjust watering frequency as necessary. If this persists, seek expert advice.
How to control the growth of rose spirea after transplanting?
Prune rose spirea regularly for size management and to encourage bushier growth. Late winter or early spring is the best time for pruning.
What to do if rose spirea doesn't bloom after transplanting?
Patience is crucial as rose spirea may require time to adjust and bloom in its new setting. Ensure it receives enough sunlight, water, and nutrients from the soil.



