How to Transplant Least snout-bean?
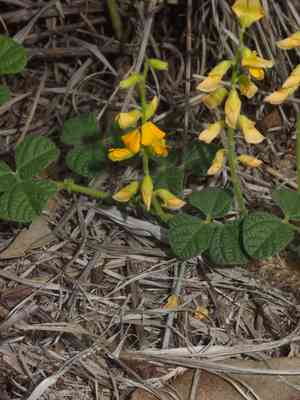
The ideal window for transplanting least snout-bean extends from the initial stirrings of early spring through the vigorous development of late spring, facilitating superior root integration. Select a location bathed in sunlight with soil that drains effectively to guarantee a smooth adjustment for least snout-bean. This schedule capitalizes on the plant's inherent growth rhythm for effective relocation.
Essential Preparations Before Relocating Least Snout-bean?
When is the Best Period for Moving Least Snout-bean?
The prime period for transplanting least snout-bean spans from early to late spring, coinciding with nature's gentle reawakening. This timing allows least snout-bean to settle into warming soil, benefiting from spring rains and moderate temperatures for vigorous development. Shifting least snout-bean during this window provides a head start to establish strong roots before the rigors of summer heat, ensuring a smooth transition and abundant growth.
What is the Recommended Spacing Between Least Snout-bean Plants?
Greetings, aspiring gardener! When preparing to rehouse your least snout-bean, position them approximately 2-3 feet apart, which translates to about 60-90 cm. This spacing provides your least snout-bean ample room to thrive!
What is the Optimal Soil Blend for Least Snout-bean Transplantation?
For your least snout-bean, you'll want to prepare a comfortable bed with soil that drains effectively. An excellent mixture would be loamy soil enhanced with compost. Prior to transplanting, incorporate a balanced, slow-release fertilizer to give your least snout-bean a robust beginning!
Where Should You Replant Your Least Snout-bean?
Your least snout-bean thrives on ample sunlight! Select a garden spot that receives full sun to partial shade. This means at least 6 hours of direct sunlight daily. Happy planting!
What Tools Should You Gather Before Transplanting Least Snout-bean?
Gardening Gloves
To safeguard your hands while handling soil and plants.
Spade or Shovel
For excavating the plant and preparing its new location.
Hand Trowel
For more precise handling when lifting the plant, especially if it's small.
Watering Can or Hose
To hydrate the plant before and after its relocation.
Pruning Shears
To trim any damaged roots or foliage.
Wheelbarrow
To transport the plant from its original spot to the new one.
Garden Fork
To loosen the soil around the plant if it's being extracted from the ground.
Plant Supports/Stakes
To help stabilize the least snout-bean after transplanting, if necessary.
How to Extract Least Snout-bean from the Soil?
How to Extract Least Snout-bean from the Soil?
From Ground: First, moisten the least snout-bean's soil by watering. Dig a wide circle around the plant using a spade or shovel, ensuring to retain a generous amount of soil with the roots. Gently pry the soil to lift the root ball from the ground.From Pot: Water the least snout-bean thoroughly. Turn the pot on its side, grasp the stem at its base, and tap the bottom to dislodge the plant. If it doesn't slide out, carefully run a hand trowel along the inner edge to help free it.From Seedling Tray: Water the seedlings to make the soil damp. Use a hand trowel or a small stick to gently lift the seedling from the tray, making sure to include the roots and as much soil as possible.
Step-by-Step Guide for Transplanting Least Snout-bean
Prepare the New Location
Choose an appropriate spot in your garden and dig a hole that is twice as wide and equally as deep as the least snout-bean's root ball.
Carefully Remove the least snout-bean
Depending on its initial position, use the appropriate removal technique to extract the least snout-bean without harming its roots.
Examine the least snout-bean
Gently shake off excess soil to assess the roots' health, and use pruning shears to snip away any damaged or dead roots.
Position the least snout-bean in the New Hole
Place the least snout-bean in the center of the hole. The top of the root ball should be level with the surrounding ground. Fill in around the root ball with soil, gently firming it.
Water Generously
After planting, water the least snout-bean thoroughly to settle the roots and soil, eliminating any air pockets.
Provide Support if Needed
If the least snout-bean is tall or susceptible to wind damage, insert plant supports or stakes into the ground and loosely tie the stems for stability.
How to Care for Least Snout-bean After Transplanting?
Observation
Keep a close watch on the least snout-bean for indications of transplant shock, such as wilting or leaf drop, and take appropriate measures if necessary, like providing shade or additional water.
Vigilance
Regularly monitor the least snout-bean for any signs of distress and respond by adjusting its care as needed.
Watering
Ensure the least snout-bean receives sufficient moisture, particularly during the initial weeks of establishment. Water deeply to encourage robust root development.
Mulching
Apply a layer of organic mulch around the base of the least snout-bean to assist in moisture retention and temperature regulation.
Stabilizing
Periodically check the stakes or supports and adjust them to prevent them from cutting into growing stems or hindering natural growth.
Pruning
Remove any dead or damaged foliage to stimulate new growth and maintain the plant's health.
Addressing Common Issues with Least Snout-bean Transplantation.
What's the ideal time to transplant least snout-bean?
The optimal period for transplanting least snout-bean is from early to late spring when temperatures are mild.
How much space should I leave between least snout-bean when transplanting?
Position least snout-bean at intervals of approximately 2-3 feet (60-90 cm) to ensure ample room for growth.
Why is my least snout-bean wilting after transplanting?
Wilting may be due to transplant shock. Ensure proper watering, avoid direct sun for a few days, and maintain soil moisture.
Should I prune least snout-bean before transplanting?
Light pruning can help lessen transplant stress by balancing root loss; just trim sparingly.
How deep should I plant least snout-bean?
Plant least snout-bean at the same depth it was in its previous container, aligning soil levels.
Can I transplant least snout-bean during summer or fall?
It's feasible, but spring is preferable to allow least snout-bean to establish before hot or cold extremes.
What soil type is best for transplanting least snout-bean?
Utilize well-draining soil rich in organic matter to provide a suitable environment for least snout-bean's roots.
How much water does least snout-bean need after transplanting?
Water least snout-bean thoroughly after transplanting, then keep the soil consistently moist but not waterlogged.
How can I tell if least snout-bean is successfully transplanted?
Look for indications of new growth, such as fresh leaves or stems, signaling that least snout-bean is settling in.
Why are the leaves of least snout-bean turning yellow post-transplant?
Yellow leaves can indicate either over-watering or under-watering. Check soil moisture and adjust your watering routine.



