How to Transplant Traveller's palm?
The optimal period for relocating traveller's palm spans from mid-spring through late spring, or from late autumn into early winter, due to the moderate temperatures that aid root establishment. Choose a site with good drainage and abundant sunlight. Think about planting in clusters for an impressive visual effect. Enjoy your gardening!
What Preparations are Needed Before Transplanting Traveller's Palm?
What is the Ideal Time for Transplanting Traveller's Palm?
Relocating traveller's palm is best done from mid-spring through late spring, or again from late fall to early winter. This timing allows the roots to become established with minimal environmental stress. Moving them during these seasons provides optimal growing conditions and promotes healthier development for traveller's palm. Aligning with nature's rhythm will help your traveller's palm thrive vigorously.
How Much Space Should You Leave Between Traveller's Palm Plants?
When moving your traveller's palm, ensure each plant is spaced approximately 12-18 feet (3.6 - 5.5 meters) apart. This provides ample room for growth and expansion, while also guaranteeing proper air circulation and preventing competition for nutrients.
What is the Best Soil Mix for Traveller's Palm Transplanting?
Before relocating your traveller's palm, prepare the ground using a loamy, well-draining soil mixture. Enrich the soil with organic materials such as compost or aged manure. Incorporating some slow-release, all-purpose granular fertilizer will also help supply vital nutrients.
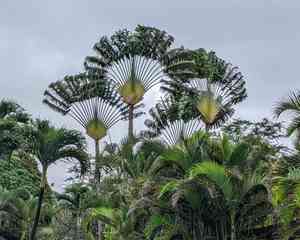
Where Should You Relocate Your Traveller's Palm?
Select a garden spot where your traveller's palm will receive full sun to partial shade for most of the day. Ensure the location offers some protection from strong winds, as the large leaves of traveller's palm can be easily damaged during storms or gusty conditions.
What Equipments Should You Prepare Before Transplantation Traveller's Palm?
Gardening Gloves
To protect your hands from scratches or irritating plants, and to keep them clean.
Shovel or Spade
For extracting the traveller's palm from its original spot and digging a hole at the new location.
Watering Can or Hose
To hydrate the traveller's palm during and after the transplanting process.
Trowel
For more precise digging and to assist in positioning the plant in its new home.
Wheelbarrow or cart
For moving the traveller's palm from its initial position to the new site without harming the root ball.
Pruning Shears
To trim away any damaged roots or leaves.
How Do You Remove Traveller's Palm from the Soil?
How Do You Remove Traveller's Palm from the Soil?
From Ground: Start by saturating the soil around the traveller's palm to make it easier to work with. Dig around the plant with a shovel, ensuring you maintain enough distance to avoid harming the roots. Once the roots are visible, carefully dig beneath the root ball and lift the plant from the ground.From Pot: Water the traveller's palm before transplanting to moisten the soil. Gently grasp the base of the plant, tip the pot on its side, and carefully jiggle it free. Avoid pulling on the stems or foliage. If the plant is stuck, you might need to break the pot for easier removal.From Seedling Tray: Moisten the soil by lightly watering the tray. Carefully lift the traveller's palm from its cell by holding the leafy part, not the stem. If there's resistance, use a kitchen spoon to scoop it out along with the surrounding soil.
Step-by-Step Guide for Transplanting Traveller's Palm
Preparation
The new site should be prepared before removing the traveller's palm from its original spot. Dig a hole twice as wide but no deeper than the root ball.
Placement
Position the traveller's palm in the hole. The top of the root ball should be level with or slightly above the surrounding soil.
Filling
Backfill around the root ball with soil, pressing gently to ensure there are no air pockets.
Watering
Water the traveller's palm generously immediately after transplanting, thoroughly soaking the area around the root ball.
How Do You Care For Traveller's Palm After Transplanting?
Watering
Consistent watering is crucial, especially during the initial weeks post-transplant. However, ensure the soil isn't waterlogged to prevent root rot.
Pruning
Promptly remove any dead or damaged leaves to ensure resources are directed towards growth.
Inspection
Regularly check for pests and diseases. Detecting any potential issues early can make a significant difference.
Eliminating Stress
Transplanting can be stressful for plants. For the first few weeks, try to avoid any additional stressors such as extreme temperatures or further relocation.
Patience
Remember, plants like traveller's palm need time to adapt to their new surroundings. Don't rush the process; it's all part of the cultivation journey!
Troubleshooting Common Issues with Traveller's Palm Transplantation.
When is the best time to transplant my traveller's palm?
The ideal period to move your traveller's palm is between mid to late spring or late autumn to early winter. This offers optimal conditions for root establishment.
What is the proper spacing when transplanting traveller's palm?
Provide ample room for each plant. Ensure they are about 12-18 feet (3.6-5.5 meters) apart. This allows for proper growth and spread.
What steps should I follow before transplanting traveller's palm?
Before transplanting, prepare the new planting hole. It should be twice the size of the traveller's palm's root ball. Also, incorporate good quality compost into this hole.
What is ideal soil for transplanting traveller's palm?
Traveller's palm thrive in rich, well-draining soil abundant in organic matter. Avoid locations with clay or sandy soil, as they lack nutrients and don't retain enough moisture.
How should I handle the root ball during the traveller's palm transplant process?
During the transplant process, handle the root ball with care to prevent root damage. Loose or injured roots can impede the plant’s ability to settle in its new location.
How deep should I plant my traveller's palm during transplantation?
Plant the traveller's palm at the same depth it was previously. This will prevent it from being too deep or too shallow in the soil.
Should I water traveller's palm immediately after transplanting?
Yes, it's essential to water the traveller's palm immediately after transplanting. This helps the roots settle and absorb vital nutrients from the soil.
What should I do if the leaves of my transplanted traveller's palm start turning yellow?
Yellow leaves could indicate water stress or nutrient deficiency. Ensure adequate watering and provide the traveller's palm with necessary plant food or fertilizer.
How to handle a traveller's palm that isnât taking to its new location?
Assess for signs of shock like wilting or yellowing leaves. Ensure the traveller's palm is watered correctly, not overexposed to sunlight, and has plenty of soil nutrients.
Should I prune my traveller's palm after transplanting?
Limit pruning to only damaged or diseased fronds after transplanting. This helps your traveller's palm to focus energy on root establishment rather than foliage growth.


