Boost Growth: How and When to Repot Your Traveller's palm Plant
1
Traveller's palm flourishes optimally when transplanted during the spring or winter seasons.
2
An excessively large container may result in overwatering, a condition not well-tolerated by Traveller's palm roots.
3
Employing a soil blend that drains effectively is vital for the well-being of your Traveller's palm.
Why Replant Your Traveller's Palm?
Understanding the Life Cycle of Traveller's Palm
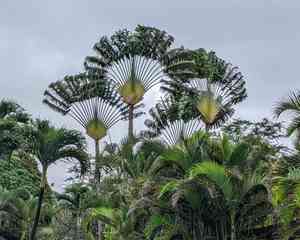
The Traveller's palm (Ravenala madagascariensis) is a remarkable tropical plant recognized for its striking, fan-like leaf arrangement. Originating from Madagascar, this plant can reach heights of up to 30 feet (9 meters) in ideal conditions. Its extensive root system supports its vigorous growth, making regular repotting crucial. As the plant matures, its roots can outgrow its container, hindering its development and vitality. Comprehending this life cycle aids in timely repotting, ensuring your plant remains vibrant and healthy.
Indicators That Your Traveller's Palm Requires a New Container
Identifying when to repot your Traveller's palm can be straightforward if you recognize the warning signs. Symptoms include roots emerging from the pot's drainage holes, inhibited growth, or yellowing foliage. Furthermore, if the soil drains too rapidly or becomes compacted, it's a clear signal your plant needs more room. These indicators typically appear every two to three years, suggesting it's time for a larger pot.
Selecting the Appropriate Pot and Substrate for Your Traveller's Palm
Choosing the Optimal Pot Size and Material
Selecting the correct pot for your Traveller's palm is vital for successful repotting. Choose a container that is 2-3 inches (5-7.5 cm) wider in diameter than the current one. This provides the roots ample space to expand without becoming overcrowded. Additionally, consider the pot's composition. Terracotta pots are excellent for their breathability, but plastic pots are lighter and often more economical. Ensure the pot has sufficient drainage holes to prevent waterlogging.
The Ideal Soil Mixture for Traveller's Palm Health
Soil selection is paramount for the well-being of your Traveller's palm. A well-draining soil blend rich in organic matter is perfect. You can create an optimal mix using equal parts of potting soil, perlite, and peat moss. This combination ensures the soil retains the appropriate amount of moisture while providing proper aeration for the roots. Avoid using dense garden soil, as it can hold too much water, leading to root rot.
Step-by-Step Guide to Replanting Traveller's Palm
Preparing Your Work Area and Assembling Tools
Before commencing the repotting process, prepare your workspace to facilitate the task and maintain cleanliness. Lay down old newspapers or a gardening mat to catch any spilled soil. Gather the necessary tools such as gardening gloves, a trowel, pruning shears, and the chosen pot and soil. Having everything prepared makes the process smooth and efficient.
Steps to Safely Extract Your Palm from Its Current Container
To safely remove your Traveller's palm from its current pot, begin by gently moistening the soil to loosen it. Next, hold the palm by its base and carefully tilt the pot to slide out the plant. If the plant is stuck, tap the sides of the pot to loosen the roots or use a trowel to carefully dislodge it. Avoid pulling forcefully as this can damage the root system.
Transplanting into the New Container and Post-Care Advice
Once the plant is out, inspect the roots. Trim any damaged or excessively long roots with pruning shears. Place a layer of the prepared soil mix at the bottom of the new pot. Position your Traveller's palm in the center, then fill around it with soil, ensuring the root-ball is covered but the base of the plant is at the soil surface level. Water the newly potted plant thoroughly to settle the soil. Post-care involves keeping the plant in a shaded area for a week to help it acclimate, then gradually returning it to its original location.
Expert Tips for Nurturing Your Traveller's Palm After Replanting
Watering Schedule Adjustments
After repotting, your Traveller's palm will require a slight modification in its watering routine. Initially, water the plant thoroughly but allow the top 2 inches (5 cm) of soil to dry out before the next watering to prevent overwatering. Gradually, revert to your regular watering schedule while observing the plant's response.
Monitoring Development and Detecting Early Problems
Keep a close watch on your Traveller's palm for any indications of stress or recovery issues after repotting. Yellowing leaves, wilting, or stunted growth can signal problems with the new pot or soil. Regularly check the moisture level, and ensure the plant isn't exposed to extreme temperature fluctuations. Promptly addressing these signs ensures your palm flourishes in its new home.


