How to Transplant Fringed polygala?
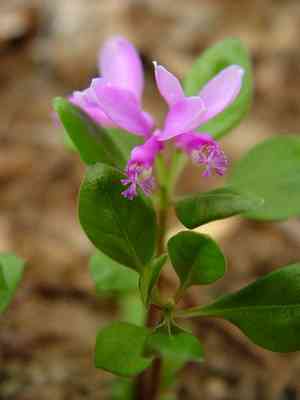
For fringed polygala, the ideal period for relocation extends from the start of early spring through the pleasant warmth of late spring, facilitating robust root development. Choose a location offering partial shade and damp, adequately draining earth for optimal outcomes. Careful manipulation aids in successful adaptation.
What Preparations are Needed Before Transplanting Fringed Polygala?
What is the Ideal Time for Transplanting Fringed Polygala?
The optimal period for relocating fringed polygala spans from early spring's thaw until the approach of summer. This timeframe enables fringed polygala's root system to settle into the warming earth, benefiting fully from increasing daylight and stable temperatures for prime development. Moving fringed polygala at this point encourages vigorous growth before summer's peak heat, ensuring a more robust, thriving plant. This timing aligns with fringed polygala's natural growth cycle, facilitating a smooth transition and higher transplant success rate.
How Much Space Should You Leave Between Fringed Polygala Plants?
When moving fringed polygala, provide ample room for expansion by spacing them approximately 4-6 inches (10-15 cm) apart. This generous spacing allows for healthy development, enabling them to flourish and display their beauty.
What is the Best Soil Mix for Fringed Polygala Transplanting?
For robust fringed polygala growth, prepare a planting area with well-draining, loamy soil enriched with a balanced, slow-release fertilizer. This creates a nurturing environment, fostering strong roots and vibrant blooms.
Where Should You Relocate Your Fringed Polygala?
Select a site for fringed polygala that receives partial shade, as excessive direct sunlight can be detrimental. This ensures your fringed polygala receives the perfect amount of gentle warmth without the intensity of midday sun.
What Equipments Should You Prepare Before Transplantation Fringed Polygala?
Gardening Gloves
To safeguard your hands while handling soil and the plant.
Shovel or Spade
For excavating the plant without harming its root ball.
Watering Can
To hydrate the plant prior to and following its relocation.
Wheelbarrow or Garden Cart
For moving the plant and any required soil or compost.
Pruning Shears
To trim any damaged roots or foliage before the transplant.
Garden Trowel
For precise adjustments when positioning the plant in its new spot.
Mulch
To aid in retaining soil moisture and regulating temperature post-transplant.
How Do You Remove Fringed Polygala from the Soil?
How Do You Remove Fringed Polygala from the Soil?
From Ground: First, moisten the fringed polygala plant to make the soil easier to manage. Using a shovel or spade, dig a wide trench around the plant, maintaining a good distance from the base to prevent root damage. Carefully work the tool beneath the root ball and gently lift the plant from the ground, preserving as much of the root system as possible.From Pot: Hydrate the fringed polygala plant an hour before beginning. Turn the container on its side and tap the bottom to dislodge the plant. If it resists, use a gardening trowel around the inner edge to help free the roots. Gently slide the plant out, holding it by the root ball and not the stems or leaves.From Seedling Tray: Water the seedlings to keep the soil intact. Using a trowel or your fingers, carefully extract the fringed polygala plant, ensuring you take a good amount of soil with the roots to minimize disturbance.
Step-by-Step Guide for Transplanting Fringed Polygala
Digging the Hole
Excavate a hole in your chosen location that is twice as wide and the same depth as the root ball of your fringed polygala.
Preparing the Plant
Examine the root ball of the fringed polygala and trim any damaged or excessively long roots. Gently untangle if the roots are circling or matted.
Placing the Plant
Position the fringed polygala in the center of the hole. The top of the root ball should be flush with the surrounding soil surface. Adjust the depth of the hole if necessary.
Refilling the Hole
Backfill the hole halfway with soil, gently tamping down to eliminate air pockets. Water thoroughly to help the soil settle, then continue filling the hole and gently firm the soil around the base of the fringed polygala.
Mulching
Apply a layer of mulch around the base of fringed polygala, keeping it clear of the stem to prevent rot. The mulch will assist in maintaining soil moisture and regulating temperature.
How Do You Care For Fringed Polygala After Transplanting?
Initial Watering
Water the fringed polygala generously immediately after transplanting to help settle the soil and provide instant moisture to the roots.
Monitoring
Inspect the plant daily for signs of transplant shock, such as wilting or discolored leaves, and address any issues promptly.
Subsequent Watering
Water the fringed polygala frequently to keep the soil consistently moist until new growth indicates the plant has become established.
Pruning
Trim any damaged or dying branches to direct the fringed polygala's energy towards establishing new growth and roots.
Supporting
If the fringed polygala is a taller variety or appears delicate, consider providing stakes for additional support until it establishes itself.
Troubleshooting Common Issues with Fringed Polygala Transplantation.
When's the best time to transplant fringed polygala?
The optimal period is during the fresh growth of early to late spring.
How far apart should I space fringed polygala when transplanting?
Allow each fringed polygala about 4-6 inches (10-15 cm) for adequate growth space.
What's the best soil for transplanting fringed polygala?
Utilize well-draining soil rich in organic matter for the healthiest transplant.
How much should I water fringed polygala after transplanting?
Water thoroughly post-transplant, then regularly to keep the soil moist but not waterlogged.
Should I fertilize fringed polygala after transplanting?
Wait 4-6 weeks before applying a balanced fertilizer to allow fringed polygala to acclimate.
What light conditions does fringed polygala need after transplanting?
Place fringed polygala in a location receiving partial shade to protect it during establishment.
How deep should I plant fringed polygala's roots?
Plant the roots at the same depth they were in their previous spot to avoid stress.
What signs indicate fringed polygala isn't thriving post-transplant?
Yellowing leaves, wilting, or stunted growth suggest that fringed polygala may be struggling.
Can I transplant fringed polygala on a hot, sunny day?
Relocate fringed polygala on an overcast day or in the evening to minimize transplant shock.
How can I protect fringed polygala from pests after transplanting?
Monitor fringed polygala for pest signs and treat promptly with suitable methods.



