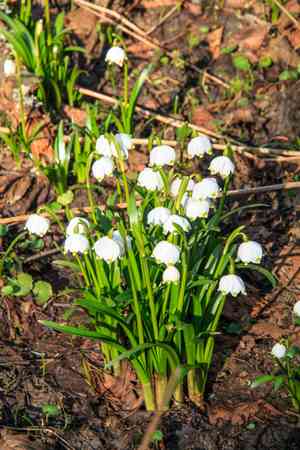
How to Transplant Spring snowflake?
The ideal time to transplant spring snowflake is at the beginning of spring's warmth, as the ground softens, facilitating root development in aerated soil that receives partial sun. Ensure steady hydration without oversaturation, for a smooth acclimation.
What Preparations are Needed Before Transplanting Spring Snowflake?
What is the Ideal Time for Transplanting Spring Snowflake?
The period immediately following winter's end, as growth commences, is the best time to move spring snowflake. This timing leverages the plant's emerging vitality, directing it towards successful root establishment in its new spot. Relocating during this window enhances the garden with spring snowflake's allure as the season begins, ensuring a strong and vibrant display.
How Much Space Should You Leave Between Spring Snowflake Plants?
When relocating spring snowflake, maintain a distance of approximately 4-6 inches (10-15 cm) between each plant. This provides ample room for development while also promoting a lush appearance.
What is the Best Soil Mix for Spring Snowflake Transplanting?
For spring snowflake, prepare soil that drains well and is rich in organic material. A simple blend of compost and garden soil works perfectly. Before planting, incorporate some slow-release, granular fertilizer to stimulate growth.
Where Should You Relocate Your Spring Snowflake?
Spring snowflake thrives best in areas with partial shade. Choose a spot that receives sunlight during the day but also offers some shaded protection. This allows the plant to benefit from both sunny and sheltered conditions.
What Equipments Should You Prepare Before Transplantation Spring Snowflake?
Gardening Gloves
To safeguard your hands while handling soil and spring snowflake.
Spade or Shovel
Needed for excavating spring snowflake from its original location, and for digging a hole at the new transplant site.
Trowel
Useful for making minor adjustments to the planting hole.
Watering Can
To hydrate the plant before and after relocation, ensuring it stays moisturized.
Gardening Scissors
Helpful for trimming any damaged roots or leaves of spring snowflake prior to transplanting.
Wheelbarrow (optional)
If the original plant is large and requires transport to a new spot.
How Do You Remove Spring Snowflake from the Soil?
How Do You Remove Spring Snowflake from the Soil?
From Ground: Water the spring snowflake plant to moisten the soil. Begin digging a wide circle around the plant with a spade or shovel, being careful not to harm the root ball. Gently work the shovel beneath the root ball and slowly lift the plant from its original position. Remember not to pull the plant; let the shovel do the work.From Pot: Start by watering the spring snowflake plant. Let it sit for an hour so the plant and its roots absorb water. Carefully invert the pot, holding the plant at its base, and gently ease it out. Ensure the root ball's structure remains intact.From Seedling Tray: Water the seedlings. Using a trowel or similar tool, carefully separate the spring snowflake seedling from its cell. Do this delicately, keeping the small root ball undisturbed.
Step-by-Step Guide for Transplanting Spring Snowflake
Preparation
Prepare the new location for your spring snowflake plant. The hole should be twice as wide and as deep as the plant's root ball.
Placement
Position your spring snowflake into the hole. The plant should sit at the same depth as it was in its previous spot. Arrange it upright and fill half of the hole with compost or organic material.
Confirmation
Gently firm the soil and compost around the plant by hand and fill the remaining hole with soil.
Watering
Ensure the soil is damp by thoroughly watering the plant. However, avoid excessive watering.
How Do You Care For Spring Snowflake After Transplanting?
Monitoring
Regularly inspect your spring snowflake plant, as the initial weeks post-transplant are crucial. Look for any indications of stress or illness.
Feeding
Avoid immediate fertilization of your recently transplanted spring snowflake. Begin applying a mild liquid plant food only after a few weeks following transplantation.
Weeding
It's important to remove any undesirable plants or weeds that might compete with your spring snowflake for moisture and nutrients.
Protection
Shield your spring snowflake plant from harsh weather conditions such as heavy rainfall or intense heat, especially soon after relocation.
Troubleshooting Common Issues with Spring Snowflake Transplantation.
What is the ideal time to transplant spring snowflake?
The most suitable period to move your spring snowflake is during the season S1. Correct timing maximizes survival chances.
How much space does spring snowflake require between plantings?
Aim for a gap of 4-6 inches (10-15 cm) between each spring snowflake. This promotes healthy growth and prevents disease spread.
What's the procedure for watering spring snowflake after transplanting?
Immediately after transplanting, thoroughly water spring snowflake. Afterward, keep the soil consistently moist, but avoid waterlogging to prevent root rot.
What's the optimal soil type for transplanting spring snowflake?
Spring snowflake prefers well-drained, organic-rich soil. Incorporating compost into the soil during transplant can be beneficial for this.
Can spring snowflake be transplanted in a container?
Absolutely, spring snowflake can thrive in pots. Select a well-draining container and ensure a spacing of 4-6 inches (10-15 cm) between plants.
How deep should the planting hole be for transplanting spring snowflake?
The hole should be deep enough to accommodate the bulb of spring snowflake, typically about 3-4 inches (7.6-10 cm). Cover the bulb with soil after planting.
What should I do if my transplanted spring snowflake wilts?
Wilting spring snowflake may require more water. Check soil moisture levels. If dry, water more regularly. If waterlogged, improve drainage.
How often should I fertilize my transplanted spring snowflake?
Feed your spring snowflake at least once a year. Using a balanced, slow-release fertilizer during S1 can support root growth and flowering.
What happens if I plant spring snowflake too close together?
If spring snowflake are planted too closely, it could impede growth and encourage disease. Always maintain a 4-6 inch (10-15 cm) gap.
Should I prune spring snowflake after transplanting?
Pruning isn't necessary right after transplanting. Spring snowflake naturally dies back after flowering, at this point remove the dead foliage to keep the plant healthy.


