How to Transplant Cider gum?
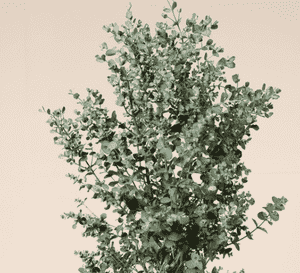
Relocate cider gum during the agreeable period from mid-spring to early summer, when conditions are ideal for robust root development. Select a bright spot with soil that drains effectively. Be sure to provide ample hydration following the move, guaranteeing a flourishing focal point for your garden.
Essential Preparations Before Relocating Cider Gum
Optimal Period for Moving Cider Gum?
The best time to move cider gum is from late spring through early summer. This timeframe offers cider gum the gentle warmth and sunlight necessary for it to settle and establish itself. Transplanting during this season ensures cider gum benefits from the best conditions for root development before colder weather arrives. This will give your cider gum a strong start for vigorous growth and blooming in the subsequent season. We are confident you will be delighted by how healthy and thriving your cider gum becomes if you follow this schedule!
Recommended Spacing Between Cider Gum Plants?
When relocating cider gum, ensure each plant is spaced approximately 18-24 feet (5.5-7.3 meters) apart. This provides ample room for their growth and spread, promoting healthy development.
Ideal Soil Mixture for Cider Gum Transplantation?
For cider gum, select well-draining soil that is slightly acidic to neutral (pH 6-7). Incorporating a foundational fertilizer, such as compost or aged manure, will supply vital nutrients and enhance soil structure.
Choosing a New Location for Your Cider Gum?
Pick a spot in your garden that receives full sun or partial shade (4-6 hours of direct sunlight) for cider gum. This will help guarantee robust growth and a healthy plant over the long term.
Equipment Needed Before Transplanting Cider Gum?
Gardening Gloves
To safeguard your hands while handling soil and cider gum.
Shovel or Spade
For digging the planting hole for cider gum and extracting it from its original spot.
Garden Fork
Useful for breaking up compacted soil before moving your cider gum.
Bucket or Wheelbarrow
To transport cider gum from its initial location to the new site.
Mulch
To aid in moisture retention and suppress weed growth after transplantation.
Watering Can or Hose
For irrigating cider gum during and following the transplanting process.
How to Extract Cider Gum from the Ground?
How to Extract Cider Gum from the Soil?
From Ground: Start by watering cider gum to dampen the soil. This facilitates digging around the root system. Using a shovel or spade, begin digging a wide circle around the plant, ensuring the root ball remains intact. Once the circle is dug, work the spade under the root ball and gently lift cider gum from its original position.From Pot: If cider gum is in a pot, water it thoroughly first. Turn the pot on its side, carefully hold the plant by its stems, and tap the bottom of the container until cider gum slides out. Be cautious not to pull on the plant's stems.From Seedling Tray: For seedlings, water them initially. Then, using a small tool or even a kitchen utensil, carefully pry the seedling out, making sure to lift it by the leaves, not the stem, to prevent damage. Keep as much of the original compost attached to protect the roots.
Step-by-Step Guide for Relocating Cider Gum
Digging
Excavate a hole that is twice as wide and as deep as the root ball of your cider gum. Ensure the hole's sides are loose to allow roots to spread easily.
Moving
Carefully transfer the cider gum from its initial spot or container to the newly prepared hole. Handle the plant by its root ball, not the stem or trunk.
Positioning
Place cider gum in the hole. The top of the root ball should be level with or slightly above the surrounding soil. Avoid planting cider gum too deeply, as this could lead to trunk rot.
Filling
Backfill the hole with the original soil. Gently firm the soil around the root ball.
Watering
Thoroughly water cider gum after transplanting. This helps the soil settle around the roots.
Mulching
Once watered, apply a layer of mulch around cider gum, keeping it a few inches away from the trunk to prevent rot.
Post-Transplantation Care for Cider Gum
Watering
Water your cider gum consistently for the first few weeks after relocation. This aids the plant in establishing itself in its new environment. Afterward, you can reduce the frequency, but always monitor the soil's moisture level. In hot and dry conditions, water more often.
Protection
Shield cider gum from strong winds and harsh weather until it is well-established in its new location. You may need to stake it initially for added support.
Pruning
Postpone pruning for a period after transplanting to avoid adding stress to the cider gum. You can begin light pruning after one year in its new spot.
Addressing Common Issues with Cider Gum Relocation.
When is the best time to move my cider gum plant?
The ideal season to relocate your cider gum is from mid-spring to early summer, when the plant is experiencing its most vigorous growth.
How much space should I allow between my cider gum plants when moving them?
For successful relocation, provide ample space between each cider gum. A distance of 18-24 feet (5.5-7.3 meters) is recommended.
What if my relocated cider gum shows no new growth?
Patience is crucial. Sometimes, cider gum needs time to adapt to its new surroundings before exhibiting new growth. Ensure it receives adequate water and protection from severe weather.
Why are the leaves of my relocated cider gum turning yellow?
Yellow leaves can indicate a watering problem. Cider gum requires well-drained soil, so excessive watering can cause this discoloration. Adjust water levels and observe any changes.
How should I prepare the ground before moving cider gum?
Prepare the ground by loosening the soil and adding compost if necessary. Ensure the hole is deep enough to accommodate cider gum's root ball and allows for proper drainage.
How do I handle the roots of cider gum during relocation?
Handle cider gum's roots with care to prevent stressing the plant. Gently untangle the roots before placing them in the planting hole, spreading them out naturally.
My cider gum's leaves appear shriveled after relocation. What should I do?
Shriveled leaves may signal dehydration. Water your cider gum sufficiently without overwatering. Protect it from intense sun for the initial few weeks after transplanting.
How do I safeguard my relocated cider gum from cold climates?
Young cider gum plants can be susceptible to frost. Use mulch to protect the roots, and cover them with frost cloth during extremely cold weather.
What kind of soil is best for relocating my cider gum?
Cider gum thrives in well-draining soil rich in organic matter. Avoid waterlogged or overly compacted soil, as it can hinder growth.
Is pruning necessary for my cider gum after relocation?
Light pruning can help cider gum conserve energy after transplanting. Avoid heavy pruning initially, as it may cause additional stress to the plant.



