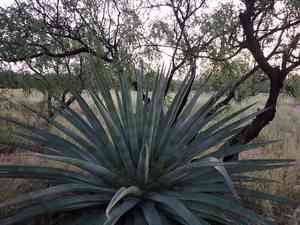
How to Transplant Palmer's century plant?
Relocate palmer's century plant during the mild period of early winter to leverage its inactive state, thereby reducing shock. Select a location bathed in sunlight with effective water runoff, and if required, enrich the earth to ensure peak performance. This prepares the ground for vigorous development in spring.
Essential Preparations Before Relocating Palmer's Century Plant
Optimal Period for Moving Palmer's Century Plant?
The best time to move palmer's century plant is during the cooler periods of late autumn or early winter. This timing allows palmer's century plant to adjust without the stress of intense heat, promoting root development before the vigorous growth of spring. Benefits of this season include reduced water needs and a gentle recovery phase for roots, ensuring strong regrowth when warmer weather returns. Remember, careful timing sets palmer's century plant up for success in its new home!
Recommended Spacing Between Palmer's Century Plant Specimens?
To provide palmer's century plant ample room for development, ensure proper spacing. Allow approximately 6-8 feet (1.8-2.4 meters) between plants during relocation. Adequate spacing helps palmer's century plant grow comfortably and minimizes competition for resources. Best of luck with your gardening endeavors!
Ideal Soil Blend for Palmer's Century Plant Relocation?
Prior to moving palmer's century plant, prepare the soil. Palmer's century plant thrives in well-drained, sandy, or gravelly soil. Additionally, incorporate a base fertilizer rich in potassium and low in nitrogen. This supports the growth and overall health of your palmer's century plant. Successful planting begins with quality soil!
Selecting a New Site for Your Palmer's Century Plant?
Sunlight is vital for palmer's century plant. Choose a location with full sunâmeaning the spot receives at least 6 hours of direct sunlight daily. Remember, sufficient sunlight ensures robust plant development. Enjoy your gardening journey!
Tools Required for Transplanting Palmer's Century Plant
Gardening Gloves
To safeguard your hands when handling rough soil and potentially sharp foliage of palmer's century plant.
Shovel
For excavating a hole in the ground appropriate for the plant's root ball size. Also useful for extracting the plant from its current in-ground position.
Garden Trowel
For more precise digging and backfilling soil around the plant once it's situated in its new spot.
Garden Hose or Watering Can
To irrigate the plant immediately after it has been moved.
Mulch
To assist in retaining soil moisture post-transplantation.
How to Extract Palmer's Century Plant from the Ground?
How to Extract Palmer's Century Plant from the Ground?
From Ground: Start by watering the palmer's century plant to soften the surrounding soil. Next, use a shovel to dig a circle around the plant, maintaining a safe distance to avoid root damage. Once the plant is loosened, carefully dig beneath it and lift the root ball, preserving as much of the root system as possible. From Pot: Ideally, attempt to transplant palmer's century plant when the soil is dry. This facilitates easier removal from the pot. Turn the pot sideways, gently hold the plant, and tap the pot's rim on a firm surface. This should dislodge the plant, allowing you to pull it out along with its soil and root system. From Seedling Tray: Gently grasp the palmer's century plant seedling by its leaves to prevent stem damage, then invert the tray to allow the plant to fall out. Be careful to keep the root system as intact as possible.
Step-by-Step Guide for Relocating Palmer's Century Plant
Preparation
Prepare the new site for palmer's century plant relocation. The hole should be twice the width of the plant's root ball and of equal depth.
Plant Placement
Gently position the palmer's century plant in the prepared hole, ensuring the top of the root ball is level with the ground surface.
Backfilling
Refill the hole with the excavated soil, making sure no air pockets remain around the plant's root system, as these can cause root desiccation.
Watering
Thoroughly water the palmer's century plant, ensuring the water penetrates deeply and saturates the roots.
Mulching
Apply mulch around the plant's base; this will aid in moisture retention and inhibit weed growth.
Post-Transplant Care for Palmer's Century Plant
Watering
Instead of daily shallow watering, it's generally better to water deeply and less frequently to help palmer's century plant establish its roots. The soil should always be allowed to dry out before the next irrigation.
Monitoring
Observe your palmer's century plant closely after transplanting, especially during the initial weeks. If leaves appear wilted or discolored, it may indicate transplant shock. Upon noticing such signs, ensure the plant receives adequate water and is not exposed to harsh weather conditions.
Resolving Common Issues with Palmer's Century Plant Relocation.
When is the optimal time to move palmer's century plant?
The best period to transplant palmer's century plant is from late summer to early fall (S9-S10). These conditions allow the plant to establish itself before winter.
What is the recommended spacing for moving palmer's century plant?
For optimal development, palmer's century plant should be planted 6-8 feet (1.8-2.4 meters) apart. Spacing is vital to prevent overcrowding and ensure proper air circulation.
What precautions should I take before moving palmer's century plant?
Inspect palmer's century plant for pests or diseases prior to relocation. This helps prevent spreading issues to the new site. Also, ensure the destination soil is well-prepared.
What kind of soil does palmer's century plant prefer?
Palmer's century plant thrives in well-draining soil. It can grow in various soil types, provided water does not accumulate, which could lead to root rot.
How should I handle palmer's century plant during the relocation process?
Handle palmer's century plant with care to avoid damage, especially to the roots. Use gloves and be mindful of the plant's spines. Try to keep the root ball intact.
At what depth should I plant palmer's century plant?
Palmer's century plant should be planted at the same depth as it was in its previous location. This helps the plant adapt to its new environment more quickly.
Can I move palmer's century plant into a container?
Absolutely! Palmer's century plant can be transplanted into a container. Just ensure the pot has sufficient drainage and is large enough to accommodate the plant's growth.
How long should I wait to water palmer's century plant after relocating?
Wait approximately one week before watering palmer's century plant after transplanting. This allows the roots to recover from transplant shock and begin establishing in the new location.
What happens if I move palmer's century plant during the wrong season?
Transplanting palmer's century plant outside of late summer to early fall may stress the plant, leading to slow growth or even plant loss. It may not adapt to the change quickly.
What should I do if palmer's century plant's leaves start to droop after relocation?
Drooping leaves could indicate transplant shock. Mitigate this by watering thoroughly while ensuring the soil drains well. Make sure it's not exposed to extreme temperature fluctuations.


