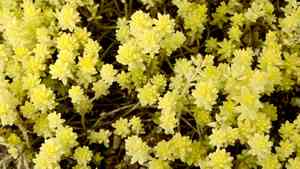
Boost Growth: How and When to Repot Your Japanese stonecrop Plant
1
The best period to transplant Japanese stonecrop is in early Spring or late Winter.
2
Employ soil blends that drain effectively, having a pH between 6.0 and 7.5, for robust Japanese stonecrop development.
3
Japanese stonecrop thrives in containers that offer good drainage; terracotta pots are a superb option.
Knowing When to Replant Your Japanese Stonecrop
Recognizing indications of root congestion in Japanese stonecrop
When your Japanese stonecrop exhibits signs of distress, such as yellowing foliage or stunted development, it may signal root overcrowding. Observe for roots coiling at the pot's base or emerging from drainage openings. These are clear indicators your plant has outgrown its container and requires repotting.
Considering the growth cycle and seasonal timing
Japanese stonecrop benefits most from repotting during its dormant phase or just prior to its active growth period. Thus, the optimal times to transplant this succulent are in early spring or late winter. During these intervals, the plant will experience minimal shock and can readily adapt to its new surroundings, ensuring robust growth.
Choosing the Ideal Container and Substrate for Japanese Stonecrop
Selecting the appropriate pot size and material
Choosing the correct container for your Japanese stonecrop is vital for its well-being. Opt for a pot that is 2-3 cm (1 inch) wider than the current one to provide ample space for root expansion. Terracotta pots are especially suitable as they offer excellent drainage, a crucial requirement for succulents.
The best substrate blends for vigorous development
Japanese stonecrop necessitates a well-draining soil mixture to prevent root rot. A good blend comprises 50% cactus potting mix and 50% perlite or pumice. This combination ensures the substrate doesn't retain excessive moisture, which is harmful to succulents.
A Step-by-Step Guide to Transplanting Japanese Stonecrop
Preparing your work area and implements
Before you begin repotting, gather all necessary tools: a new container, a well-draining soil blend, a small shovel, and pruning shears. Select a clean workspace where spills can be easily managed. Lay down newspapers or a gardening mat to catch loose soil.
Gently extracting the plant from its current container
To carefully remove your Japanese stonecrop from its current pot, begin by tilting the pot on its side and gently squeezing the edges to loosen the soil. Hold the base of the stem and carefully pull the plant out. Be cautious not to tug too forcefully to avoid damaging the roots.
Inspecting and pruning the roots if necessary
Once extracted, examine the roots of your Japanese stonecrop. If you observe dead, damaged, or overly long roots, trim them using clean pruning shears. This will encourage healthy new growth and help the plant acclimate to its new pot more easily.
Positioning the plant in its new pot and adding substrate
Place a thin layer of soil at the bottom of the new pot, and center your Japanese stonecrop. Fill in around the plant with the soil mix, gently pressing it down to secure the plant. Ensure the plant is upright, and do not bury the stem too deeply to prevent rot.
Post-Repotting Care for Your Japanese Stonecrop
Watering requirements after transplanting
After repotting, avoid watering your Japanese stonecrop immediately. Wait approximately one week to allow the plant to adjust and for the roots to heal from any trimming. Following this period, water sparingly, letting the soil dry out completely between waterings.
Monitoring plant health and growth adjustments
Keep a close watch on your Japanese stonecrop for any signs of stress or pests. In its new pot, the plant should begin to show signs of new growth. Adjust watering and lighting as needed, ensuring it receives ample indirect sunlight to flourish.


