Boost Growth: How and When to Repot Your Yellow butterfly palm Plant
1
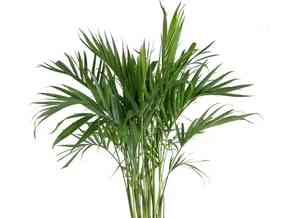
The yellow butterfly palm is frequently referred to as a 'household essential' due to its ability to cleanse the air.
2
To encourage the best development, transplant your yellow butterfly palm every two to three years.
3
The perfect time to re-pot your yellow butterfly palm is during the spring season.
Why Your Dypsis lutescens Requires Re-potting
Identifying indications of a root-bound specimen
A primary indicator that your Dypsis lutescens needs re-potting is becoming root-bound. This signifies the roots have exceeded their current container and are beginning to encircle the pot. Another clear sign is roots emerging from the drainage apertures. If you observe diminished growth or yellowing foliage, it may suggest insufficient space for root respiration and expansion.
The effect of restricted volume on plant vitality
Confined space can significantly impair the well-being of your Dypsis lutescens. When roots lack adequate room, their ability to absorb water and nutrients efficiently is compromised. This stress can result in stunted development and a less vibrant plant. In severe instances, it might even shorten the plant's overall lifespan if not addressed promptly.
Optimal re-potting frequency for robust development
To ensure your Dypsis lutescens flourishes, plan to re-pot it every 2-3 years. This will provide the roots with ample room to expand and allow you to replenish the growing medium, supplying vital nutrients. Consistent re-potting aids in preserving the plant's vigor and longevity.
Selecting the Appropriate Container and Substrate for Dypsis lutescens
Choosing the correct pot dimensions and material
Selecting the right container is vital for the health of your Dypsis lutescens. Opt for a pot that is 2-3 inches (5-7 cm) wider in diameter than the existing one. Ensure the pot features adequate drainage holes to prevent water accumulation. Terracotta or ceramic pots are suitable choices as they are porous and encourage root development.
Understanding soil compositions and requirements for Dypsis lutescens
For the growing medium, a well-draining potting mix is ideal for the Dypsis lutescens. You can formulate a blend of peat, pine bark, and perlite to ensure good drainage while retaining some moisture. Avoid using garden soil as it can be excessively dense and may impede root growth.
Preparing for Re-potting
Assembling necessary implements and supplies
Before commencing, gather all required materials: a new container, fresh potting mix, and essential gardening tools such as gloves and a hand trowel. Having everything prepared will streamline the re-potting procedure and enhance its efficiency.
Methods for safely extracting Dypsis lutescens from its current container
To safely remove the Dypsis lutescens from its present pot, begin by watering the plant a day prior to facilitate easier root ball extraction. Gently tilt the pot and tap its sides to loosen the soil. Carefully slide the plant out by grasping the base of the stem. If the plant resists, use a trowel to work around the edges to free the roots.
Step-by-Step Re-potting Procedure
Positioning the plant in the new container
Once you've extracted the Dypsis lutescens from its old pot, inspect the roots. Trim any deceased or decaying roots to foster healthy growth. Place a layer of soil in the new pot and center the plant. The top of the root ball should rest approximately 2 inches (5 cm) below the pot's rim.
Filling voids with soil and proper substrate compaction
Begin filling the spaces around the root ball with fresh soil. Ensure the plant remains level as you add the substrate. Gently press the soil to eliminate air pockets but avoid over-compacting it, as this can restrict root growth. Aim to leave some space at the top for irrigation.
Watering your freshly potted Dypsis lutescens
Following re-potting, thoroughly water the Dypsis lutescens. This aids in settling the soil and removing any air pockets. Ensure the water drains effectively to prevent root rot. Position the plant in a location with indirect light to help it adapt to the new container.
Post-Re-potting Care for Dypsis lutescens
Immediate care recommendations after re-potting
After re-potting, it's crucial to closely observe the plant. Keep the soil slightly moist but not waterlogged for the initial few weeks. Refrain from immediate fertilization as the roots require time to adjust to the new surroundings.
Monitoring your plant for indications of stress
Watch for any signs of distress such as drooping leaves or discoloration. These indicate the plant is struggling to adapt. If you notice any issues, check the soil moisture levels and light conditions and make necessary adjustments.
Long-term care approaches
For enduring success, ensure your Dypsis lutescens receives consistent care. Place it in a spot with bright, indirect illumination and maintain regular watering. Fertilize every 2-3 months with a balanced, water-soluble nutrient solution to encourage healthy development.


