Boost Growth: How and When to Repot Your Angel's trumpet Plant
1
The best times to repot Angel's trumpet are during spring and winter.
2
Angel's trumpet grows quickly, so it needs to be repotted promptly.
3
Employing an appropriate soil blend can greatly enhance your plant's vitality and development.
The Importance of Repotting Angel's Trumpet
Understanding the growth pattern of Angel's Trumpet
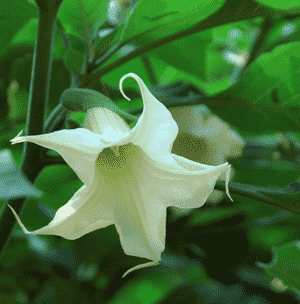
Angel's Trumpet is renowned for its stunning, bell-shaped blooms in various vibrant hues. This plant exhibits a notably fast growth rate, often outgrowing its container quickly. When confined, its roots can become constricted, hindering development and reducing flower production.
Recognizing indicators that your Angel's Trumpet requires a new container
Knowing when your Angel's Trumpet needs transplanting is vital for its continued vitality. Look for signs like roots emerging from drainage holes, foliage turning yellow, or stunted development. These signal the plant has outgrown its current pot and needs more room to thrive.
Advantages of timely transplanting for plant vitality
Repotting your Angel's Trumpet at the appropriate moment offers numerous benefits. It guarantees ample space for growth, fostering improved root development and overall plant health. Furthermore, fresh potting mix supplies crucial nutrients that support abundant flowering and lush foliage.
Selecting the Ideal Pot and Soil for Angel's Trumpet
Choosing the appropriate pot size and material
When selecting a new container for your Angel's Trumpet, consider one that is 2-4 inches (5-10 cm) wider in diameter than its current one. Material also matters; while lightweight plastic pots are easier to move, ceramic or clay pots provide better stability and air circulation.
The optimal soil blend for robust growth
For Angel's Trumpet, a well-draining soil mixture is essential. A recommended blend includes equal parts peat moss, perlite, and compost. This combination ensures roots receive sufficient aeration while retaining necessary moisture.
Significance of drainage and air circulation in pot selection
Proper drainage is crucial to prevent root rot in Angel's Trumpet. Ensure the pot has adequate drainage holes. Adding a layer of gravel at the bottom can also enhance drainage. Similarly, aerated soil prevents compaction, promoting healthier root growth.
A Step-by-Step Guide to Repotting Angel's Trumpet
Preparing your work area and gathering necessary tools
Start by setting up a spacious work zone, ideally outdoors or in a well-ventilated space. Collect tools such as gardening gloves, a trowel, fresh potting mix, and the new pot. Having everything ready will streamline the repotting process.
Carefully extracting the plant from its current container
To remove the Angel's Trumpet from its current pot, gently tilt the container and tap its sides to loosen the soil. Carefully hold the plant's base and ease it out. Avoid forcefully pulling the plant to prevent root damage.
Transplanting: positioning and stabilizing Angel's Trumpet in the new pot
Prepare the new pot by filling it with a layer of fresh soil mix. Place the Angel's Trumpet in the center, then add soil around the roots, ensuring the plant is upright and stable. Gently press the soil to eliminate air pockets.
Aftercare: Watering and placing your newly potted plant
Once repotted, water the Angel's Trumpet thoroughly to help settle the soil. Position the plant in a spot with partial sunlight and shield it from strong winds. Avoid immediate exposure to direct sunlight post-repotting to minimize transplant shock.
Addressing Common Issues After Repotting Angel's Trumpet
Managing post-transplant stress
After repotting, some plants may exhibit signs of stress, such as wilting or yellowing leaves. Ensure the plant is adequately watered and placed in a stable environment. Gradually introduce it to direct sunlight over several days.
Identifying and resolving irrigation errors
Overwatering is a frequent error after repotting. Check the soil moisture level before watering; the top 1-2 inches (2.5-5 cm) should be dry before the next irrigation. Ensure the pot's drainage holes are clear to prevent waterlogged roots.
Tips for fertilization and promoting growth
Once the plant has acclimated to its new pot, regular fertilization can boost its development. Use a balanced, water-soluble fertilizer every 4-6 weeks during the growing season. This will supply essential nutrients and encourage vigorous flowering.



