How to Prune White-panicle aster?
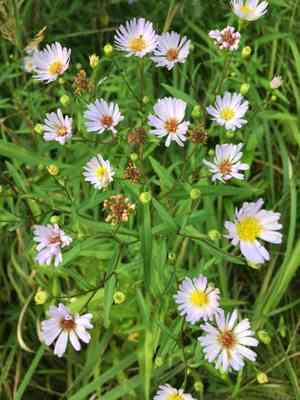
This enduring plant is recognized for its elevated height and abundant, pale blossoms that embellish it toward the end of the growing period. For white-panicle aster, trim in early spring or following the initial frost in late autumn to preserve its form and stimulate robust development. Removing faded blooms encourages additional flowering. Reducing crowded stalks enhances air movement, aiding in disease prevention. Trimming also revitalizes white-panicle aster, guaranteeing a lively presentation annually.
What Are the Benefits of Pruning White-panicle Aster?
What Are the Benefits of Pruning White-panicle Aster?
Trimming white-panicle aster encourages vigorous development and helps maintain a dense, well-proportioned shape, crucial for visual appeal and overall garden aesthetic.
What Is the Best Time for Pruning White-panicle Aster?
What Is the Best Time for Pruning White-panicle Aster?
Pruning in early spring allows for the removal of any winter damage before the plant begins its active growth phase, ensuring energy is directed towards the production of healthy new shoots. Late fall pruning, after flowering, permits gardeners to shape the plant and remove spent flower stalks without affecting next season's blooms, as white-panicle aster forms buds on new wood. Additionally, fall cleanup helps prevent disease by removing potentially infected or dead plant material before winter.
What Tools Do I Need to Prune White-panicle Aster?
Hand Pruners
Perfect for cutting through white-panicle aster stems, which are typically under 1/2 inch thick. Hand pruners provide a clean cut essential for the plant's well-being.
Pruning Shears
Best for shaping and managing white-panicle aster growth by cutting at an angle, which promotes new growth and maintains the plant's form.
Long-Handled Loppers
Useful for reaching into dense white-panicle aster clumps to thin out stems from the base, improving air circulation and reducing disease risk.
Garden Gloves
Crucial for protecting the gardener's hands from thorns and rough stems while trimming white-panicle aster.
Pruning Saw
Needed for cutting through woody white-panicle aster stems that may exceed 1/2 inch in thickness, which could be too tough for hand pruners or loppers.
How to Prune White-panicle Aster
Step1: Tool Preparation
Prepare your pruning tools by ensuring they are clean and sharp to prevent disease transmission and to make precise cuts. Disinfect your tools with a solution of one part bleach to nine parts water or use rubbing alcohol.
Step2: Deadheading Flowers
Identify white-panicle aster's spent flowers, which may have lost their color or appear withered. Using your fingers or pruning shears, carefully snip off the dead flower heads at their base, just above the first set of healthy leaves.
Step3: Trimming Wilted Shoots
Locate wilted shoots on white-panicle aster. These typically droop, appear discolored, and might have a soft texture. Trim each wilted shoot back to the ground or to a strong lateral branch or bud that is oriented in a desirable direction for new growth.
Step4: Cutting Old Woody Stems
Examine white-panicle aster for old stems that have become woody and unproductive. Cut these stems down to ground level or to a new growth point if you see green shoots emerging from the base. Ensure the cuts are clean and made at a slight angle to prevent water from accumulating on the cut surface.
Step5: Shaping and Thinning
After pruning the specific parts mentioned, give white-panicle aster a general shape by trimming any erratic or disproportionately long growth to maintain its natural form and encourage healthy, bushy growth. Aim to keep the plant well-aerated with an open center to reduce the risks of fungal infections.
Step6: Clearing Debris
Dispose of all removed material by composting healthy plant matter and securely discarding any diseased or insect-infested trimmings to prevent spreading any potential pathogens back to the garden.
Step7: Post-Pruning Watering
Water white-panicle aster after pruning to help reduce stress on the plant and to encourage a flush of new growth. Ensure the soil is kept moist but not waterlogged, as white-panicle aster prefers consistently moist soil conditions.
Step8: Continuous Growth Monitoring
Monitor white-panicle aster for new growth, and perform maintenance pruning as needed throughout the growing season to remove any new dead flowers, wilted shoots, or old stems that may develop. This will promote continued flowering and healthy plant vigor.
Post-Pruning Care for White-panicle Aster
Post-Pruning Care for White-panicle Aster
Immediately after trimming white-panicle aster, ensure it's watered deeply to promote root recovery. Adjust environmental conditions by providing partial sun and shielding white-panicle aster from high winds. Maintain a consistent humidity level and avoid temperature extremes. Apply a balanced slow-release fertilizer to support new growth. Regularly inspect white-panicle aster for disease or pest stress signs, like wilted leaves or discolored stems, and promptly remove affected parts.
Common Pruning Mistakes with White-panicle Aster
Overpruning Weakens Plant Vitality
Excessive pruning is a common error where too much of white-panicle aster is removed, weakening the plant and reducing its vigor and bloom potential.
Improper Tool Use Causes Stem Damage
Using dull or dirty pruning tools can harm white-panicle aster stems, leading to jagged cuts that are more vulnerable to disease.
Indiscriminate Pruning Disrupts Growth
Pruning without careful consideration of the plant's natural shape can result in an unattractive appearance and impede its growth pattern.
Bud Removal Reduces Flowering
Removing new buds or shoots on white-panicle aster can unintentionally decrease the number of flowers it produces.
Improper Cut Placement Invites Disease
Cutting too close to the main stem or node, or leaving too long a stub, can cause damage or invite disease to white-panicle aster.
Common Pruning Tips for White-panicle Aster
Clean Cuts with Sharp Shears for Quick Healing
Use sharp, clean pruning shears to make precise cuts that will heal quickly, minimizing the risk of disease entering white-panicle aster.
Remove Only Dead or Damaged Stems
Focus on removing only dead or damaged stems, as well as any weak or spindly growth to direct energy to the healthier parts of white-panicle aster.
Angle Cuts Above Outward-Facing Buds
Cut white-panicle aster stems at an angle, about 1/4 inch above an outward-facing bud, to encourage outward growth and improve air circulation.
Thin Foliage for Air Circulation and Light
Thin out dense areas of foliage to ensure good air circulation and light penetration, which are crucial for the health and flowering of white-panicle aster.
Respect Natural Structure When Shaping
When shaping white-panicle aster, consider its natural structure and aim to maintain an appealing form while encouraging healthy growth.


