How to Propagate Bristly locust?
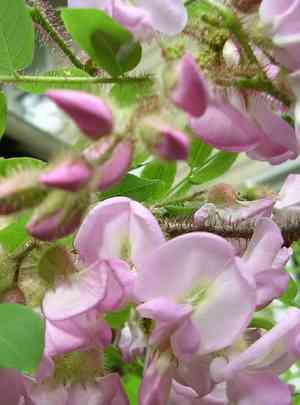
Belonging to the Fabaceae family, bristly locust is a sturdy bush ideal for propagation through cuttings. For optimal results, utilize vigorous, uninfected semi-hardwood segments harvested from the present year's growth. Prepare cuttings of average size, and apply rooting compound to the base to encourage root growth. Supplying a steady environment with uniform humidity and heat will improve root establishment. Avoiding disruption to the roots is crucial during the sensitive transfer to potting medium or a final site.
Optimal Propagation Period for Bristly Locust
Propagation Type
Cutting
Propagation Season
Autumn,Winter
Essential Tools for Bristly Locust Propagation
Sharp Pruning Shears
These are crucial for obtaining clean, precise cuts from bristly locust. Sharp shears ensure smooth cut surfaces, vital for preventing disease and encouraging better root development when planted.
Rooting Hormone
This chemical compound promotes root formation at the severed end of bristly locust stem cuttings. Applying rooting hormone speeds up new root growth, thereby boosting propagation success.
Sterilized Potting Mix
A well-draining, sterile potting medium offers an ideal setting for bristly locust cuttings to root. It lowers the risk of fungal or bacterial infections, which can harm new cuttings trying to establish roots.
Humidity Dome or Cover
Maintaining high humidity around bristly locust cuttings is critical during the initial rooting phases. A humidity dome or plastic cover helps retain atmospheric moisture around the cuttings, preventing dehydration and fostering successful root growth.
Heat Mat
This device is especially useful for stimulating root growth in bristly locust during cooler temperatures. A heat mat helps maintain an ideal soil temperature, which is crucial for root initiation and development in cuttings.
Bristly Locust Propagation Difficulty
Propagation Type
Moderately Difficult
Post-Propagation Care for Bristly Locust
How to Care for Your Newly Propagated Bristly Locust?
Once bristly locust has rooted and adapted, transplant them to their permanent spot, ensuring full sun to partial shade. Keep the soil moist and well-drained, and apply mulch to keep roots cool. Regular trimming helps manage growth and improves air circulation, reducing fungal disease risk. Monitor for pests and diseases, treating as needed to protect bristly locust.
Common Errors to Avoid When Propagating Bristly Locust
Overwatering
Excessive soil moisture can lead to root rot in bristly locust, hindering successful propagation.
Neglecting cleanliness
Using uncleaned propagation tools can introduce pathogens, negatively impacting bristly locust's health and development.
Improper cuttings
Taking cuttings that are too small or unhealthy can result in unsuccessful rooting and growth for bristly locust.
Ignoring pest control
Failing to manage pests during the vulnerable propagation stages can cause damage and poor success rates for bristly locust.
Planting depth
Planting bristly locust cuttings too deep can impede proper establishment and shoot emergence.
Advice for Propagating Bristly Locust
Appropriate moisture
Maintaining consistent soil moisture allows bristly locust cuttings to root correctly without the threat of decay.
Cutting selection
Choosing robust and healthy semi-hardwood stem cuttings improves the propagation success of bristly locust.
Hygiene practices
Sterilizing tools before taking bristly locust cuttings prevents disease spread and promotes healthy growth.
Pest management
Regularly checking for and managing pests during bristly locust's propagation phase ensures strong plant development.
Planting technique
Inserting bristly locust cuttings to the correct depth encourages stable root establishment and optimal shoot emergence.



