How to Propagate Turnsole?
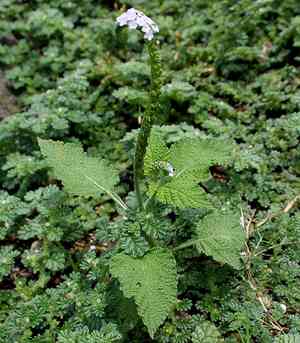
Heliotropium is a adaptable blooming flora that flourishes when reproduced by seeding. For optimal development, employ new seeds and embed them in porous earth, guaranteeing sufficient dampness and heat for sprouting. After young plants appear, thin them to prevent excessive density, which can hinder their progress. Careful handling and minimal disruption of roots during relocation will foster strong establishment.
Optimal Period for Turnsole Propagation
Propagation Method
Seeding
Propagation Period
Spring
Essential Tools for Turnsole Propagation
Seed trays
Seed trays are shallow containers for indoor seed starting. They efficiently organize turnsole seeds, offering ample space for germination and minimizing damage from crowding. These trays can be filled with a suitable germination mix that retains moisture while providing adequate aeration.
Potting mix
A premium potting mix ensures turnsole seeds receive an ideal balance of moisture, oxygen, and nutrients. Seek a mix containing components like peat moss or coconut coir, vermiculite, and perlite, which support water retention and proper drainage, crucial for effective turnsole germination.
Spray bottle
A spray bottle is vital for gently watering turnsole seeds. It allows the propagator to moisten the soil without dislodging seeds, maintaining consistent moisture levels essential for germination. The fine mist prevents over-saturation, thus avoiding issues like mold or fungal growth.
Grow lights
If germinating turnsole indoors or in low-light conditions, grow lights provide supplementary illumination to encourage steady growth. The correct light wavelength adequately stimulates photosynthesis, ensuring young turnsole plants develop robustly and healthily during their critical early stages.
Turnsole Propagation Guide
Propagation Type
Simple
Post-Propagation Care for Turnsole
Post-Propagation Care for Turnsole
Once turnsole seeds have germinated, gradually introduce seedlings to more direct sunlight. Continue to water the plants, keeping the soil moist but not waterlogged. Apply a balanced fertilizer monthly during the growing season to support vigorous growth. Monitor for pests and diseases, addressing them promptly if they appear.
Common Errors to Avoid During Turnsole Propagation
Excessive watering during propagation
Overwatering can cause root rot in turnsole, weakening the plant and significantly reducing propagation success. Persistently soggy soil can deprive roots of oxygen and encourage fungal development.
Using unsterilized tools or containers
Non-sterile propagation tools or containers can introduce pathogens to turnsole. This can lead to diseases that hinder root development and the plant's overall health.
Overuse of fertilizer
Applying too much fertilizer during turnsole propagation can result in nutrient burn, damaging young roots and shoots, inhibiting their growth, and jeopardizing the viability of new plants.
Tips for Propagating Turnsole
Proper cutting selection
Select healthy, disease-free turnsole cuttings, approximately 4-6 inches long. Ensure each cutting has at least two nodes, as nodes are essential for root development.
Appropriate moisture levels
Maintain consistent moisture without over-saturating the soil. Using a well-draining soil mix helps prevent waterlogging, which is crucial for healthy turnsole root development.
Use of rooting hormones
Applying a rooting hormone to turnsole cuttings can significantly boost the chances of successful propagation. Rooting hormones help stimulate root growth and enhance the overall health of the new plants.



