How to Propagate Chequered daffodil?
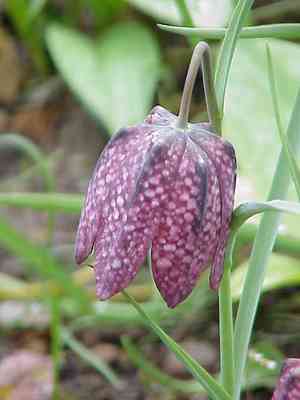
Fritillaria meleagris is a distinctive bulb-forming perennial that thrives in damp earth and dappled light, perfect for establishing in lawns. To achieve successful reproduction, cultivators must concentrate on its corms. These ought to be set at a depth approximately three times their diameter, making certain the tapered tip points skyward. Position them roughly 10 centimeters apart to facilitate organic expansion. This propagation technique is uncomplicated and preserves the plant's singular attributes.
Optimal Time for Chequered Daffodil Propagation
Propagation Method
Utilize The Tubers
Propagation Period
Spring
Tools Required for Chequered Daffodil Propagation
Gardening gloves
Shields hands from dirt, moisture, and potential irritants when handling chequered daffodil tubers. This ensures safe and clean manipulation of plant material during division or planting.
Trowel
Employed for excavating and lifting chequered daffodil tubers with minimal harm. It assists in carefully digging around the plant without damaging the tuber structure, vital for successful propagation.
Sharp knife or scalpel
Crucial for cleanly cutting or dividing the chequered daffodil tuber, if needed. A sharp blade ensures precise cuts, reducing tissue damage and promoting better healing and growth post-division.
Labeling tags and marker
Aids in marking and identifying chequered daffodil tubers after harvest and during storage. Accurate labeling helps track plant growth and health, ensuring proper care and planting.
Perlite or vermiculite
Offers aeration and enhances drainage when mixed with soil, creating an ideal growing medium for chequered daffodil tubers. These materials help maintain necessary moisture balance and prevent rot, critical for tuber health.
Watering can with a fine rose
Delivers a gentle water spray that won't disturb newly planted chequered daffodil tubers. It allows for even and safe hydration, especially important in the initial growth stages after propagation.
Post-Propagation Care for Your Chequered Daffodil
Post-Propagation Care for Your Chequered Daffodil
After propagation, ongoing care involves monitoring moisture levels to keep soil damp without overwatering, particularly during dry spells. Avoid heavy watering to prevent bulb rot. Provide shade during the day's hottest hours. Gradually reduce watering as chequered daffodil enters dormancy post-flowering to prevent tuber rot. Divide and replant tubers every few years to prevent overcrowding and encourage vigorous growth.
Common Errors to Avoid When Propagating Chequered Daffodil
Overwatering
Excessive water can lead to the rotting of chequered daffodil's bulbs. Bulb rot can significantly decrease propagation success.
Deep planting
Planting chequered daffodil's bulbs too deeply can impede their ability to sprout. Appropriate depth is essential to encourage proper growth.
Ignoring dormancy period
Chequered daffodil requires a resting period. Planting during or immediately after dormancy without allowing the bulb to rest can stress the plant, resulting in poor or no growth.
Using poor drainage materials
Inadequate soil drainage can cause waterlogging, which is harmful to chequered daffodil's bulbs, potentially leading to rot or fungal diseases.
Advice for Propagating Chequered Daffodil
Correct soil preparation
Utilizing well-draining soil helps prevent waterlogging and bulb rot. Chequered daffodil thrives in soil that allows moisture to pass through without retaining excess water.
Adequate spacing
Provide sufficient room between each chequered daffodil bulb. Crowding can hinder growth and increase the risk of disease spread.
Mild watering
Water chequered daffodil's bulbs moderately. The key is to keep the soil moist but not waterlogged, balancing hydration needs especially during growth phases.
Appropriate planting depth
Plant chequered daffodil's bulbs at a shallow depth, typically around 2 to 4 inches deep, depending on the size of the bulbs. This depth supports optimal growth.



