How to Propagate Field eryngo?
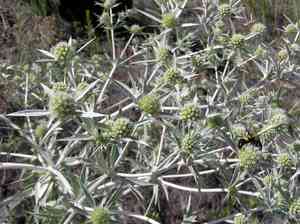
Frequently encountered in arid grasslands and stony regions, field eryngo is a perennial valued for its thistle-like look. Reproduction mainly entails planting seeds, with a primary emphasis on supplying soil that drains effectively, replicating its native environment for peak development. Seeds ought to be planted in pots or specific nursery plots and subsequently moved to their permanent cultivation sites once they have formed a robust root structure. Nurturing field eryngo during its initial stages involves consistent irrigation and guaranteeing sufficient sunlight exposure to foster vigorous growth.
Optimal Period for Field Eryngo Propagation
Propagation Method
Seeding
Propagation Period
Spring
Tools for Field Eryngo Propagation
Seed trays
Seed trays are vital for initiating field eryngo from seeds. Their shallow compartments facilitate easy management of soil quality and moisture. They also ensure each seedling can develop without root interference from others, promoting consistent growth and simpler transplantation.
Peat pots
Peat pots offer a biodegradable container for field eryngo seedlings, minimizing transplant shock by allowing the entire pot to be planted. This tool is especially beneficial as it reduces root disturbance, which is crucial for maintaining the health and viability of field eryngo during relocation.
Fine mist sprayer
A fine mist sprayer is essential for gently watering field eryngo seedlings without dislodging soil or harming delicate new growth. It ensures even moisture distribution across the surface, which is critical for seed germination and seedling establishment.
Sieve or sifter
A sieve or sifter is utilized for preparing the planting medium by removing larger particles that could hinder the germination of field eryngo seeds. This creates a fine, uniform soil texture ideal for maintaining moisture and oxygen levels, encouraging more effective root penetration and development.
Perlite or vermiculite
Incorporating perlite or vermiculite into the soil mix can enhance drainage and air circulation around field eryngo roots, which is vital for preventing root rot and establishing an optimal growing environment for seedlings.
How to Propagate Field Eryngo?
Propagation Type
Easy
Caring for Newly Propagated Field Eryngo
Caring for Newly Propagated Field Eryngo
Post-propagation, field eryngo needs full sun and well-draining soil to flourish. Water young plants consistently to keep the soil moist but not saturated, and reduce watering once established, as field eryngo is drought-tolerant. Fertilization is generally not required, but a light application of balanced fertilizer can be given in spring. Protect young plants from extreme cold and pests until they are well-established.
Common Errors to Avoid When Propagating Field Eryngo
Overwatering
Excessive watering can lead to root rot and fungal growth, which are detrimental to field eryngo's health, particularly since it prefers well-drained soil conditions.
Ignoring soil composition
Failing to provide an appropriate soil mix can impede field eryngo's root development. Field eryngo requires soil with good drainage to thrive.
Planting depth
Planting field eryngo's seeds or root cuttings too deeply can prevent successful sprouting due to insufficient light exposure and air circulation.
Neglecting dividing
Failure to divide field eryngo at the correct time can result in overcrowding, which may reduce plant vigor and hinder healthy growth.
Tips For Propagating Field Eryngo
Seed stratification
Cold stratifying field eryngo's seeds can boost germination rates as it mimics the natural wintering process the seeds undergo in their native habitat.
Soil aeration
Ensuring the soil is well-aerated will promote healthy root growth for field eryngo, which is crucial for successful propagation.
Root cutting care
Take root cuttings carefully to include a healthy section of the parent plant's root system, improving the chances for successful propagation of field eryngo.
Regular monitoring
Consistently observing field eryngo's propagation environment helps in making timely adjustments to moisture levels and light exposure, which is crucial for the plant's well-being.


