How to Transplant Common prickly-ash?
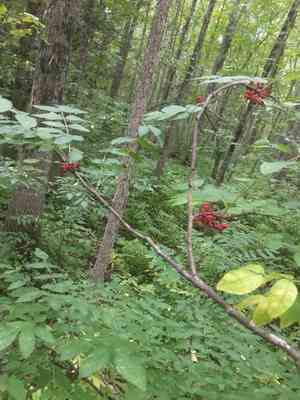
The ideal period for relocating common prickly-ash is from the vigorous growth of late spring through early summer, which helps the plant establish itself successfully. Select a site offering filtered light and soil that drains effectively, replicating its native forest environment.
What Preparations are Needed Before Transplanting Common Prickly-ash?
What is the Ideal Time for Transplanting Common Prickly-ash?
Relocate common prickly-ash during the peak of spring. This period sees robust plant development, facilitating better establishment in its new spot. Consider late spring, or even early summer for this task, giving common prickly-ash ample time to develop strong roots before winter. This timing leverages the season's mild temperatures and increased rainfall, which promotes root growth. Moving common prickly-ash now minimizes stress and promises a productive growing season ahead.
How Much Space Should You Leave Between Common Prickly-ash Plants?
Let's proceed systematically. The initial consideration is the spacing for common prickly-ash transplantation. Ideally, maintain a distance of 3-4 feet (0.91-1.22 meters) between each plant. This provides sufficient room for growth without overcrowding. You're doing well!
What is the Best Soil Mix for Common Prickly-ash Transplanting?
Next, prepare the soil for common prickly-ash! This plant thrives in well-drained, fertile soil, so be sure to incorporate organic matter or compost to enrich it. You can stimulate initial growth by adding a base layer of slow-release fertilizer as well. Remember, gardening requires patience!
Where Should You Relocate Your Common Prickly-ash?
Finally, common prickly-ash appreciates ample sunlight, but it can endure partial shade. Endeavor to locate a spot in your garden that offers this balance. Don't fret if it's not perfect, common prickly-ash is quite resilient, and it's all part of the learning experience!
What Equipments Should You Prepare Before Transplantation Common Prickly-ash?
Gardening Gloves
To safeguard your hands while handling soil and common prickly-ash.
Shovel or Trowel
To excavate a hole for the common prickly-ash in the ground. A shovel is for larger plants, while a trowel is for smaller ones.
Pruning Shears
To trim and remove any damaged or dead sections from the common prickly-ash prior to transplant. Cut back approximately one-third of the plant to lessen transplant stress.
Watering Can or Hose
To hydrate the common prickly-ash before and after relocation.
Mulch
To assist in maintaining soil temperature and moisture levels post-transplantation of the common prickly-ash.
Bucket or Wheelbarrow
To transport the common prickly-ash from its original spot to the new site, especially if it's already a sizable plant.
How Do You Remove Common Prickly-ash from the Soil?
How Do You Remove Common Prickly-ash from the Soil?
From Ground: Start by watering the common prickly-ash to moisten the soil, facilitating easier removal. Using a shovel, dig a wide circle around the plant, ensuring the root ball remains intact. Gently loosen the soil surrounding the roots before carefully lifting the plant with its root ball. Place the plant in a bucket or wheelbarrow for transfer to the new location.From Pot: Water the potted common prickly-ash thoroughly to simplify the extraction process. Tilt the pot sideways, and with one hand supporting the plant's base, gently tap the bottom of the pot until the plant, along with the soil, slides out. Be cautious not to harm any part of the plant during this process.From Seedling Tray: Begin by watering the common prickly-ash seedlings to dampen the soil. Gently push up the base of each cell or use a dibber to carefully lift out the seedling. Ensure you do not pull the seedling, as this could damage the stem or roots.
Step-by-Step Guide for Transplanting Common Prickly-ash
Inspecting the Plant
Verify that your common prickly-ash is in good health before transplanting. Remove any yellowed or deceased leaves. This helps to alleviate stress on the plant during relocation. Use pruning shears for this step.
Preparing the Plant
Thoroughly water your common prickly-ash several hours before transplanting to ensure it is well-hydrated.
Digging the Hole
In the designated area, excavate a hole wide and deep enough to comfortably accommodate the root ball of your common prickly-ash. Place the excavated soil nearby in a mound for later backfilling.
Positioning the Plant
Hold your common prickly-ash over the hole, setting it so the top of the root ball is flush with the ground surface. Adjust the hole depth if necessary.
Replanting
Backfill the hole with the remaining soil, gently pressing it around the base of your common prickly-ash. Water the plant generously in its new position.
Mulching
Once planted, spread a 2-inch layer of mulch around the plant's base, taking care not to pile it against the stem. This will aid in moisture retention and weed suppression.
How Do You Care For Common Prickly-ash After Transplanting?
Watering
After transplanting your common prickly-ash, ensure it receives adequate water, but avoid overwatering. While the plant is settling into its new location, it may require more frequent irrigation.
Careful Pruning
To encourage new growth, lightly prune the common prickly-ash after a few weeks. This promotes the development of fresh, healthy branches and foliage.
Monitor Growth
Keep a close watch on the health of your common prickly-ash. If you observe any yellowing or wilting, this could indicate transplant shock. It's normal for plants to need some time to adapt to their new surroundings.
Pest and Disease Control
Regularly inspect your common prickly-ash for any indications of pests or diseases. Early detection is vital for preventing significant damage.
Troubleshooting Common Issues with Common Prickly-ash Transplantation.
When is the ideal time to transplant common prickly-ash?
The optimal period to transplant common prickly-ash is between late spring and mid-summer (S2-S4).
How far apart should I plant common prickly-ash seedlings?
Provide each common prickly-ash sapling with ample room to grow by maintaining a distance of 3-4 feet (approximately 1-1.2 meters) between each plant.
Why is my transplanted common prickly-ash wilting?
Wilting after transplanting can be attributed to shock, insufficient hydration, or root damage during the process. Ensure your common prickly-ash is well-watered and handle roots gently.
What kind of soil does common prickly-ash prefer when transplanting?
Common prickly-ash thrives in well-drained soil that is moderately fertile. Aim for a slightly acidic to neutral pH for robust growth.
My transplanted common prickly-ash is not growing, what could be wrong?
Stunted growth might be due to inadequate light, nutrient-deficient soil, or insufficient water. Assess your common prickly-ash's condition and adjust care accordingly.
Why are the leaves of my transplanted common prickly-ash turning yellow?
Yellowing leaves may signal overwatering, a lack of nutrients, or disease. Reduce watering, enrich the soil, and monitor your common prickly-ash for diseases.
What steps should I take to prepare for transplanting common prickly-ash?
Prepare the transplanting hole in advance, making it twice the size of the root ball. Gently remove common prickly-ash from its current location and place it in the hole, covering it with soil.
How much water does a transplanted common prickly-ash need?
Common prickly-ash requires frequent watering after transplanting until it establishes. Subsequently, moderate watering is sufficient; do not allow the soil to dry out completely.
How can I alleviate transplant shock in my common prickly-ash?
Transplant shock can be mitigated by thoroughly watering the plant before and after relocation. Additionally, avoid transplanting during extreme temperature conditions.
Can I use fertilizer on my newly transplanted common prickly-ash?
Yes, applying a balanced liquid fertilizer can provide your newly transplanted common prickly-ash with a nutrient boost, but do not overdo it, as excessive fertilizer can harm the plant.



