How to Transplant Koromiko?
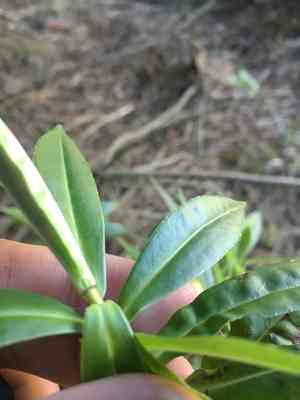
The optimal period for transplanting koromiko is during the vibrant early to mid-spring season. Select a location that receives full sun to partial shade and features soil with good drainage. When shifting koromiko, guarantee sufficient room for expansion to preserve its beauty.
Preparations for Koromiko Transplanting
Optimal Transplanting Period for Koromiko
The best time to move koromiko is in mid-spring. This period offers stable temperatures and ideal soil conditions, facilitating a smooth transition and robust root development for koromiko. Additionally, ample spring growth allows koromiko sufficient time to adapt before summer or winter stresses. Transplanting koromiko then can result in a lush, vigorous plant, ready for the upcoming seasons.
Spacing Requirements for Koromiko Plants
When relocating your koromiko, aim for a spacing of approximately 1.5-3 feet (45-90 cm) between each plant. This provides adequate room for growth and expansion without competition for nutrients and sunlight.
Ideal Soil Blend for Koromiko Transplanting
Koromiko thrives in well-drained soil. Prepare your soil base with a mix of peat moss and perlite to enhance drainage. Incorporating a slow-release fertilizer will ensure your plant receives proper nutrition over time.
Choosing a New Location for Your Koromiko
Koromiko loves sunlight! Select a sunny spot in your garden that receives ample daily sun exposure. However, ensure it's not exposed to direct sunlight during the hottest part of the day to prevent potential leaf scorch.
Equipment Needed Before Transplanting Koromiko
Shovel
For excavating the new site and carefully extracting the plant from its current spot.
Gardening Gloves
To safeguard your hands while handling soil and the plant.
Watering Can
To moisten the soil and for hydrating the plant both before and after its removal.
Trowel
To assist with the delicate process of removing plants from smaller containers.
Pruning Shears
To trim any damaged, broken, or diseased roots or branches.
Garden Fork
To aerate the soil in the new planting location.
Wheelbarrow
For moving the koromiko from its original position to its new home.
How to Extract Koromiko from the Soil
How to Extract Koromiko from the Soil
From Ground: Start by watering the koromiko plant to moisten the soil, making it easier to dig. Dig a wide trench around the plant using a shovel, ensuring the plant's root ball remains intact. Carefully work the spade beneath the root ball to lift the plant from its original spot.From a Pot: Water the koromiko thoroughly. Turn the pot on its side or upside down and gently tap the sides to loosen the plant and root ball from the pot. Slide the plant and soil out of the pot without pulling on the stems.From a Seedling Tray: Water the koromiko plant first to make the soil damp. Push the seedling up from the bottom of the tray, ensuring to support the plant's roots and avoid pulling or tugging the stem. If the seedling doesn't budge, you can carefully use a trowel to assist with lifting it out.
Step-by-Step Guide for Transplanting Koromiko
Preparation
Prepare the new site. It should be sufficiently deep and wide for the koromiko's root ball.
Removal
Execute the removal process thoroughly as described above, based on the plant's original location.
Placement
Position the koromiko in the hole. Ensure the top of the root ball is level with or slightly below the surrounding ground. Backfill the hole with soil, gently firming it to eliminate large air pockets.
Watering
Water the plant immediately after planting, saturating the area completely.
Stability
If the koromiko is a large specimen, support may be necessary; stake the plant to prevent it from toppling until new roots establish.
Post-Transplant Care for Koromiko
Watering
Ensure consistent watering for koromiko during the initial weeks after transplanting, keeping the soil uniformly moist but not waterlogged.
Pruning
Prune the plant if needed, removing any broken or damaged branches to redirect energy towards new growth.
Observation
Monitor for signs of transplant shock, such as wilting leaves or a lack of new growth.
Delay Fertilizing
It's a common error to assume the plant needs fertilizer immediately after transplanting; it's best to wait until new growth appears.
Protection
Depending on the season, you might need to shield the koromiko from harsh weather conditions like frost or intense heat.
Troubleshooting Common Koromiko Transplant Issues
When is the best time of year to transplant koromiko?
Koromiko prefers to be transplanted in late spring or early summer, corresponding to the S2-S3 season.
What is the correct spacing for each koromiko plant during transplantation?
Aim for a spacing of approximately 1.5 to 3 feet (45.7 cm to 91.4 cm) between each koromiko plant when transplanting.
What are the ideal soil conditions for transplanting koromiko?
Koromiko thrives in well-drained soil enriched with organic matter. Ensure your soil is prepared to meet these requirements for successful transplantation.
How deep should the hole be when transplanting?
Dig a hole twice as wide and as deep as the koromiko's root ball, typically around 10-12 inches (25-30 cm).
How can I ensure the koromiko plant will flourish after being transplanted?
Proper water management after transplanting is vital. Water the koromiko sufficiently but avoid waterlogging. The plant prefers damp, but not saturated, soils.
What to do if the transplanted koromiko is wilting?
If your koromiko is wilting post-transplant, it might be due to transplant shock. Maintain consistent watering and consider using a root stimulator to encourage root development.
What type of sun exposure does koromiko prefer after transplantation?
Koromiko requires full sun to partial shade exposure. They thrive best in a location with ample morning sunlight.
How to prevent transplant shock in koromiko plants?
Minimize transplant shock by transplanting during the preferred season, keeping roots moist throughout the process, and ensuring the new hole is suitable for koromiko.
Does koromiko need any specific care after transplantation?
Post-transplant, ensure consistent watering without overdoing it. A light but regular feeding schedule with a balanced fertilizer will help koromiko plants establish quickly.
How can I protect my koromiko plant from pests after transplanting?
Maintain good plant hygiene, regularly remove dead leaves, and implement practices like neem oil treatment to deter pests.



