How to Propagate Koromiko?
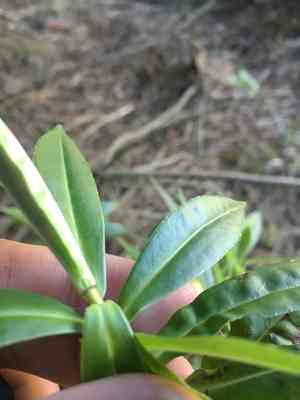
Koromiko is frequently multiplied via stem sections. For optimal results, choose robust, non-blooming stems and prepare sections containing multiple leaf junctions. A rooting stimulant can boost root formation, and sustaining a moist atmosphere assists the procedure. After rooting, these sections ought to be progressively accustomed to less regulated surroundings prior to outdoor transplantation.
Optimal Time for Koromiko Propagation
Propagation Method
Cutting
Propagation Period
Spring,Summer
Equipment for Koromiko Propagation
Sharp Pruning Shears
Sharp pruning shears are vital for taking cuttings from koromiko. Their sharpness ensures a clean cut without crushing stem tissue, which is crucial for encouraging healthy root development. These shears offer precision and minimize the risk of disease transmission between plants. Opting for shears with non-stick blades can further improve the cutting process, preventing sap buildup and allowing for quick, successive cuts.
Rooting Hormone
Rooting hormone is utilized to accelerate root growth on koromiko cuttings. This hormone is available in powder, gel, or liquid form and is applied to the cut end of the cutting before planting. Using rooting hormone increases the likelihood of successful rooting by stimulating root cell development at the cut site, which is essential for koromiko's establishment in a new environment.
Sterile Potting Mix
A sterile potting mix offers a disease-free environment for koromiko cuttings to root. This medium should be light and well-draining, yet capable of retaining sufficient moisture to support root growth. A mix specifically formulated for cuttings or seedlings typically contains peat moss, perlite, or vermiculite, which helps ensure the necessary balance of aeration and moisture.
Propagation Tray with Dome
Propagation trays equipped with a clear dome create a controlled humidity environment, which is beneficial for the initial growth phase of koromiko cuttings. The dome helps maintain high humidity by trapping moisture in the air, simulating a mini-greenhouse. This environment helps prevent cuttings from drying out before their roots develop, significantly boosting their survival rate.
How to Propagate Koromiko?
Propagation Type
Moderately Difficult
Caring for Your Newly Propagated Koromiko
Caring for Your Newly Propagated Koromiko?
Once roots have formed, gradually introduce the koromiko cutting to its permanent growing conditions. This involves slowly exposing it to the light levels and temperatures it will experience in its final spot. When the cutting is robust enough, repot it into a larger container or plant it directly into garden soil that is well-drained and rich in organic matter. Maintain consistent watering, allowing the soil to dry slightly between irrigation sessions. Apply a balanced, slow-release fertilizer according to package directions to support healthy growth. Monitor the plant for pests and diseases and address any issues promptly.
Common Mistakes to Avoid When Propagating Koromiko
Overwatering
Excessive moisture can lead to root rot and fungal diseases, as koromiko prefers well-drained soil and can suffer from overly saturated conditions.
Using old or contaminated soil
Reusing soil without sterilization can harbor pathogens harmful to koromiko's roots, hindering healthy development.
Neglecting to provide adequate light
Koromiko requires sufficient light for photosynthesis, but can be stressed by too much direct sunlight, leading to poor propagation outcomes.
Planting cuttings too deep
Inserting cuttings too far into the soil can cause them to rot before they establish roots, as koromiko cuttings need proper aeration.
Ignoring plant hygiene
Not sterilizing tools or using dirty pots can introduce diseases to koromiko, impeding its propagation process.
Tips For Propagating Koromiko
Maintain moderate moisture
Ensuring the soil is moist but not waterlogged promotes healthy root development without the risk of rot in koromiko.
Use fresh, sterile soil
Starting koromiko in sterile, nutrient-rich soil prevents disease and provides a supportive environment for root growth.
Provide bright, indirect light
Locate koromiko in a spot with ample indirect sunlight to facilitate photosynthesis without causing leaf burn.
Plant cuttings shallowly
Place koromiko cuttings just beneath the soil surface, allowing space for growth and minimizing rot risks.
Practice cleanliness
Sterilize cutting tools and use clean pots to reduce the chance of introducing pathogens to koromiko.



