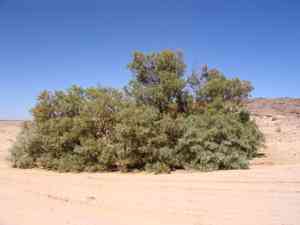
How to Transplant Athel tamarisk?
Select the period from late spring to early summer for relocating athel tamarisk, enabling its root system to settle in temperate weather. Pick a bright spot featuring soil that drains effectively. Careful handling is crucial to prevent transplant shock.
What Preparations are Needed Before Transplanting Athel Tamarisk?
What is the Ideal Time for Transplanting Athel Tamarisk?
For athel tamarisk, the best time to move it is from late spring to early summer. This period ensures soil warmth for root development and avoids frost, reducing stress on the athel tamarisk. The summer months allow athel tamarisk a full season to grow and establish before colder weather arrives. Transplanting during this window gives your athel tamarisk the best chance to flourish, as moderate temperatures and increased daylight support a strong root system and vigorous growth. By choosing this season, you're setting athel tamarisk for success!
How Much Space Should You Leave Between Athel Tamarisk Plants?
When relocating athel tamarisk, ensure ample room for each plant to expand. An optimal spacing of 8-10 feet (approximately 2.5-3 meters) between them is recommended. This provides sufficient area for foliage spread and prevents overcrowding.
What is the Best Soil Mix for Athel Tamarisk Transplanting?
Athel tamarisk prefers soil that drains well. Just before transplanting, enrich the soil by incorporating a balanced, slow-release fertilizer. This provides a nutritional boost to the roots, aiding the plant in establishing itself more quickly in its new spot.
Where Should You Relocate Your Athel Tamarisk?
Remember, placement is crucial for athel tamarisk! It thrives in full sun, so select a location where it will receive at least 6 hours of sunlight daily. This will encourage robust growth and abundant blooms.
What Equipments Should You Prepare Before Transplantation Athel Tamarisk?
Gardening Gloves
To safeguard your hands while handling soil and the plant.
Trowel
A useful implement for loosening the soil around the plant's roots.
Shovel/Spade
Depending on the size of your athel tamarisk plant, you might need a shovel or spade to excavate a sufficiently large hole in the ground.
Watering Can or Hose
Essential for hydrating the athel tamarisk immediately after its relocation.
Pruning Shears
May be necessary to trim any damaged roots or branches during the transplanting process.
How Do You Remove Athel Tamarisk from the Soil?
How Do You Remove Athel Tamarisk from the Soil?
From Ground: Begin by thoroughly and gently watering your athel tamarisk plant to facilitate easier uprooting. Next, carefully dig around the plant, creating a wide enough circle to encompass all roots while keeping the root ball intact. Then, scoop out the soil beneath the root ball, taking care not to harm the roots, and gently lift the plant.From Pot: Hydrate the soil in the container before starting. Turn the pot on its side, hold the athel tamarisk plant gently by its base, and tap the pot's rim against a firm surface. If the plant doesn't slide out easily, run a knife along the pot's interior to loosen it.From Seedling Tray: The athel tamarisk seedlings should be well-watered prior to removal from the tray. Hold the seedling by its leaves to avoid damaging its delicate stem, and push the bottom of the cell to release the plant along with its soil.
Step-by-Step Guide for Transplanting Athel Tamarisk
Prepare the Hole
Excavate a hole that is twice as wide and equally deep as the container or root ball. This ample space will allow athel tamarisk's roots to spread comfortably.
Prepare the Plant
Inspect the root ball of your athel tamarisk plant and trim any damaged or excessively long roots. From here, position your plant in the center of the hole.
Plant
Hold your athel tamarisk plant upright and refill the hole with soil, ensuring no air pockets remain. Avoid mounding soil or mulch against the plant's stem, which can lead to rot.
Water
After planting, thoroughly water your athel tamarisk to settle the soil around the roots and aid its establishment in its new location.
How Do You Care For Athel Tamarisk After Transplanting?
Watering
For the initial weeks following the relocation of your athel tamarisk, maintain consistently moist soil. Water deeply to ensure moisture reaches the deeper root system.
Mulching
Protect your newly transplanted athel tamarisk with a 2-3 inch layer of mulch to conserve moisture, stabilize soil temperature, and reduce weed competition.
Pruning
After transplanting, athel tamarisk may experience some stress. Lightly prune the plant to decrease its water requirements and help it adjust to the new environment.
Monitoring
Watch for any indications of transplant shock, such as leaf drop or wilting, which might necessitate additional watering and care.
Troubleshooting Common Issues with Athel Tamarisk Transplantation.
When is the best time to transplant athel tamarisk?
The optimal period for relocating athel tamarisk is during S3-S6, which corresponds to late summer through early winter months.
What is the ideal spacing for athel tamarisk when transplanting?
Maintain a healthy distance of approximately 8-10 feet (around 2.45-3.05 meters) between each athel tamarisk during transplantation for robust growth.
Is there a specific depth while transplanting athel tamarisk?
Plant athel tamarisk at the same depth as it was in its original pot. A deep hole can make the plant unstable and impede growth.
How can I ensure successful transplantation of athel tamarisk?
Ensure the roots of athel tamarisk are well-hydrated before transplanting and apply root-stimulating hormones to encourage strong new growth.
Why are the leaves of my transplanted athel tamarisk turning yellow?
Yellow leaves can signal water stress. Make sure your athel tamarisk is receiving adequate water, but avoid overwatering as this can cause root rot.
Why is my transplanted athel tamarisk not showing any growth?
Stunted growth might be due to insufficient light. Position your athel tamarisk in a sunny spot and ensure it gets enough moisture, but not excessively wet.
Which type of soil is best when transplanting athel tamarisk?
Athel tamarisk thrives best in well-drained soil. A mixture of peat moss, compost, and coarse sand can provide an ideal environment.
What should I do if the transplanted athel tamarisk appears droopy?
A droopy athel tamarisk may be exhibiting transplant shock. Keep the soil moist, provide partial shade for the initial few days, and reduce fertilization.
Should I trim athel tamarisk before transplanting it?
Trimming isn't essential, but removing old or dead branches can redirect energy to root development, helping athel tamarisk adapt to its new surroundings.
Should I fertilize athel tamarisk soon after transplanting?
It's advisable to postpone fertilizing. Allow athel tamarisk to adjust to its new location first to prevent root burn. Fertilize after 3-4 weeks.


