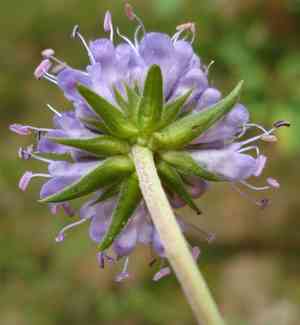
How to Transplant Devilsbit?
To achieve optimal outcomes, relocate devilsbit during the peak of late spring through early summer, fostering vigorous development. This plant flourishes in moist, brightly lit environments; maintaining uniformity post-transplant is crucial for its adaptation.
What Preparations are Needed Before Transplanting Devilsbit?
What is the Ideal Time for Transplanting Devilsbit?
The optimal period to relocate devilsbit is during the onset of warm weather, typically from late spring to early summer. This timeframe provides the mild conditions devilsbit thrives in, promoting robust root development before the intense summer heat. By selecting this season, you allow devilsbit to benefit from cooler, yet stable temperatures for root establishment without the strain of midsummer's intensity. As days lengthen with promise, devilsbit settles into its new home, finding comfort in the balanced moisture and warmthâessential elements for successful transplanting. Additionally, gardening during this pleasant season is enjoyable, as both plant and gardener can appreciate the burgeoning growth period.
How Much Space Should You Leave Between Devilsbit Plants?
When moving your devilsbit, it's crucial to provide ample room for each plant to expand. A general guideline is to space them approximately 2-3 feet (60-90 cm) apart. This ensures the roots have sufficient area to spread and the foliage receives enough sunlight to thrive.
What is the Best Soil Mix for Devilsbit Transplanting?
For your devilsbit, you'll require soil that drains well and is enriched with organic matter or compost. A foundational fertilizer rich in phosphorus would be an excellent starting point, stimulating strong root growth and encouraging abundant blooms.
Where Should You Relocate Your Devilsbit?
Position your devilsbit in an area where it can receive full sun to partial shade. While they prefer sunlight, they can also endure some shade, making them suitable for various garden spots.
What Equipments Should You Prepare Before Transplantation Devilsbit?
Gardening Gloves
To safeguard your hands while handling soil and devilsbit.
Spade or Shovel
To excavate the plant from its original spot or to create a new hole for replanting.
Rake
To assist in leveling the ground and clearing any debris, stones, or leaves from the transplanting area.
Pruning Shears
To trim any damaged roots or upper growth to stimulate new development after relocation.
Watering Can
To hydrate the devilsbit both before and after transplanting to lessen shock and encourage root growth.
Gardening Trowel
To aid in delicate work around the root system if necessary.
Wheelbarrow
To transport the devilsbit from its initial location to the new planting site if the plant is large.
How Do You Remove Devilsbit from the Soil?
How Do You Remove Devilsbit from the Soil?
From Ground: Start by lightly watering the devilsbit plant to moisten the soil, which facilitates digging and reduces root damage. Then, using a shovel or spade, dig a wide circle around the plant, ensuring the root ball remains intact. Once the soil around the plant is loosened, carefully work the spade beneath the root ball and gently lift the plant from its original position.From Pot: If the devilsbit is in a container, water it thoroughly, then turn the pot on its side, hold the plant loosely by the stems, and tap the bottom of the pot to dislodge it. Carefully ease the plant out, taking care not to yank or pull it, which could harm the root system.From Seedling Tray: Gently lift the devilsbit from the seedling tray, using a small gardening trowel or similar tool to assist in removal without damaging the roots. Handle with care to minimize root disturbance and shock.
Step-by-Step Guide for Transplanting Devilsbit
Evaluation
Inspect the devilsbit root system once it's removed from the ground or container. Trim any damaged or broken roots using pruning shears.
Preparation
Prepare the planting site by digging a hole twice the width of the root ball and the same depth as the root ball using your shovel.
Placement
Carefully position the devilsbit in the hole. The top of the root ball should be level with the ground surface.
Backfill
Refill the planting hole with native soil, gently firming it around the root ball.
Watering
After the devilsbit plant is in place, water it thoroughly with a gentle spray from a watering can. Avoid overwatering as this can lead to waterlogged roots.
Monitor
Over the next few days, closely observe the plant to ensure it's adapting well to its new surroundings.
How Do You Care For Devilsbit After Transplanting?
Monitoring
Observe the devilsbit over the next few weeks for indications of stress or transplant shock. Look for wilting, yellowing, or dropping leaves. If these issues persist, consult a local nursery or extension service.
Watering
Maintain consistent but not excessively wet soil moisture. The devilsbit will require regular watering, especially during the initial weeks as it establishes itself.
Feeding
After approximately three weeks, consider a light application of a balanced, mild fertilizer to further promote root development and plant vitality.
Seasonal Care
As devilsbit is a perennial, ensure it's protected during severe weather conditions. Depending on your climate, this might involve measures such as mulching or covering during freezes.
Troubleshooting Common Issues with Devilsbit Transplantation.
What is the ideal season to transplant devilsbit?
The optimal period to transplant devilsbit is during late summer or early fall, also known as Seasons 3 to 4.
How far apart should I space devilsbit plants during transplanting?
It's best to space devilsbit plants about 2-3 feet (60-90 centimeters) apart to allow ample growth space.
How deep should I dig a hole when transplanting devilsbit?
Dig a hole that's about twice as wide and the same depth as the root ball of your devilsbit plant.
What type of soil is best for transplanting devilsbit?
Devilsbit prefers well-draining soil, ideally loamy or sandy. Incorporate some organic matter for added nutrients.
How much should I water devilsbit after transplanting?
Give devilsbit a thorough watering after transplanting, ensuring the soil is moist but not waterlogged. Check soil moisture levels regularly.
Should I put fertilizer when transplanting devilsbit?
Adding compost or a mild, slow-release fertilizer at transplanting time can boost devilsbit's growth. However, avoid high-nitrogen fertilizers.
Do I need to prune devilsbit after transplanting?
Pruning is not necessary immediately after transplanting, but once devilsbit is established, occasional deadheading can encourage fuller growth.
How should I handle devilsbit during the transplanting process?
Always handle devilsbit with care - avoid touching the roots as much as possible and never lift the plant by its stem.
What can I do if my transplanted devilsbit is wilting?
Wilting can be due to transplant shock. Keep the soil consistently moist and place the plant in a semi-shaded area until it recovers.
When should I expect new growth after transplanting devilsbit?
New growth should appear within a few weeks after transplanting, given plenty of water, adequate spacing, and good weather conditions.


