How to Transplant Parrot pitcherplant?
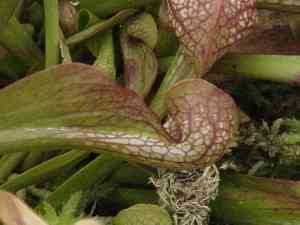
The ideal period for relocating parrot pitcherplant is during the revitalizing phase of early to mid-spring, capitalizing on robust development. Choose a bright, marshy location that replicates its native environment. Continuously damp substrate is crucial. If needed, enrich the soil with peat for superior adaptation.
What Preparations are Needed Before Transplanting Parrot Pitcherplant?
What is the Ideal Time for Transplanting Parrot Pitcherplant?
The best time to move parrot pitcherplant is at the start of spring, specifically early to mid-spring. This aligns with the plant's natural growth cycle, allowing it to establish roots with the entire growing season ahead. Transplanting parrot pitcherplant at this point also takes advantage of cool yet warming soil temperatures, which are perfect for root development without the stress of summer heat. By choosing this season, you give parrot pitcherplant a supportive period for recovery and adjustment, setting the stage for strong, healthy growth throughout the year. Embrace this ideal transplanting season to ensure your parrot pitcherplant flourishes with vitality and grace.
How Much Space Should You Leave Between Parrot Pitcherplant Plants?
For parrot pitcherplant spacing, it's best to allow 1-2 feet (30-60 cm) between each plant. This provides ample room for their beautiful leaves to grow, preventing competition for space or nutrients.
What is the Best Soil Mix for Parrot Pitcherplant Transplanting?
When preparing the planting area for parrot pitcherplant, aim for a peat-based soil, enriched with a slow-release, balanced fertilizer. This combination will help the plant thrive and maintain its health.
Where Should You Relocate Your Parrot Pitcherplant?
Parrot pitcherplant enjoys full-day sunlight but can handle some partial shade. Therefore, select a garden spot that receives abundant sun, ideally for at least six hours daily. However, a bit of shade won't harm it!
What Equipments Should You Prepare Before Transplantation Parrot Pitcherplant?
Shovel or Spade
To excavate the hole in the desired new location and to extract parrot pitcherplant from its original spot.
Gardening Gloves
To safeguard your hands while working with the plant and soil.
Watering Can
To hydrate the plant both at its initial site before removal and at the new site after transplanting.
Gardening Trowel
To create a precise hole if relocating a smaller parrot pitcherplant plant or young seedling.
Wheelbarrow or Bucket
Useful for transporting the plant from one place to another, especially if it has a large root ball or if moving multiple plants.
How Do You Remove Parrot Pitcherplant from the Soil?
How Do You Remove Parrot Pitcherplant from the Soil?
From Ground: Start by watering the soil around the parrot pitcherplant plant to moisten it. Using a shovel or spade, dig a trench wide enough to encompass the plant's root ball. Carefully lift the plant from the base to keep the root ball intact. Be sure to handle it gently to avoid damaging the plant.From Pot: Begin by thoroughly watering the pot until the soil is moist, not saturated. Turn the pot on its side, gently hold the plant by its base, and pull it out. If it resists, tap the pot's sides to loosen the soil.From Seedling Tray: Water the tray first to dampen the soil. Reach under the cell of the seedling tray and push up until you can easily and gently remove the plant and its root ball.
Step-by-Step Guide for Transplanting Parrot Pitcherplant
Preparation
Pre-water the parrot pitcherplant in its current location until the surrounding soil is damp. This will make the removal process less stressful for the plant and help keep the root ball intact.
Digging Hole
Dig a hole at the new site. It should be as deep as the root ball and twice as wide. This provides ample space for the plant to establish its roots.
Transplant
Place the parrot pitcherplant in the hole, ensuring the top of the root ball is level with the soil surface. Fill the hole with soil, firming it around the plant's base.
Watering
Water the parrot pitcherplant generously immediately after transplanting. This will help the soil settle around the plant's roots.
How Do You Care For Parrot Pitcherplant After Transplanting?
Watering
Maintain consistently moist soil around the parrot pitcherplant plant for the initial weeks following transplanting. This aids in establishing strong roots. Adjust watering based on weather, increasing frequency during hot, dry periods.
Mulching
Apply a layer of mulch around your parrot pitcherplant after planting. This will help retain moisture and suppress weed growth.
Observing
Closely monitor your parrot pitcherplant during the first few weeks post-transplant. If you observe wilting or yellowing leaves, it may indicate plant stress. You might need to adjust watering or consider a partial shade cloth to shield it from intense sunlight until it has fully adapted.
Troubleshooting Common Issues with Parrot Pitcherplant Transplantation.
When should I transplant my parrot pitcherplant?
The optimal time to move your parrot pitcherplant is during the transition period between S1 and S2. This ensures the plant adapts smoothly to its new environment.
What is the best spacing for parrot pitcherplant when transplanting?
Ideally, you should keep each parrot pitcherplant approximately 1-2 feet (30-60 cm) apart. This provides your plant with sufficient room to spread and grow without becoming overcrowded.
What type of soil does parrot pitcherplant need for successful transplanting?
Parrot pitcherplant prefers acidic, well-draining soil. A potting mix with sand or perlite should work well to provide the correct texture and drainage.
How much sun does my transplanted parrot pitcherplant need?
Parrot pitcherplant thrives best in full sun to partial shade. Be sure to place it where it can receive 6 to 8 hours of sunlight daily.
Should I water my parrot pitcherplant immediately after transplanting?
Yes! Water your parrot pitcherplant right after transplanting to help it settle. Ensure the soil remains consistently moist but not waterlogged.
My transplanted parrot pitcherplant is wilting, what should I do?
Wilting could indicate transplant shock. Regular watering and partial shade can aid recovery. However, if the condition persists, consider seeking professional advice.
My parrot pitcherplant has yellow leaves after transplanting, why so?
Yellow leaves might signal overwatering or poor drainage. Check if the soil drains well and reduce watering frequency if necessary.
Why are the leaves of my transplanted parrot pitcherplant turning brown?
Brown leaves can be a reaction to low humidity or excessive sun exposure. Ensure your parrot pitcherplant is not receiving too much light and mist it occasionally to boost humidity.
How deep should I plant my parrot pitcherplant?
Typically, you should only dig a hole as deep as the root ball of your parrot pitcherplant to ensure optimal growth.
Can I transplant my parrot pitcherplant in a pot?
Absolutely! Just make sure the pot is wide and deep enough for the plant's roots, and use well-draining, acidic soil for the best results.



