How to Prune Parrot pitcherplant?
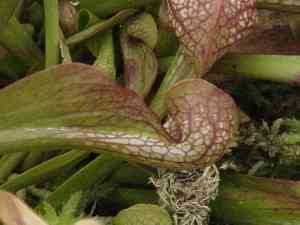
The parrot pitcherplant, a carnivorous perennial featuring pitcher-shaped foliage, flourishes with limited trimming, mainly for eliminating withered or discolored pitchers. Trimming during its active growth periodâspring or early summerâstimulates fresh development. Employ sanitized shears to clip away only the clearly compromised or deceased pitchers at their base, taking care to avoid vibrant green tissue. This practice not only neatens the plant but also deters potential fungal proliferation and pest invasions.
What Are the Benefits of Pruning Parrot Pitcherplant?
What Are the Benefits of Pruning Parrot Pitcherplant?
Trimming parrot pitcherplant encourages robust development and helps maintain its unique shape. It's crucial for eliminating dead or overgrown pitchers, ensuring parrot pitcherplant remains aesthetically pleasing and thriving.
What Is the Best Time for Pruning Parrot Pitcherplant?
What Is the Best Time for Pruning Parrot Pitcherplant?
Early spring is optimal for pruning parrot pitcherplant, as it marks the end of its dormant phase and the start of its active growth period. This allows the plant to efficiently recover and produce new growth after spent pitchers are removed. Trimming in late summer aids in removing any foliage that has become damaged or diseased during the growing season without affecting the plantâs overall vigor as it prepares for dormancy.
What Tools Do I Need to Prune Parrot Pitcherplant?
Small, sharp scissors or snips
Given the delicate nature of parrot pitcherplant, it's essential to use small, sharp scissors or snips for precise cuts without harming the plant's sensitive pitchers and leaves.
Fine-tipped forceps
For extracting dead or decaying material from narrow pitchers without disturbing the rest of the plant, fine-tipped forceps are an excellent choice.
Small, long-bladed shears
To access dense clusters without damaging adjacent growth, small, long-bladed shears offer the necessary reach and control.
Sterilizing solution (such as isopropyl alcohol or bleach solution)
Sterilizing pruning tools before and after use prevents the spread of disease and pests, which is vital for maintaining the health of parrot pitcherplant.
Gloves
While not a pruning tool, gloves protect your hands from the plant's sharp edges and any potential irritants in the soil. They also help prevent the transfer of oils or substances from your skin that could harm the plant.
How to Prune Parrot Pitcherplant
Sterilize tools
Before beginning, ensure your cutting implements are clean and sterilized to prevent disease transmission.
Identify
Carefully inspect parrot pitcherplant to locate diseased or withered leaves, as well as any affected stems. These parts often appear discolored, shriveled, or spotted.
Cut Diseased Leaves
Using your sterilized tools, carefully snip off diseased or withered leaves at their base, taking care to avoid damaging healthy parts of parrot pitcherplant.
Cut Diseased Stems
Cut any diseased stems back to where healthy tissue begins. For parrot pitcherplant, it's important to cut at the stem's base, without harming the rhizome from which it grows.
Clean Up
Dispose of all removed material away from parrot pitcherplant to prevent the spread of any pathogens, and clean your tools again after pruning.
Common Pruning Mistakes with Parrot Pitcherplant
Over-pruning
Removing too much of parrot pitcherplant's foliage at once can stress the plant, leading to poor growth and reduced vitality.
Pruning healthy pitchers
Cutting off healthy pitchers that are still capable of photosynthesis and trapping insects can weaken parrot pitcherplant.
Pruning during active growth
Pruning parrot pitcherplant when it is producing new pitchers may inhibit its growth and development.
Using dirty tools
Pruning with unclean tools can introduce diseases to parrot pitcherplant, potentially harming the plant.
Teasing apart pitchers
Attempting to separate tangled pitchers instead of carefully pruning them can cause unnecessary damage to the delicate structures of parrot pitcherplant.
Common Pruning Tips for Parrot Pitcherplant
Health check
Inspect parrot pitcherplant for dead or brown pitchers before pruning, as these are the best candidates for removal to foster healthy new growth.
Sharp tools
Use sharp and clean pruning shears to make clean cuts, which help prevent infections and encourage quicker healing.
Selective pruning
Only remove pitchers that are brown or damaged, as parrot pitcherplant relies on its pitchers for photosynthesis and nutrient capture.
Conservative approach
Prune sparingly, ensuring not to remove more than one-third of parrot pitcherplant's pitchers in a single session to avoid plant stress.
Post-pruning care
After pruning, provide parrot pitcherplant with adequate water and its preferred conditions to support recovery and regrowth.



