How to Transplant Beach plum?
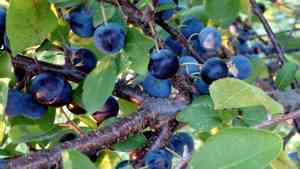
The optimal period for relocating beach plum is throughout the winter dormancy, allowing the root system to settle without strain. Select sites that offer excellent drainage and abundant solar exposure. A beneficial practice is to confirm the soil is adequately hydrated before the transplanting process.
Essential Preparations Before Relocating Beach Plum
Optimal Period for Relocating Beach Plum?
The best time to move beach plum is during its dormant phase, specifically in late winter before new growth emerges. This timeframe allows beach plum ample opportunity to establish robust roots in its new spot without the strain of harsh temperatures, ensuring a smooth transition to vigorous spring growth. Relocating beach plum during this season maximizes recovery and promotes a thriving display come spring. With the plant's energy focused on root development, it's the ideal moment to give beach plum a fresh start. A friendly reminder to consider this calm and gentle part of the year for optimizing your beach plum's potential!
Required Spacing Between Beach Plum Plants?
For your beach plum, it's advisable to maintain a distance of approximately 4-6 feet (1.2-1.8 meters) between each plant. This provides them sufficient room to expand and flourish without competition. Happy planting!
Best Soil Mixture for Beach Plum Relocation?
Your beach plum will thrive in soil that drains well. Amend the soil with organic matter such as compost or a general-purpose fertilizer to give your new plant a healthy beginning. Remember to mix it in thoroughly!
Where to Replant Your Beach Plum?
Beach plum loves sunlight! Choose a location for your beach plum where it will receive full sun exposure for a significant portion of the day. Your plant will flourish under these conditions!
Equipment Needed Before Transplanting Beach Plum
Gardening Gloves
To shield your hands from soil and plant thorns.
Spade or Shovel
For digging the transplanting hole and loosening soil around the plant in its original spot.
Gardening Trowel
For precise digging, especially when extracting the plant from a pot or seedling tray.
Wheelbarrow or Plant Pot
To safely move the beach plum plant from its initial location to the new one.
Watering Can
To hydrate the plant before and after relocation.
How to Extract Beach Plum from the Soil?
How to Extract Beach Plum from the Soil?
From Ground: First, put on your gardening gloves. Water the beach plum plant thoroughly to moisten the soil, which will make root removal easier. Using a spade or shovel, dig a wide trench around the plant, ensuring the plant's root ball remains intact. Be careful not to harm the roots as you work the spade beneath the root ball. Gently lift the plant from its original spot and carefully place it in a wheelbarrow or plant pot, ready for transplanting.From Pot: Begin by watering the beach plum plant in its pot. This reduces root stress during transplanting. Turn the pot on its side, hold the plant at its base, and gently try to slide it out. You might need to tap the bottom of the pot to help the beach plum plant release. Once out, be careful not to disturb the root ball.From Seedling Tray: Water the seedling tray before starting. Use a gardening trowel or even a spoon to carefully dig around the beach plum seedling, trying not to disturb the roots. Once you've gently uprooted the seedling, hold it by its leavesânot the stemâas you move it to the new location.
Step-by-Step Guide for Relocating Beach Plum
Preparation
Dig a hole in your chosen spot that is twice the width of the root ball and as deep as its height. Add a layer of compost at the bottom of the hole to aid the establishment of the beach plum plant.
Transplanting
Gently place the beach plum plant into the hole, ensuring the top of the root ball is level with the soil surface. Gradually backfill the hole, firming the soil around the beach plum plant as you proceed.
Watering
Water the plant thoroughly after transplanting. This helps roots establish in their new environment and also aids in settling the soil around the beach plum plant.
Post-Transplant Care for Beach Plum
Monitoring
For the initial few weeks after transplanting, closely observe the beach plum plant for any signs of distress, such as wilting leaves or lack of growth. Prompt action can often save a struggling plant.
Pest Control
Keep an eye out for pests on your beach plum plant and employ organic pest control methods if necessary.
Trimming
Remove any dead or dying leaves from the beach plum plant. This helps the plant conserve energy for growth and establishment in its new location.
Watering
Maintain a consistent watering schedule. However, ensure you do not overwater, as this can lead to root rot. Water when the top inch of soil feels dry to the touch.
Addressing Common Issues with Beach Plum Transplantation.
When is the best time to transplant beach plum?
The most suitable period for relocating beach plum is from late-fall to early-winter (S10-S12). The plant will have ample time to establish before the growing season.
How much space should I leave between beach plum plants?
Consider leaving a distance of 4-6 feet (1.2-1.8 m) between each beach plum. This spacing will ensure each plant receives adequate sunlight and air circulation.
What steps do I need to follow to ensure successful transplanting of beach plum?
First, dig a hole twice as wide and the same depth as the root ball. Place the beach plum in the hole, ensuring it's not deeper than its original depth. Fill the hole, water generously, and mulch the plant base.
Why is my transplanted beach plum wilting?
Wilting could indicate stress from transplanting, insufficient water, or root damage. After transplanting, ensure the beach plum is watered regularly and carefully inspect the roots before planting.
Is it necessary to prune beach plum while transplanting?
Pruning isn't typically necessary during transplanting. However, if the plant has damaged or dead branches, remove them to direct energy toward root establishment.
Why are the leaves of my transplanted beach plum turning yellow?
Yellowing leaves might indicate watering issues or nutrient deficiencies. Ensure the beach plum is getting enough water and consider a slow-release fertilizer to provide added nutrients.
Should I add any fertilizer when transplanting beach plum?
It's not necessary during initial transplanting. Nonetheless, after a few weeks, apply a slow-release fertilizer to boost nutrient availability as the beach plum begins active growth.
Why hasn't my transplanted beach plum started growing yet?
The beach plum may be putting its energy into root development first; visible growth will come later. Give it time, ensure proper watering, and protect it from extreme weather.
Can I transplant beach plum during summer?
While possible, it's not ideal. The stress of warmer weather can hinder successful transplantation. The recommended time is late-fall to early-winter (S10-S12).
How often should I water beach plum after transplanting?
For the first few weeks after transplantation, water the beach plum deeply once a week. After that, adjust based on rainfallâless often during wet periods and more frequently during dry spells.



