How to Transplant Sea daffodil?
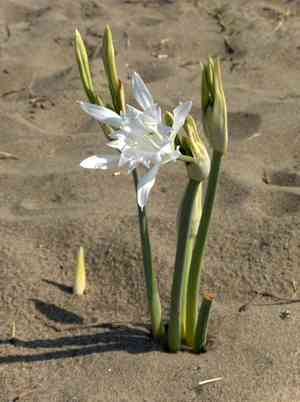
The ideal period for relocating sea daffodil is from the gentle warmth of late spring into early summer, or when the cool air of autumn transitions to the initial cold of winter, allowing roots to settle in moderate temperatures. Select a location that receives ample sunlight and drains effectively; although the transplanting process is straightforward, it's crucial to minimize disruption to the root system for optimal outcomes.
What Preparations are Needed Before Transplanting Sea Daffodil?
What is the Ideal Time for Transplanting Sea Daffodil?
The optimal period for relocating sea daffodil is during its active growth initiation or its peaceful dormant phase, typically spanning from late spring to early summer or late autumn to early winter. Performing this task during these intervals aligns with the plant's inherent growth rhythm, fostering strong root development without the strain of harsh weather. This establishes a foundation for abundant blossoms and robust growth, as moderate temperatures and sufficient moisture levels create an ideal setting for sea daffodil to flourish.
How Much Space Should You Leave Between Sea Daffodil Plants?
When getting ready to move your sea daffodil, ensure each plant has ample personal room. Aim for approximately 6-8 inches (15-20 cm) between them. This will guarantee they have plenty of space to thrive!
What is the Best Soil Mix for Sea Daffodil Transplanting?
Your sea daffodil will prosper in soil that drains effectively. Incorporate some sand if your garden soil is dense. Additionally, a mild application of balanced fertilizer will help them settle into their new home. Consider it a welcoming present for their root system!
Where Should You Relocate Your Sea Daffodil?
Select a bright location for your sea daffodil where they can enjoy full sun exposure for most of the day. They are sun-lovers and require that radiance to develop strong and healthy!
What Equipments Should You Prepare Before Transplantation Sea Daffodil?
Gardening Gloves
To safeguard your hands while handling soil and plants.
Shovel or Spade
For excavating and lifting the plant.
Garden Fork
Useful for loosening the earth around the plant's root system.
Watering Can or Hose
To hydrate the plant before and after its relocation.
Wheelbarrow or Tarp
For transporting the plant and soil without creating a mess.
Pruning Shears
For trimming any damaged roots or foliage.
Mulch
To aid in retaining soil moisture post-transplanting.
Ruler or Measuring Tape
For maintaining proper spacing between transplanted specimens.
How Do You Remove Sea Daffodil from the Soil?
How Do You Remove Sea Daffodil from the Soil?
From Ground: Gently moisten the area around the sea daffodil to soften the earth. Using a shovel or spade, dig a wide circle around the plant, being careful to go deep enough to preserve the root ball. Employ a garden fork if needed to loosen the soil. Slide the shovel beneath the root ball, and carefully lift the plant from its spot, aiming to keep the root ball and surrounding soil as intact as possible.From Pot: Water the sea daffodil thoroughly beforehand. Turn the pot on its side, tap the bottom, or gently squeeze the sides to loosen the soil. Support the plant by its base, and carefully slide the sea daffodil out of the pot, ensuring the root ball is preserved and roots are not harmed.From Seedling Tray: Water the seedlings well to moisten the soil, which will facilitate removal. Use a spoon or a small tool to gently lift each sea daffodil seedling from its cell, taking care not to damage the delicate roots. Handle the seedlings by their leaves, rather than their stems, to prevent injury.
Step-by-Step Guide for Transplanting Sea Daffodil
Choosing the Right Time
Relocate the sea daffodil during its inactive phase. Early spring or autumn can be ideal periods as the weather is milder.
Preparing the New Location
Excavate a hole that is twice as wide and the same depth as the sea daffodil's root ball.
Plant Spacing
Ensure there is sufficient distance between holes if planting multiple sea daffodil, based on their anticipated mature size.
Inspecting the Roots
Prior to planting, examine the root ball for any damaged roots and use pruning shears to remove these sections.
Placement
Position the sea daffodil in the center of the hole so it sits at the same depth it was previously growing. The top of the root ball should be level with the surrounding ground.
Refilling the Hole
Carefully backfill the hole with soil, gently patting it down without excessive compaction.
Watering
Water the sea daffodil generously after planting to settle the soil and eliminate air pockets.
Mulching
Apply a layer of mulch around the base of the sea daffodil to help maintain soil moisture and temperature levels.
How Do You Care For Sea Daffodil After Transplanting?
Watering
Ensure the soil around the sea daffodil remains consistently moist, especially during its initial growth season. This aids root establishment without waterlogging the soil.
Mulching
Keeping the mulch layer refreshed will assist in moisture retention and weed suppression without touching the plant's stem.
Monitoring
Observe for indications of transplant shock, such as wilting or yellowing leaves, and promptly address by adjusting care as needed.
Pruning
Trim any damaged or dead foliage to encourage healthy growth and direct energy towards the roots.
Staking
If the sea daffodil is tall or in a windy spot, staking might be necessary to provide support until the roots firmly anchor in the soil.
Troubleshooting Common Issues with Sea Daffodil Transplantation.
When is the best time to transplant sea daffodil?
Relocate sea daffodil from late spring through early summer, or from late fall to early winter for optimal outcomes.
How far apart should I space sea daffodil when transplanting?
Space your sea daffodil approximately 6-8 inches (15-20 cm) apart to allow ample room for development.
How deep should I plant sea daffodil's bulbs when transplanting?
Plant the bulbs of sea daffodil so their tops are just beneath the surface, about 4 inches (10 cm) deep.
What type of soil is best for transplanting sea daffodil?
Utilize well-draining soil, rich in organic matter, to ensure the vitality of transplanted sea daffodil.
What should I do if sea daffodil's leaves yellow after transplanting?
Yellow leaves might indicate over-watering. Allow the soil to dry out more between irrigation sessions.
How much should I water sea daffodil after transplanting?
Water sea daffodil thoroughly after transplanting, then only when the top 1 inch (2.5 cm) of soil is dry.
Should I fertilize sea daffodil after transplanting?
Wait one month post-transplanting before applying a balanced, slow-release fertilizer to sea daffodil.
How do I protect sea daffodil during winter after transplanting?
Apply mulch around sea daffodil to shield it from extreme cold, but avoid covering the plant directly.
Can I transplant sea daffodil on a sunny day?
Transplant sea daffodil on an overcast day or in the late afternoon to minimize transplant shock from the sun.
Why is my sea daffodil not blooming after transplanting?
Lack of blooms may be due to transplant shock. Ensure proper care and await the subsequent growth cycle.



