How to Transplant Chincherinchee?
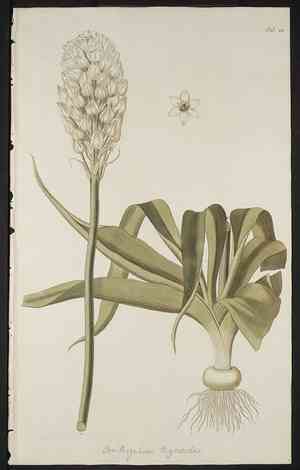
Relocate chincherinchee as spring revitalizes outdoor spaces, providing moderate temperatures for root development. Select a sunny spot with adequately draining earth to promote vigorous development. Carefully placing chincherinchee in its new position facilitates a smooth adaptation.
What Preparations are Needed Before Transplanting Chincherinchee?
What is the Ideal Time for Transplanting Chincherinchee?
The start of spring, particularly as winter's cold recedes, offers an optimal period for relocating chincherinchee. This timeframe, typically early to mid-spring, allows chincherinchee to establish itself in cooler temperatures, yet with ample opportunity to benefit from the upcoming growth season. Moving it during this period helps chincherinchee's root system recover from the shift before the intensity of summer heat, providing a strong base for vigorous growth and vibrant blooms. It's a promising chance for gardeners to prepare for a successful year in their landscapes with chincherinchee shining brightly.
How Much Space Should You Leave Between Chincherinchee Plants?
When getting ready to move your chincherinchee, ensure sufficient room between each plant. Aim for a gap of approximately 3-4 feet (0.91-1.22 meters). This will provide your chincherinchee ample area to expand and thrive.
What is the Best Soil Mix for Chincherinchee Transplanting?
The perfect soil for your chincherinchee is well-draining with a moderate amount of organic material. Before transplanting, amend the soil by incorporating some slow-release granular fertilizer. This will supply the nutrients your chincherinchee requires for growth.
Where Should You Relocate Your Chincherinchee?
Select a spot with full to partial sun exposure for moving your chincherinchee. This plant thrives in direct sunlight, but also appreciates some shade during the hottest part of the day.
What Equipments Should You Prepare Before Transplantation Chincherinchee?
Gardening Gloves
To safeguard your hands while handling soil and chincherinchee.
Spade or Shovel
To extract chincherinchee from its original spot, whether in the ground or a container.
Gardening Trowel
To excavate a hole in the new planting location.
Watering Can
To hydrate the plant before and after its relocation.
Wheelbarrow or Container
For moving the chincherinchee from its initial position to the new site.
Pruning Shears
To trim roots and any damaged or diseased parts of chincherinchee if necessary.
How Do You Remove Chincherinchee from the Soil?
How Do You Remove Chincherinchee from the Soil?
From Ground: First, moisten the chincherinchee plant to dampen the soil. Then, dig a wide trench around the plant using a shovel or spade, ensuring the plant's root ball remains intact. Carefully work the spade beneath the root ball to lift the plant from its original spot.From Pot: Water the chincherinchee plant in the pot a few hours prior to transplantation. Invert the pot and gently pull on the base of the chincherinchee. If it doesn't slide out, tap the sides and bottom of the pot to loosen the soil and roots.From Seedling Tray: Using your fingers or a small, clean tool like a spoon or stick, carefully work around the entire seedling to loosen the root ball. Gently lift it from the tray, keeping as much soil with the roots as possible.
Step-by-Step Guide for Transplanting Chincherinchee
Preparation
Thoroughly water the soil around the chincherinchee in its current location a day before the transplant is scheduled to minimize root trauma.
Removal
Follow the procedure based on the plant's initial placement as outlined above.
Planting Hole
Excavate a hole that is twice the width and the same depth as the chincherinchee's root ball. This provides roots with room to spread and grow.
Transplanting
Position the chincherinchee in the hole, ensuring the top of its root ball is level with the surrounding soil. Then gradually backfill the hole, gently firming the soil as you proceed.
Watering
Water the plant thoroughly after transplanting to settle the soil around the roots and aid its recovery from the shock of relocation.
How Do You Care For Chincherinchee After Transplanting?
Monitoring
Observe the chincherinchee closely for the initial few weeks post-transplant. Look for indications of stress or shock, such as yellowing or wilting leaves, and respond accordingly.
Watering
Maintaining consistent moisture levels after transplanting is vital. Keep the soil damp, but ensure the site has good drainage, as chincherinchee dislikes 'wet feet'.
Pruning
Light trimming may be necessary to shape the plant and remove any dead or damaged foliage. However, avoid extensive pruning immediately after transplanting; allow chincherinchee to acclimate to its new home first.
Protection
Shield the newly transplanted chincherinchee from harsh weather conditions like extreme heat, cold, or wind. A layer of organic mulch around the plant (not touching the stem) can help protect the roots, conserve moisture, and regulate soil temperature.
Troubleshooting Common Issues with Chincherinchee Transplantation.
When is the best season to transplant chincherinchee?
The optimal time to move chincherinchee is typically during late winter or early spring (S1-S2). This allows the plant sufficient time to establish itself before the growing season commences.
What space requirement is needed when transplanting chincherinchee?
The ideal spacing between chincherinchee is approximately 3-4 feet (around 1-1.2 meters). This ensures each plant has adequate room to spread out and develop.
How should I prepare the soil for transplanting chincherinchee?
Soil preparation is crucial. The soil needs to be well-drained yet fertile. Consider incorporating organic matter to enhance the nutrient content and texture of the soil.
How deep should I dig the hole for transplanting chincherinchee?
The hole should be twice the width and the same depth as the plant's root ball. This ensures ample space for the roots to spread and grow.
How to ensure the correct positioning of chincherinchee during transplanting?
Chincherinchee should be placed in the hole at the same level it was growing in its previous location. Avoid setting it too deep or too high as it may impede its growth.
What care should I take immediately after transplanting chincherinchee?
After relocation, water chincherinchee deeply and regularly. This helps the plant settle into its new location and develop a healthy root system.
How do I know if my chincherinchee is successfully transplanted?
Healthy new growth indicates successful transplantation. However, if chincherinchee shows signs of wilting or discoloration, it might be experiencing transplant shock.
What is transplant shock? And how can it be prevented while transplanting chincherinchee?
Transplant shock can occur when chincherinchee is disturbed during relocation. It can be prevented by watering generously, and avoiding immediate exposure to intense sunlight or wind.
How to handle chincherinchee during transplanting to prevent damage?
Handle chincherinchee gently, especially its root ball, during relocation. Avoid tugging or pulling on the stems as it can cause stress to the plant or even damage it.
Do I need to fertilize chincherinchee right after transplanting?
Refrain from fertilizing immediately after moving chincherinchee. Allow the plant time to adjust to its new environment first. Fertilize only after you observe new growth, which could take several weeks.



