How to Propagate Chincherinchee?
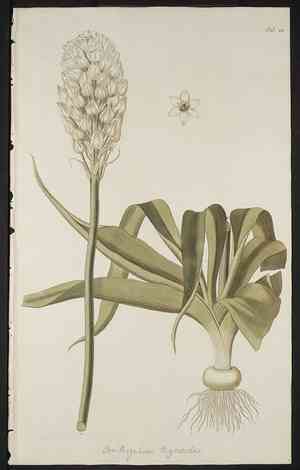
For successful chincherinchee propagation, employing its underground storage structures is vital. Gently unearth these tubers, taking care to avoid harm, and re-embed them in rich, well-aerated earth. Confirm they are positioned at a suitable depth, with adequate room for expansion. Supplying steady hydration without saturation is paramount for proper root formation. Once the tubers are settled, uphold a routine of moderate irrigation and filtered sunlight to foster vigorous development.
Optimal Time for Chincherinchee Propagation
Propagation Method
Utilize The Tubers
Propagation Period
Spring
Tools for Chincherinchee Propagation
Small garden trowel
Crucial for excavating and lifting chincherinchee tubers without harming the surrounding root structure. Its compact size and ergonomic handle facilitate precise maneuvering in confined areas, ensuring careful tuber extraction.
Sharp knife
Used for dividing tubers if needed. A sharp, clean blade ensures precise cuts, minimizing disease risk and tissue damage to chincherinchee tubers. Sterilization before use is vital to prevent pathogen introduction.
Potting mix
A well-draining, nutrient-rich potting medium is essential for the successful establishment and growth of chincherinchee's tubers. The mix should supply adequate nutrients and support drainage to prevent root rot, a common issue in poorly drained soils.
Planting pots
Required for starting tubers indoors or when direct planting isn't feasible. Pots should have sufficient drainage holes, allowing for better control over the growing environment during chincherinchee's initial development stages.
Watering can with a gentle shower head
Used to delicately water tubers without dislodging them or causing erosion in the potting mix. A gentle shower head ensures even water distribution, promoting uniform growth.
Labels and a permanent marker
Essential for tracking planting dates and specific care requirements for each tuber. Proper labeling aids in monitoring progress and maintaining an organized chincherinchee propagation setup.
Post-Propagation Care for Chincherinchee
Post-Propagation Care for Chincherinchee
Once chincherinchee begins to grow, maintain consistently moist soil without overwatering, as chincherinchee is susceptible to excessive moisture. Fertilize with a balanced, water-soluble plant food every four weeks during the active growth period, and reduce feeding when the plant enters dormancy. Monitor for pests and diseases, treating as necessary. When chincherinchee foliage dies back after blooming, decrease watering to allow for the plant's natural dormancy period.
Common Errors to Avoid When Propagating Chincherinchee
Overwatering
Excessive watering of chincherinchee can lead to root rot and fungal infections, hindering root formation and overall plant health.
Deep planting
Placing chincherinchee bulbs too deep in the soil can impede proper sprouting and growth as they may struggle to reach the soil surface.
Ignoring soil composition
Selecting soil that lacks proper drainage can cause moisture to accumulate around the bulbs, resulting in rotting and poor growth.
Neglecting separation
Failing to carefully separate offsets from the parent bulb can damage developing roots and decrease the likelihood of successful propagation.
Chincherinchee Propagation Advice
Moderate watering
Ensure chincherinchee bulbs receive just enough water to keep the soil moist, not saturated, to encourage healthy root development.
Appropriate depth
Plant chincherinchee bulbs at the correct depth, typically about two to three times the bulb's height, for optimal growth.
Well-draining soil
Using well-draining soil for chincherinchee will prevent moisture accumulation and provide a suitable environment for bulb development.
Gentle separation
Carefully separating offsets from the parent chincherinchee bulb can protect delicate roots and increase the number of viable new plants.



