How to Transplant Buttonsage?
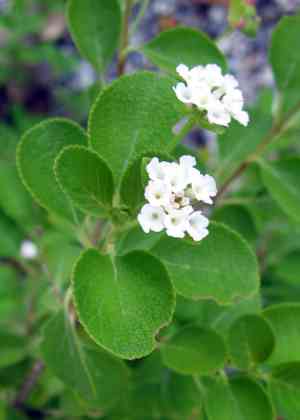
The ideal period for relocating buttonsage is during the mild conditions of late spring, which encourages vigorous development. Select locations that are sunny and offer good drainage. When shifting buttonsage, safeguard the root system's wholeness to ensure successful integration.
What Preparations are Needed Before Transplanting Buttonsage?
What is the Ideal Time for Transplanting Buttonsage?
The optimal period for relocating buttonsage spans from the onset of late winter to the peak of spring. During this timeframe, moderate temperatures and increasing daylight foster root development, thereby minimizing transplant stress. Moving buttonsage then capitalizes on spring's inherent growth surge, allowing ample time for roots to establish deeply before the summer heat. By selecting this window, you provide buttonsage with a head start, aligning with natural cycles for robust growth and resilience.
How Much Space Should You Leave Between Buttonsage Plants?
When preparing a new spot for your buttonsage, remember they appreciate their personal area! Aim for a generous spacing of 24-36 inches (61-91 cm) between plants. This provides them ample room to thrive without competition.
What is the Best Soil Mix for Buttonsage Transplanting?
To prepare the perfect bed for your buttonsage, utilize a soil mixture that drains effectively. Enhance it with a balanced, slow-release fertilizer to give your plants a strong start. Consider it a warm, nutrient-rich welcome embrace for their roots!
Where Should You Relocate Your Buttonsage?
Select a sunny location for your buttonsage, where they can absorb at least 6 hours of sunlight daily. They are sun-lovers, so the brighter, the better. An east or south-facing position would suit them perfectly!
What Equipments Should You Prepare Before Transplantation Buttonsage?
Gardening Gloves
To safeguard your hands while handling soil and plants.
Shovel or Spade
For digging around and lifting the plant's root ball.
Garden Fork
To loosen the soil around the roots if necessary.
Watering Can or Hose
For hydrating the plant before and after its relocation.
Trowel
For minor adjustments and planting in the new space.
Pruning Shears
For trimming any damaged roots or stems.
Wheelbarrow
To move the plant from one spot to another if it's large.
Burlap or Tarp
For transporting the root ball and keeping it intact during movement.
Measuring Tape
To gauge the depth and width of the new planting hole.
Plant Support Stakes (if the plant is large)
To stabilize the plant in its new position.
How Do You Remove Buttonsage from the Soil?
How Do You Remove Buttonsage from the Soil?
From Ground: First, irrigate the buttonsage plant to moisten the soil. Next, excavate a wide trench around the plant using a shovel or spade, ensuring the plant's root ball remains undisturbed. Carefully work the spade beneath the root ball to extract the plant from the ground.From Pot: Begin by watering the buttonsage to facilitate easier removal. Invert the pot onto its side and gently ease the plant out by supporting the stem's base with one hand and tapping the pot's edges on a firm surface. If the plant resists, use a trowel to loosen the soil along the pot's rim.From Seedling Tray: Water the seedling tray to dampen the soil. Use a trowel or a dibber to carefully lift each buttonsage seedling by pushing up from the cell's bottom. Hold onto the seedling's base to prevent damage and ensure you retrieve the entire root system.
Step-by-Step Guide for Transplanting Buttonsage
Preview Transplant Site
Assess the environment where the buttonsage will be planted. Ensure it is clear of weeds and debris.
Dig New Hole
Excavate a hole that is twice the width of the root ball and equally deep to provide ample space for root expansion.
Root Ball Care
Gently untangle any roots circling the root ball to encourage outward growth. If there are any broken or excessively long roots, trim them with pruning shears.
Position buttonsage in Hole
Place the buttonsage in the center of the hole. The top of the root ball should be level with the surrounding soil surface.
Backfill the Hole
Carefully refill the hole with the soil that was originally removed, gently firming it around the root ball to eliminate air pockets.
Water Generously
After planting, thoroughly water the buttonsage to settle the soil around the roots and help alleviate transplant shock.
Stake if Necessary
If the buttonsage is large or in a windy location, install plant support stakes to stabilize the buttonsage until it develops stronger roots.
Mulch Application
Apply a layer of mulch around the plant's base to conserve moisture and regulate soil temperature, being careful to keep it from directly touching the stem.
How Do You Care For Buttonsage After Transplanting?
Irrigation
Ensure the buttonsage receives sufficient water, especially in the initial weeks after transplant, to aid root establishment.
Mulch Benefits
Maintain mulch around the base to retain soil moisture and deter the growth of competing weeds.
Observation
Regularly inspect the buttonsage for any signs of stress such as wilting or discolored leaves, which can indicate watering or disease issues.
Gentle Fertilization
After a few weeks, you may apply a mild, balanced fertilizer according to the specific needs of the buttonsage, avoiding anything too high in nitrogen to prevent burning the plant.
Support Maintenance
Check any stakes or supports to ensure they are secure but not overly tight, allowing some natural movement for the buttonsage to strengthen its stem.
Troubleshooting Common Issues with Buttonsage Transplantation.
When is the best time to transplant buttonsage?
The ideal period for relocating buttonsage is between mid-spring and late spring, when the soil is warm and workable.
How far apart should I space buttonsage when transplanting?
For optimal growth, position buttonsage plants approximately 24-36 inches (61-91 cm) apart to provide them ample room to thrive.
Why is my buttonsage wilting after transplant?
Wilting after transplant could be due to shock. Ensure proper watering, avoid direct sun initially, and consider using a root stimulator.
Can I transplant buttonsage on a hot day?
It's best to transplant buttonsage on a cooler, overcast day to minimize transplant shock and water loss.
How deep should the hole be for buttonsage?
The hole should be as deep as the root ball and twice as wide to encourage root expansion.
What soil condition is ideal for transplanting buttonsage?
Choose well-draining soil rich in organic matter to provide buttonsage with the best environment for successful transplantation.
How much water does buttonsage need after transplanting?
Water buttonsage thoroughly after transplanting. Keep the soil consistently moist but not waterlogged during the initial weeks.
Do I need to prune buttonsage before transplanting?
Pruning is not essential, but trimming can reduce stress on buttonsage by minimizing water loss through leaves.
How can I tell if buttonsage is ready for transplant?
Buttonsage is ready when it's established and healthy. Avoid transplanting during flowering or extreme temperatures.
Should I fertilize buttonsage during transplant?
Avoid fertilizing immediately to prevent root burn. Let buttonsage settle for a few weeks and then use a balanced fertilizer.



