How to Prune Buttonsage?
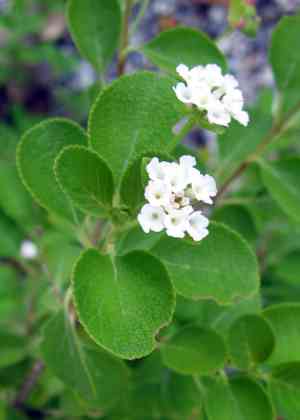
Buttonsage, a adaptable shrub recognized for its thick leaves and tiny blossoms, flourishes in diverse environments. Trimming ought to concentrate on excising lifeless or ailing branches, sculpting for dimension management, and fostering fresh development. The most suitable times for pruning are during spring and summer, coinciding with the plant's vigorous growth stage. It is crucial to guarantee precise cuts to avert illness. Pruning buttonsage encourages blooming, improves air movement, and sustains plant vitality, thereby boosting its decorative value.
What Are the Benefits of Pruning Buttonsage?
What Are the Benefits of Pruning Buttonsage?
Trimming buttonsage promotes robust development and helps maintain its desired form. Precise cuts can encourage fresh shoots, boosting the plant's vitality and visual appeal.
What Is the Best Time for Pruning Buttonsage?
What Is the Best Time for Pruning Buttonsage?
The ideal periods for trimming buttonsage are Spring and Early Summer. These seasons coincide with buttonsage's active growth phase, typically starting in early spring and continuing through summer. Pruning during this time encourages new growth, assists in maintaining the desired shape, and improves air circulation within the plant. By performing the trimming just before or at the start of the growth cycle, gardeners can benefit from the plant's natural growth responses, leading to a more vigorous and healthy plant. Additionally, pruning in these seasons helps promote blooming, as buttonsage flowers on new wood. Removing old or dead stems before the active growth cycle ensures energy is directed towards producing fresh growth that can support the flowering phase. It is also crucial to avoid heavy pruning in late summer or fall, as this can stimulate new growth that may not have enough time to harden off before colder temperatures arrive, making the plant more vulnerable to frost damage.
What Tools Do I Need to Prune Buttonsage?
Hand Pruners
Perfect for making clean cuts on buttonsage's thinner stems and smaller branches, ensuring minimal harm to the plant during trimming.
Lopping Shears
Best for cutting through thicker branches of buttonsage that hand pruners might struggle with, providing leverage for larger cuts.
Pruning Saw
Essential for removing any mature or woody stems of buttonsage, which may be too thick for shears, allowing for precise and efficient cuts on older growth.
Gardening Gloves
To safeguard hands from buttonsage's rough texture and offer a better grip on the tools during the trimming process.
How to Prune Buttonsage
Disinfect Tools
Before trimming buttonsage, ensure all pruning tools are sanitized to prevent disease spread. Use a solution of one part bleach to nine parts water to sterilize the blades.
Remove Diseased Parts
Carefully inspect buttonsage for any signs of diseased leaves and stems. Use sharp, clean pruning shears to remove these parts. Cut at an angle, and make the cut at least a few inches below the affected area to ensure removal of all diseased tissue.
Prune Withered Leaves
Identify and trim away any withered leaves from buttonsage to maintain healthy growth and appearance. Snip the leaves at the base of their stems, taking care not to damage nearby healthy foliage.
Thin Stems
Thin out dense areas of buttonsage by removing some stems completely. This promotes better air circulation and light penetration, which is critical for the prevention of disease.
Clean Up
After pruning buttonsage, clean up all removed plant debris from the area to prevent the potential spread of disease. Dispose of the diseased plant material properly, away from healthy plants.
Common Pruning Mistakes with Buttonsage
Over Pruning
Removing too much foliage at once can stress buttonsage and lead to weak growth or reduced flowering. Aim to prune no more than one-third of the plant at a time.
Improper Tools
Using dull or dirty tools can damage the branches of buttonsage, creating jagged cuts that are vulnerable to pests and diseases. Ensure tools are sharp and clean before pruning.
Incorrect Cut Placement
Making cuts too far from a bud can result in dead stubs while cutting too close can damage the bud. Cuts should be made just above a healthy bud or branching point.
Neglecting Deadheading
Failing to remove spent flowers from buttonsage can prevent the plant from producing new blooms, as it may start to form seeds instead.
Pruning Healthy Growth
Cutting away healthy growth indiscriminately may reduce the plant's vigor. Focus on removing only dead, damaged, or diseased wood unless reshaping is needed.
Ignoring Shape
Pruning without attention to the natural shape of buttonsage can lead to an unbalanced appearance. Aim to maintain a pleasing shape while pruning.
Common Pruning Tips for Buttonsage
Sterilize Tools
Before pruning buttonsage, clean and sterilize pruning tools to prevent the spread of disease.
Thinning Crowded Areas
Thin out congested areas to increase air circulation and light penetration, which encourages healthy growth and reduces disease risk.
Cutting Angle
Make cuts at a 45-degree angle about 1/4 inch above the bud or branch to promote effective healing and prevent water accumulation.
Identify Grow Points
Before cutting, identify where new growth is likely to emerge. This ensures that the pruning will result in the desired direction of plant growth.
Successive Pruning
If reshaping or size reduction is necessary, practice successive pruning. Spread out the pruning process over a few seasons to avoid shock.
Post-Pruning Care
After pruning, water buttonsage well and consider applying a balanced fertilizer to support recovery and new growth.



