How to Transplant Rocky mountain iris?
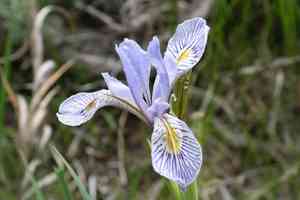
The optimal period for relocating rocky mountain iris spans from mid-spring to late spring, facilitating excellent root development prior to the summer warmth. Choose a location that receives ample sunlight and possesses soil with good drainage. When shifting rocky mountain iris, guarantee very little disruption to the roots to foster an effortless adjustment.
What Preparations are Needed Before Transplanting Rocky Mountain Iris?
What is the Ideal Time for Transplanting Rocky Mountain Iris?
The optimal period for relocating rocky mountain iris is from mid to late spring. During this time, the gently warming soil promotes robust root development. Moving rocky mountain iris in this season maximizes root establishment before summer's heat, ensuring a stronger, more vibrant plant. This timing perfectly aligns with the plantâs natural growth cycle, creating an ideal environment for rocky mountain iris to flourish. Embrace this season to give your rocky mountain iris the best start in its new location!
How Much Space Should You Leave Between Rocky Mountain Iris Plants?
For rocky mountain iris, the ideal spacing is 1-2 feet (30-60 cm) apart. This ensures each plant has ample room to expand and grow. Estimation is acceptable; your rocky mountain iris will be tolerant!
What is the Best Soil Mix for Rocky Mountain Iris Transplanting?
Your rocky mountain iris would thrive in a well-draining soil such as sandy loam. A balanced starter fertilizer applied before planting will provide an excellent beginning. These materials are available at your local garden center.
Where Should You Relocate Your Rocky Mountain Iris?
Find a spot where your rocky mountain iris can receive full sun to partial shade. Excessive shade might lead to leggy growth and fewer blooms. Remember, a thriving rocky mountain iris means a happy gardener!
What Equipments Should You Prepare Before Transplantation Rocky Mountain Iris?
Gardening Gloves
To safeguard your hands while handling soil and plants.
Shovel or Garden Spade
Essential for excavating the rocky mountain iris from its original spot and creating a new hole at the transplant site.
Watering Can
To keep the plant hydrated throughout the transplanting process.
Mulch
Beneficial for retaining soil moisture and regulating temperature post-transplant.
Garden Cart or Wheelbarrow
Useful for moving the rocky mountain iris plant from its initial location to the new site if it's large or heavy.
Tarp
Helps in gathering and moving soil while maintaining a tidy work area.
Gardener's Knife
Crucial tool for dividing the plant's root ball if necessary.
Rooting Hormone
Stimulates root growth and can aid the rocky mountain iris in establishing itself at the new site.
How Do You Remove Rocky Mountain Iris from the Soil?
How Do You Remove Rocky Mountain Iris from the Soil?
From Ground: After moistening the soil around the rocky mountain iris plant, begin digging a wide trench around it with a shovel or spade, being careful not to harm the root ball. Gently work the spade beneath the root ball to loosen and lift the plant from its current spot. If it's a large plant, you might need help or a garden cart for safe transport.From Pot: First, water the rocky mountain iris adequately to keep the soil and roots moist. Firmly grasp the plant's base and tip the pot sideways, then lightly tap it to release the plant. Ensure the plant emerges with its root ball intact.From Seedling Tray: Carefully hold the rocky mountain iris seedling by its leaves, not the stem, and gently ease it out of its cell. If the seedling is resistant, you can use a dibber or similar tool to push it from the bottom hole of the cell, but always be gentle to avoid damaging the delicate roots.
Step-by-Step Guide for Transplanting Rocky Mountain Iris
Digging
Excavate a hole in the new location that is twice as wide and the same depth as the rocky mountain iris's root ball.
Placement
Gently position the rocky mountain iris plant in the hole, ensuring it sits at the same level as it did in its original spot. The top of the root ball should be flush with, or slightly above, the surrounding soil.
Refilling
Backfill the hole with native soil and gently but firmly compact it around the root ball until the hole is filled, being careful not to bury the stem.
Watering
Thoroughly water the rocky mountain iris immediately after transplantation to settle the soil around the roots and minimize transplant shock.
Mulching
Apply a 2-3 inch layer of mulch around the plant's base, keeping it a couple of inches away from the stem to prevent rot and pests.
How Do You Care For Rocky Mountain Iris After Transplanting?
Watering
Regularly check the soil's moisture level. Water based on soil dryness, aiming for consistently moist but not waterlogged conditions.
Pruning
Remove any dead or damaged foliage to encourage new growth, but avoid extensive pruning until the rocky mountain iris is well established.
Observation
Monitor for signs of stress such as wilting or yellowing leaves, and adjust watering or sunlight exposure as needed.
Protection from the Elements
Initially, ensure the rocky mountain iris is shielded from harsh weather conditions until it establishes itself in its new location. A layer of mulch can also help protect the roots from extreme temperatures.
Fights Diseases and Pests
Keep an eye out for common pests and diseases that might affect rocky mountain iris. Use organic pesticides or fungicides if necessary.
Troubleshooting Common Issues with Rocky Mountain Iris Transplantation.
When is the ideal time to transplant rocky mountain iris?
The optimal time to transplant rocky mountain iris is during late spring to early summer (S2-S3). This is when the plant is most actively growing, which helps it establish faster in its new spot.
How much spacing should I allow when transplanting multiple rocky mountain iris?
When transplanting multiple rocky mountain iris, allow a spacing of 1-2 feet (30-60 cm). This provides each plant with sufficient room to thrive without competing for resources.
What ground conditions are suitable for transplanting rocky mountain iris?
Rocky mountain iris prefers well-aerated, rich organic soil. The ground should drain effectively as the plant does not tolerate soggy conditions. The pH should be slightly acidic to neutral.
How deep should I plant rocky mountain iris during transplanting?
When transplanting, bury the rocky mountain iris's roots approximately 2-3 inches (5-7.5 cm) deep in the soil. This depth ensures optimal access to nutrients and water for the roots.
What can I do if the transplanted rocky mountain iris wilts after moving?
Immediately water a wilting transplanted rocky mountain iris. It is likely experiencing transplant shock, and additional moisture will aid its recovery. However, avoid overwatering to prevent waterlogging.
Is it necessary to prune rocky mountain iris before or after transplanting?
When transplanting rocky mountain iris, pruning is optional but beneficial. Remove dead and damaged leaves to help it focus energy on new growth and root establishment.
Why isn't my transplanted rocky mountain iris blooming?
Transplanting can stress rocky mountain iris, leading to delayed blooming. If properly cared for, it should bloom by the next season. Insufficient light or nutrients may also be contributing factors.
How often should I water rocky mountain iris after transplanting?
Water the rocky mountain iris generously immediately after transplanting, then aim to maintain consistently moist soil. However, be wary of waterlogging, which can cause root rot.
Should I fertilize rocky mountain iris during the transplant process?
Yes, but with caution. Over-fertilization can harm rocky mountain iris. Use a balanced, slow-release fertilizer at half the recommended rate to support establishment without causing damage.
What might cause a transplanted rocky mountain iris to have yellow leaves?
Yellow leaves can indicate over-watering, poor drainage, or a nutrient deficiency. Evaluate your watering and fertilizing practices, and consider testing your soil.



