How to Transplant Yellow fritillary?
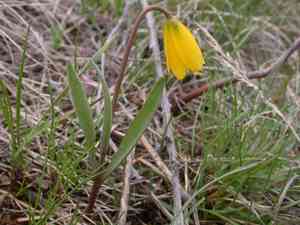
For yellow fritillary, spring offers the best conditions because of suitable temperatures that aid root growth. Select a bright location with soil that drains effectively. Avoid disturbing the roots excessively to preserve the plant's health.
What Preparations are Needed Before Transplanting Yellow Fritillary?
What is the Ideal Time for Transplanting Yellow Fritillary?
The perfect time for moving yellow fritillary is during the spring awakening, when the ground has softened and new growth begins. This timing allows roots to fully establish before summer heat. Transplanting yellow fritillary at this point leverages the season's mild temperatures and increasing daylight, encouraging strong root development and smooth adaptation to new surroundings. A friendly reminder â relocating during these months ensures a seamless transition for yellow fritillary, setting the stage for a healthy and vibrant display.
How Much Space Should You Leave Between Yellow Fritillary Plants?
When starting with yellow fritillary, ensure each plant has a clearance of 0.5-1 foot (15-30 cm) in all directions. This provides your plants with ample room to grow without resource competition. Remember, overcrowding is detrimental in a garden!
What is the Best Soil Mix for Yellow Fritillary Transplanting?
For your yellow fritillary, it's best to use rich, well-draining soil. A foundational fertilizer rich in potassium and phosphorus will stimulate growth and flower production. Fertilizer isn't a universal solution, so check for the appropriate type at your local garden center.
Where Should You Relocate Your Yellow Fritillary?
The yellow fritillary plant enjoys sunlight, but not excessively! Select a partially shaded spot in your garden. This means it receives sun for part of the day but is also shielded from intense midday rays. Your plant will appreciate it!
What Equipments Should You Prepare Before Transplantation Yellow Fritillary?
Gardening Gloves
These are essential for protecting your hands while digging soil and handling the yellow fritillary plant.
Garden Trowel
A small hand tool for digging, preparing planting holes, and removing weeds.
Garden Spade
This will be used to excavate the yellow fritillary from its original spot without harming the plant or its roots.
Garden Hose or Watering Can
You need to ensure the plant is adequately hydrated during the transplant process.
Transplanting Fertilizer
This aids in the plant's transition from one location to another.
Mulch
Crucial for helping to maintain moisture levels and temperature.
How Do You Remove Yellow Fritillary from the Soil?
How Do You Remove Yellow Fritillary from the Soil?
From Ground: Begin by watering the yellow fritillary plant, so the surrounding soil becomes moist and easier to manage. Using the garden spade, dig around the plant, ensuring ample space to avoid cutting into the root system. Once done, carefully slide the spade beneath the root ball and lift the plant.From Pot: Water the plant, then gently tip the pot sideways and tap it to loosen the soil. You should then be able to slide out the plant with its soil and roots intact.From Seedling Tray: Water the tray thoroughly to moisten the soil. Then, using a garden trowel, gently lift the yellow fritillary seedling out of its cell, taking as much of the root system and surrounding soil as possible.
Step-by-Step Guide for Transplanting Yellow Fritillary
Plant Health
Ensure the yellow fritillary is healthy and shows no signs of pests or diseases before you begin the transplant.
Digging
Using the spade, excavate a hole that is twice as wide as the root system of your yellow fritillary plant.
Placement
Carefully position the yellow fritillary plant in the center of the hole, ensuring it is at the correct depth. The root ball should be level with or slightly below the ground surface.
Filling
Backfill the hole with soil, gently firming it around the plant's base.
Watering
Thoroughly water the yellow fritillary plant.
Mulching
Apply a layer of mulch around the plant. This helps regulate soil temperature and suppress weeds.
Fertilizing
Apply a transplanting fertilizer to encourage root growth and development. Follow package instructions for correct quantities.
How Do You Care For Yellow Fritillary After Transplanting?
Watering
Water the yellow fritillary plant regularly for the initial few weeks to ensure it establishes in its new location. Avoid overwatering as this could lead to root rot.
Fertilizing
Continue to use a post-transplant fertilizer to support the yellow fritillary plant's root development and overall growth. Apply according to package directions.
Inspecting
Monitor your yellow fritillary plant for any indications of stress or disease. If any leaves begin wilting or yellowing, remove them to prevent disease spread. Remember, early detection is crucial!
Troubleshooting Common Issues with Yellow Fritillary Transplantation.
What is the best time of the year to transplant yellow fritillary?
The ideal period to transplant yellow fritillary is from late winter to early spring (S1-S3). They adapt better to new environments during cooler seasons.
How much space should I leave between each yellow fritillary while transplanting?
Maintain a spacing of approximately 0.5-1 foot (15-30 cm). This ensures yellow fritillary receives adequate sunlight and nutrients, and prevents competition among plants.
Why are the leaves of my transplanted yellow fritillary turning yellow?
Yellow leaves can indicate overwatering. Water yellow fritillary thoroughly, but infrequently, only when the top 1-2 inches (2.5-5 cm) of soil is dry.
Why is my transplanted yellow fritillary not blooming?
Failure to bloom may be due to insufficient sunlight. Ensure yellow fritillary receives at least 6 hours of direct sunlight daily for optimal flowering.
Can yellow fritillary be transplanted indoors?
Yellow fritillary can certainly survive indoors, but ensure it's placed near a bright window and the room temperature is consistent and on the cooler side.
My yellow fritillary seems to droop after transplanting. What could be the reason?
Drooping may suggest transplant shock, or inadequate access to sunlight or water. Gradually acclimate yellow fritillary to its new location, and monitor its water and sunlight requirements.
Can I transplant yellow fritillary in peak summer or mid-winter?
Transplanting yellow fritillary during extreme temperatures can cause stress to the plant. Late winter to early spring (S1-S3) is the ideal time for relocating this plant.
What type of soil does yellow fritillary prefer when transplanting?
Yellow fritillary thrives best in well-drained, loamy to sandy soil. Highly clayey or compact soil can lead to waterlogging, negatively impacting the plant's health.
Whatâs the ideal depth to plant yellow fritillary when transplanting?
The bulb of yellow fritillary should be planted 3-4 inches (7.5-10 cm) deep. This depth ensures the bulb is well insulated from temperature fluctuations.
How to care for yellow fritillary post transplantation?
After transplantation, water yellow fritillary thoroughly and keep it in indirect sunlight for a few days. Gradually increase sunlight exposure and water only when the topsoil is dry.



