How to Propagate Yellow fritillary?
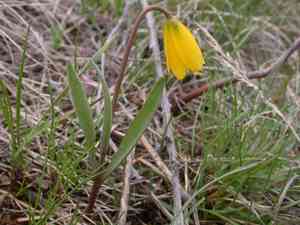
Yellow fritillary flourishes when reproduced via its corms. Cultivators looking to enlarge their assortment ought to meticulously remove these formations and re-embed them in adequately draining earth, abundant in organic material. The site ought to receive moderate to ample sunlight, accommodating its inherent growing environment. Verify that the substrate stays damp yet not oversaturated to encourage sound root formation. Careful manipulation of the corms during relocation boosts survival rates and fosters vigorous development.
Optimal Time for Yellow Fritillary Propagation
Propagation Method
Utilize The Tubers
Propagation Period
Spring
Tools for Yellow Fritillary Propagation
Garden Trowel
A garden trowel is vital for carefully digging and lifting yellow fritillary tubers without harm. Its small, pointed blade is perfect for maneuvering around delicate tubers, minimizing disruption to surrounding soil and roots. This is especially useful for yellow fritillary, which can have fragile roots prone to damage.
Tubers Labeling Tags
Labeling tags are essential for tracking the variety and developmental stage of yellow fritillary's tubers, particularly when propagating multiple plants. Proper labeling aids in monitoring growth and specific care needs for each tuber. This ensures every yellow fritillary receives appropriate attention during crucial growth phases, impacting overall health and viability.
Watering Can with a Fine Rose
A watering can with a fine rose attachment delivers a gentle water flow, crucial for newly planted yellow fritillary tubers, which can be dislodged or damaged by strong streams. This tool ensures the soil around the tubers stays moist but not saturated, promoting healthy root development without risking soil erosion near the plant.
Soil Thermometer
Monitoring soil temperature with a soil thermometer helps determine the ideal time for planting yellow fritillary's tubers. Yellow fritillary requires specific temperature conditions for successful germination and growth. Accurate soil temperature readings guide the propagation schedule, enhancing tuber survival and health.
Perlite or Vermiculite
Adding perlite or vermiculite to the soil mix when planting yellow fritillary's tubers improves drainage and aeration. These materials are crucial for creating an environment that supports healthy root growth and prevents waterlogging, key factors in successful yellow fritillary propagation.
Caring for Newly Propagated Yellow Fritillary
Caring for Newly Propagated Yellow Fritillary
Post-propagation, place yellow fritillary in a spot receiving full sun to light shade. Continue monitoring soil moisture, allowing it to dry slightly between waterings. Yellow fritillary benefits from a low-nitrogen fertilizer during its growing season to support development. As a bulbous plant, it needs minimal care once established but must be protected from excessive winter wetness to prevent tuber rot. Divide tubers every few years to encourage vigorous growth and prevent overcrowding.
Common Propagation Errors for Yellow Fritillary
Overwatering
Overwatering is a common mistake for gardeners propagating yellow fritillary. Yellow fritillary's bulbs are prone to rot when exposed to excessive moisture, leading to fungal infections and potential decay.
Deep Planting
Planting yellow fritillary's bulbs too deeply can hinder proper emergence. Deep planting may cause delayed sprouting or inhibit growth entirely, as shoots might struggle to reach the surface.
Ignoring Soil Type
Using an unsuitable soil type can impede yellow fritillary's growth. Yellow fritillary requires well-draining soil to thrive. Heavy or clay-rich soils can retain water, negatively affecting the bulbs.
Crowded Planting
Planting yellow fritillary's bulbs too close together can lead to competition for nutrients and space, reducing overall health and bloom quality. This dense planting might also impede proper air circulation, increasing disease risk.
Tips for Propagating Yellow Fritillary
Appropriate Soil Preparation
Preparing the correct soil mix enhances yellow fritillary's growth. Use a loamy soil blend with added sand or gritty material to ensure good drainage and prevent waterlogging.
Correct Bulb Depth
Planting yellow fritillary's bulbs at the proper depth is crucial. Generally, bulbs should be planted about two to three times their own height deep. This placement ensures adequate protection and support for emerging plants.
Adequate Spacing
Ensure yellow fritillary bulbs are spaced correctly to prevent overcrowding. Sufficient space between bulbs promotes better air circulation, reduces disease spread, and provides enough nutrients for each plant.
Moderate Watering
While establishing yellow fritillary, it's vital to water moderately to keep the soil moist but not soggy. Consistent, light watering helps bulbs establish without risking rot from excessive moisture.



