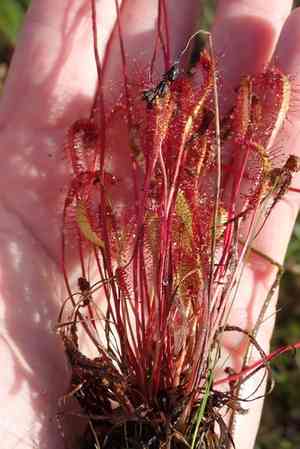
How to Transplant English sundew?
For English sundew, the ideal period for relocation spans from the onset of early spring until the threshold of summer's heat. Select a location that retains moisture and receives abundant sunlight, and although the transplanting process is straightforward, providing sufficient hydration after the move guarantees successful establishment.
What Preparations are Needed Before Transplanting English Sundew?
What is the Ideal Time for Transplanting English Sundew?
The prime period for relocating english sundew spans from early spring's thaw to the beginning of summer's warmth. This timeframe offers moderate temperatures and sufficient moisture, perfect for english sundew's root establishment and vigorous growth. Providing english sundew with this season for its new start allows for smooth acclimation, utilizing spring's emerging vitality. This ultimately sets the stage for a thriving season ahead, fostering robust health and vigor in your english sundew.
How Much Space Should You Leave Between English Sundew Plants?
When preparing to rehouse english sundew, remember to provide ample room for development! Position them approximately 6-8 inches (15-20 cm) apart, allowing each plant its own natural space without overcrowding.
What is the Best Soil Mix for English Sundew Transplanting?
Your english sundew will flourish in damp, acidic soil. Combine peat and sand to create a comfortable bed, and lightly sprinkle a low-nutrient fertilizer to welcome them to their new spot. Just enough to acknowledge their arrival, but not to overfeed them!
Where Should You Relocate Your English Sundew?
Locate a well-lit area for your english sundew that receives ample gentle sunlight. A spot with filtered light or partial shade would be ideal. Consider the refreshing feeling of a shaded area under a tree on a sunny day — english sundew would appreciate a similar environment!
What Equipments Should You Prepare Before Transplantation English Sundew?
Gardening Gloves
To safeguard your hands while handling soil and plants.
Trowel
For digging and moving plants.
Watering Can or Hose
To hydrate the plant before and after relocation.
Spade or Shovel
For extracting the plant from the ground if necessary.
Pruners
To trim any dead or excess foliage and roots.
Bucket or Container
To hold the plant during transit if removed from a pot or the ground.
Measuring Tape
To gauge the distance between plants if planting multiple english sundew.
Wheelbarrow
For transporting soil or the plant, especially if it is large.
How Do You Remove English Sundew from the Soil?
How Do You Remove English Sundew from the Soil?
From Ground: First, moisten the english sundew plant to soften the soil. Carefully excavate a wide circle around the plant using a shovel or spade, being cautious not to sever the roots. Gently work your tool beneath the root ball to dislodge the plant from the ground.From Pot: Hydrate the english sundew plant to make the soil pliable. Tilt the pot sideways and gently tap or compress its sides to loosen the root ball. Support the plant by its base and slowly extract it, keeping the soil around the roots as intact as possible.From Seedling Tray: Water the seedlings to ensure the soil is not dry. Use a trowel to carefully lift the plant from the seedling tray while supporting the root ball to prevent damage to the delicate roots.
Step-by-Step Guide for Transplanting English Sundew
Choose the Right Time
Select an overcast day with cooler temperatures, ideally in the morning or evening, to minimize transplant shock for english sundew.
Prepare the New Site
Excavate a hole twice the width of english sundew's root ball, maintaining the same depth as the current root ball to prevent burying the plant too deeply.
Plant Extraction
Following the guidelines under 'removal_process', carefully remove english sundew from its original location, aiming to keep as much of the root ball intact as possible.
Root Preparation
Examine the root ball and trim any broken or overly long roots with clean pruners. If it's rootbound, gently separate the roots. If the plant is from a seedling tray, be careful not to excessively disturb the roots.
Planting english sundew
Position english sundew in the center of the prepared hole, gently spreading out the roots. Backfill the hole with soil, firming it down to eliminate air pockets, ensuring the plant is stable and upright.
Watering english sundew
After planting, thoroughly water english sundew to help settle the soil around the roots and hydrate the plant. Avoid overwatering; just ensure it is adequately moist.
How Do You Care For English Sundew After Transplanting?
Mulching
Apply a layer of mulch around english sundew without touching the plant's base to help maintain soil moisture and temperature.
Regular Watering
Irrigate english sundew consistently to keep the soil moist until established, typically for several weeks. Over time, adjust based on natural rainfall and soil moisture levels.
Checking for Pests and Diseases
Monitor english sundew for indications of stress, pests, or diseases. Early detection can prevent potential outbreaks or damage.
Supporting Growth
Stake english sundew if necessary, especially if in an area prone to strong winds or if the plant is particularly tall and at risk of bending or breaking.
Maintaining the Area
Keep the area surrounding english sundew free of competing weeds. Hand-pull or carefully hoe around the plant without disturbing its roots.
Troubleshooting Common Issues with English Sundew Transplantation.
How can I tell if it’s the best time to transplant my english sundew?
It's optimal to transplant english sundew in early to late spring, when the ground thaws and daytime temperatures consistently exceed 50°F (10°C).
What spacing should I provide between english sundew plants?
For optimal growth, transplant english sundew with a spacing of 6-8 inches (15-20 cm) apart to give each ample room to flourish.
What should I do if my english sundew isn’t thriving post-transplant?
Post-transplant care is vital. Ensure it’s not exposed to harsh sunlight, it's watered correctly, and no signs of pests or diseases are present.
Is there a specific soil condition optimal for english sundew transplantation?
Yes, english sundew thrives in moist, acidic soil rich in peat. Ensure the soil is well-draining yet retains moisture.
What are the signs my english sundew needs more water after transplanting?
If english sundew's leaves appear wilted or the soil feels dry to the touch, it’s time to water it.
How deep should I plant english sundew when transplanting?
Transplant english sundew so the root ball rests just below the soil surface, without burying the plant's crown.
Can I fertilize my english sundew after transplanting?
Fertilizing is not advised for english sundew as it obtains its own nutrients. Simply ensure it’s in nutrient-rich, acidic soil.
How much sunlight does english sundew need after being transplanted?
Post-transplant, english sundew prefers bright, indirect sunlight. Avoid direct, intense sun that can stress the newly transplanted plant.
My english sundew is looking droopy after transplant; what should I do?
Ensure english sundew has consistent moisture and isn't in direct sunlight. Droopiness shortly after transplanting is common as it adjusts.
Is transplant shock common for english sundew, and how can I mitigate it?
Transplant shock can occur. Minimize it by transplanting in cool, cloudy weather and keeping the soil moist but not waterlogged.


