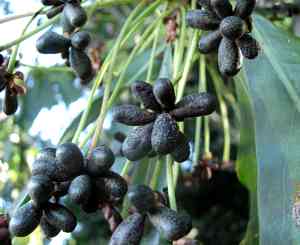
How to Transplant Winter's bark?
Relocate winter's bark during the invigorating period spanning from the onset of spring's renewal to the threshold of summer's full display, facilitating root integration. Select a protected location featuring soil that drains effectively; partial shade fosters development. Careful manipulation enhances the likelihood of a successful transplant.
What Preparations are Needed Before Transplanting Winter's Bark?
What is the Ideal Time for Transplanting Winter's Bark?
The best time to move winter's bark is from early spring's awakening to the robust days just before summer. This timing aligns with the plant's natural growth cycle, promoting better root establishment and a smooth transition. Transplanting winter's bark during this period leverages spring's mild temperatures and increasing daylight, which together encourage strong root development. This advantage is crucial for perennials like winter's bark, setting the stage for a thriving season ahead.
How Much Space Should You Leave Between Winter's Bark Plants?
Hello, green-thumbed friend! Before moving winter's bark to their new home, let's give them room to flourish. Space them about 6-10 feet apart, that's roughly 1.8-3 meters, to ensure they have ample space to grow and thrive.
What is the Best Soil Mix for Winter's Bark Transplanting?
For winter's bark, proper soil preparation can make a significant difference. Aim for well-drained soil, rich in organic matter. A generous mix of compost into your garden bed will create the perfect nourishment. Sprinkle a balanced, slow-release fertilizer to give them a little extra boost.
Where Should You Relocate Your Winter's Bark?
Choosing a sunny spot that receives dappled shade is ideal for winter's bark. They enjoy sunlight but also appreciate a break from the intense midday heat. A location with morning sun and afternoon cover is perfect for these botanical beauties.
What Equipments Should You Prepare Before Transplantation Winter's Bark?
Gardening Gloves
To safeguard your hands while handling soil and plants.
Shovel or Spade
For excavating the plant and preparing the new planting site.
Trowel
For more precise digging tasks and manipulating smaller soil areas.
Pruners or Secateurs
To trim any damaged roots or branches as needed.
Watering Can or Hose
To hydrate the plant before and after relocation.
Wheelbarrow
To transport the winter's bark if it's large or to move soil and compost.
Mulch
To help maintain soil moisture after transplantation.
Measuring Tape
To ensure the new hole has the correct dimensions.
Stakes or Supports
If the winter's bark is top-heavy or requires stabilization post-transplant.
Bubble Wrap or Burlap
To safeguard the root ball if transplanting in colder conditions.
How Do You Remove Winter's Bark from the Soil?
How Do You Remove Winter's Bark from the Soil?
From Ground: First, water the winter's bark plant to moisten the soil. Then, dig a wide trench around the plant using a shovel or spade, ensuring the plant's root ball remains intact. Carefully work the spade under the root ball to lift the plant from its original location.From Pot: Begin by watering the winter's bark to soften the soil. Tilt the pot to the side and gently tap the edges to loosen the root ball. Support the plant by the base and carefully slide it out of the pot, avoiding excessive pulling on the stems.From Seedling Tray: Moisten the soil before starting. Use a trowel to gently lift each winter's bark seedling, being sure to include as much of the root system as possible. Handle the seedlings delicately to prevent damage.
Step-by-Step Guide for Transplanting Winter's Bark
Preparation
Water the winter's bark thoroughly before starting to ease the transplant shock.
Root Ball Care
Gently free the winter's bark's root ball from its current location, being careful not to damage the roots.
Transplant Hole
Dig a hole in the new location that is twice as wide as the root ball and of the same depth, so the winter's bark sits at the same level it was previously growing.
Positioning
Place the winter's bark in the center of the hole, spreading out the roots gently to encourage outward growth.
Backing Fill
Partially fill the hole with native soil, removing any air pockets around the root ball by gently pressing down.
Watering In
Water the winter's bark generously to settle the soil and eliminate air gaps, but avoid waterlogging.
Stabilizing
If required, insert supports around the winter's bark for added stability until its roots take hold.
Mulching
Apply mulch around the base of the winter's bark, keeping it away from the stem to prevent rot and to retain soil moisture.
How Do You Care For Winter's Bark After Transplanting?
Monitoring
Regularly check the winter's bark for signs of transplant shock, such as wilting or discolored leaves, and take corrective action if needed.
Watering
Maintain even soil moisture around the winter's bark without overwatering to encourage new root development.
Supports
Ensure that any stakes or supports are secure but not too tight, allowing for natural growth and movement of the winter's bark.
Pruning
Trim away any dead or damaged branches to promote healthy growth, using proper pruning techniques to avoid further stress on the plant.
Protection
If there's unexpected frost, cover the winter's bark with bubble wrap or burlap to shield it from the cold. Remove the cover once the frost has passed.
Troubleshooting Common Issues with Winter's Bark Transplantation.
What's the ideal time to transplant winter's bark?
The optimal period is between the thaw of early spring and the blossoms of late spring.
How far apart should winter's bark be planted?
Set winter's bark at generous intervals of 6-10 feet (1.8-3 meters) to ensure adequate growth space.
How much should I water winter's bark after transplanting?
Provide a thorough soaking immediately post-transplant, then maintain consistent moisture as winter's bark establishes roots.
Is it necessary to prune winter's bark when transplanting?
Trim only damaged or dead branches to promote healthy growth; avoid excessive pruning.
What soil conditions favor winter's bark's transplant success?
Plant winter's bark in well-draining soil rich in organic matter to foster a strong start.
Should I add fertilizer when transplanting winter's bark?
Fertilize sparingly, if at all; a bit of compost or slow-release fertilizer should suffice.
How deep should the transplant hole be for winter's bark?
Dig a hole as deep as the root ball and twice as wide for a snug fit.
What if winter's bark wilts after transplanting?
Ensure adequate watering and shade from harsh sun; wilt should subside as winter's bark acclimates.
How do I protect winter's bark's roots during transplanting?
Keep roots moist and undisturbed as much as possible during the transition.
Can I transplant winter's bark in containers?
Absolutely, ensure the container is large enough and has proper drainage holes for adapting.


