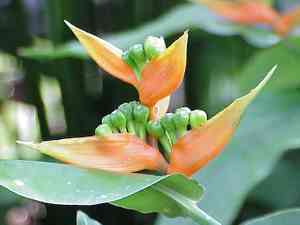
How to Transplant Red button ginger?
Spring, a period of rejuvenation, is ideal for relocating red button ginger, as this timing coincides with the plant's natural development. Select a bright location offering filtered light and verify that the substrate is fertile and drains effectively. Careful manipulation during the transfer promotes vigorous establishment.
What Preparations are Needed Before Transplanting Red Button Ginger?
What is the Ideal Time for Transplanting Red Button Ginger?
The optimal period to relocate your red button ginger is during the spring season; this coincides with its active growth phase. Moving red button ginger as the earth awakens ensures robust root establishment and vigorous development. This crucial moment provides your red button ginger with the peak of the growing season ahead, perfect for adapting and thriving in a new spot. This smart gardening strategy maximizes red button ginger's potential, giving it a nurturing boost for the sunny days to come.
How Much Space Should You Leave Between Red Button Ginger Plants?
When selecting a planting site for your red button ginger, ensure it has at least 3-4 feet (approximately 1-1.2 meters) of dedicated space. This will allow it to grow without crowding from other plants and provides sufficient room for proper air circulation.
What is the Best Soil Mix for Red Button Ginger Transplanting?
Preparing the soil for your red button ginger is vital! This plant flourishes in well-drained, nutrient-rich soil. A good option would be a loamy soil blend. Before planting, enrich the soil with organic compost or a foundational fertilizer like bone meal or fish emulsion. This will supply your red button ginger with the necessary nutrients for vigorous growth.
Where Should You Relocate Your Red Button Ginger?
Choosing the correct location for your red button ginger is crucial. Select a spot in your garden that receives partial shade. Mature red button ginger cannot endure full sun exposure all day, as it can harm its leaves. A location that gets morning sun and afternoon shade would be perfect!
What Equipments Should You Prepare Before Transplantation Red Button Ginger?
Gardening Gloves
To safeguard your hands while handling soil and the red button ginger plant.
A Trowel
This small hand tool is very useful for excavating holes and shifting soil while being careful around the root system.
A Spade or Shovel
For larger red button ginger plants, you might find it simpler to use a spade or shovel to assist in digging the plant from its original spot.
Watering Can/Hose
You will need to hydrate the plant both prior to and following transplantation.
Root stimulator
This will aid in the development of healthy roots and decrease the risk of transplant shock.
How Do You Remove Red Button Ginger from the Soil?
How Do You Remove Red Button Ginger from the Soil?
From Ground: First, water the red button ginger plant to moisten the soil. Then, dig a wide trench around the plant with a shovel or spade, ensuring the plant's root ball remains intact. Try to minimize damage to the roots as you carefully work the spade under the root ball to lift the plant from its original location.From Pot: Begin by watering the plant thoroughly. Then, gently turn the pot sideways and tap it to loosen the soil and roots. Handle the plant by its main stem, and use a trowel to guide the plant as it slides out of its pot.From Seedling Tray: Water the seedlings well before removal. Use a dibber or a similar tool to carefully lift the red button ginger seedlings without damaging the roots. Hold the seedlings by their leaves to prevent root bruising.
Step-by-Step Guide for Transplanting Red Button Ginger
Digging
Excavate a hole in your chosen spot that is twice the width and the same depth as the root ball of your red button ginger plant.
Placement
Gently position the plant in the hole. Ensure that the top of the root ball is level with the ground surface.
Backfilling
Refill the hole with the original soil. This encourages the roots to establish in the new site.
Application of Root stimulator
Dilute the root stimulator according to label instructions and pour around the planting area.
Watering
Water the plant thoroughly, aiming for deep saturation to encourage roots to grow deeper.
How Do You Care For Red Button Ginger After Transplanting?
Monitoring
Regularly inspect the red button ginger for indications of transplant shock, such as wilting, yellowing, or leaf drop. If you observe such signs, it may be necessary to provide more water, increased shade, or to check the soil for adequate drainage.
Pruning
If your red button ginger plant appears stressed after transplant, consider reducing the top growth by pruning it back by up to one-third to facilitate root system recovery.
Careful Watering
It is essential to keep the soil consistently moist, but not waterlogged, for the initial few weeks post-transplanting. This aids in establishing a strong root system and supports healthy growth.
Frequent Check-ups
Keep a close watch on your red button ginger during hot, dry, or windy days. It may require additional water beyond your typical watering schedule.
Troubleshooting Common Issues with Red Button Ginger Transplantation.
When is the best time of year to transplant 'red button ginger'?
The optimal period for transplanting 'red button ginger' is from spring to early summer (Season 1 to Season 3). This timeframe ensures ideal plant growth and recovery after transplant.
What spacing should I maintain when transplanting 'red button ginger'?
To promote healthy growth, plant 'red button ginger' at intervals of approximately 3-4 feet (90-120 cm) apart. This spacing allows for proper root development and expansive foliage spread.
How do I prepare the soil before transplanting 'red button ginger'?
Prepare a rich, well-draining soil mixture. You can incorporate organic matter like compost to enhance soil fertility. Also, ensure the soil pH is slightly acidic for 'red button ginger' to flourish.
What is the ideal depth to plant 'red button ginger' during transplanting?
Plant 'red button ginger' at the same depth it was in its original pot to prevent root suffocation or drying out. Make sure the uppermost roots are barely visible.
Should I water 'red button ginger' immediately after transplanting?
Absolutely! Watering 'red button ginger' ensures the soil and roots remain hydrated, minimizing transplant shock. However, avoid overwatering to prevent root rot or disease development.
Are there any signs of transplant shock in 'red button ginger' I should look out for?
Yes, indicators of transplant shock include wilting, yellowing, or dropping leaves. If you observe these conditions, reduce sunlight exposure and water a bit more frequently to aid recovery.
What should I do if the transplanted 'red button ginger' shows no growth?
Patience is key! 'red button ginger' may take some time to establish in its new location. Maintain consistent watering and ensure it receives ample sunlight. If there's still no growth after a few weeks, check for root disease.
Is it essential to stake 'red button ginger' after transplanting?
Staking isn't typically required for 'red button ginger'. However, in a windy location, use stakes to support its growth and prevent tipping until the plant becomes established.
Does the transplanted 'red button ginger' require any special fertilizer?
A slow-release, balanced fertilizer works well for 'red button ginger'. However, it's best to wait a few weeks post-transplant before applying any fertilizer to avoid root burn.
How should I care for 'red button ginger' to survive its first winter after transplanting?
Red button ginger' is a tropical plant and sensitive to frost. In colder regions, protect it with a frost blanket during the winter or move it indoors if potted.


