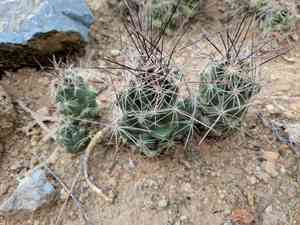
How to Transplant Nipple beehive cactus?
Relocating nipple beehive cactus is most effective from late summer through early autumn, allowing for robust development prior to the colder months. Select a brightly lit spot that drains exceptionally well. Bear in mind, careful management of the root system is crucial for a successful transfer.
What Preparations are Needed Before Transplanting Nipple Beehive Cactus?
What is the Ideal Time for Transplanting Nipple Beehive Cactus?
The optimal period for relocating nipple beehive cactus is from late summer to early autumn. This timeframe provides mild temperatures and gentle sunlight, enabling root establishment without the intense heat stress of mid-summer. Moving nipple beehive cactus during this season ensures roots strengthen before winter, giving your plant a head start for spring development. Warm soil and cooler air create the perfect balance for nipple beehive cactus to flourish post-transplant, setting the stage for vigorous growth and resilience in your garden.
How Much Space Should You Leave Between Nipple Beehive Cactus Plants?
When getting ready to move nipple beehive cactus, ensure you provide ample room for each specimen. Allocate a spacing of approximately 1-2 feet (30-60 cm) between individual plants. This will give them sufficient area to develop without competing for resources.
What is the Best Soil Mix for Nipple Beehive Cactus Transplanting?
Proper soil preparation for nipple beehive cactus is crucial. Aim for a well-draining soil—a sand or loam-based mixture should work effectively. Additionally, as an initial nutrient boost, incorporating a balanced cactus blend into the soil would establish a good foundation for this resilient perennial.
Where Should You Relocate Your Nipple Beehive Cactus?
Choose a site that receives abundant sunlight, as nipple beehive cactus thrives in full to partial sun. It's even better if the location offers afternoon shade to shield it from intense heat. Remember, a content plant is a flourishing plant!
What Equipments Should You Prepare Before Transplantation Nipple Beehive Cactus?
Garden Spade
Utilized to excavate the plant without harming its root system.
Pot (Optional)
Required if you are initially moving nipple beehive cactus from the ground or a seedling tray into a pot before its final placement.
Gardening Gloves
To safeguard your hands from spines and dirt.
Watering Can
To moisten both the plant and the soil before and after relocation.
Shovel
To prepare the new planting cavity.
Mulch
To protect the plant after transplanting, encouraging root development and moisture retention.
How Do You Remove Nipple Beehive Cactus from the Soil?
How Do You Remove Nipple Beehive Cactus from the Soil?
From Ground: To extract your nipple beehive cactus from the ground, start by lightly watering it to make the soil slightly moist. This will facilitate easier removal of the plant without damaging its root ball. Using a garden spade, carefully dig around the plant, ensuring you are not too close to protect the roots. Gradually work the spade beneath the root ball until it is lifted.From Pot: If your plant is in a container, water it lightly then gently invert the pot while supporting the plant with your other hand. Tap the bottom of the pot softly to release the nipple beehive cactus. Be cautious not to harm the root ball during this process.From Seedling Tray: If the nipple beehive cactus is growing in a seedling tray, water lightly and carefully pull on the base of the plant. Employing a transplanting tool can help ease out the root ball with minimal soil loss and without causing damage.
Step-by-Step Guide for Transplanting Nipple Beehive Cactus
Preparation
Begin by getting the new site ready for your nipple beehive cactus. Dig a hole using the shovel, which should be deep enough to encompass the cactus's root ball. The width of the hole should also be at least twice the size of the root ball.
Insertion
Carefully place the nipple beehive cactus into the hole, ensuring that the root ball is level with or slightly above the ground surface. Backfill the hole with soil, gently firming it around the base of the cactus to secure it in position.
Watering
Water the relocated cactus using your watering can. Irrigate them thoroughly until the surrounding soil becomes saturated, providing the moisture it needs to establish in its new location.
Mulching
Apply a layer of mulch around the base of the cactus, leaving a gap around the stem to prevent rot. Mulching aids in preserving moisture and inhibiting weed growth.
How Do You Care For Nipple Beehive Cactus After Transplanting?
Watering
Water the nipple beehive cactus sparingly but consistently. The uppermost layer of soil should be allowed to dry out between waterings, but never let it become completely arid. Excessive or insufficient watering can lead to root rot or desiccation, respectively.
Pruning
Remove any damaged or diseased portions of the nipple beehive cactus to ensure healthy development post-transplant.
Monitoring
Observe the nipple beehive cactus regularly for indications of transplant shock such as wilting, yellowing, or dropped foliage. If these symptoms persist, consult with a gardening specialist or local nursery.
Troubleshooting Common Issues with Nipple Beehive Cactus Transplantation.
When is the best time to transplant nipple beehive cactus?
The optimal period to relocate nipple beehive cactus is between seasons 5-7. This is when the plant can best endure the change and will ensure a successful move.
How much distance should be kept between two nipple beehive cactus plants while transplanting?
For ideal growth and health of nipple beehive cactus, it's advisable to maintain a spacing of 1-2 feet (30-60 centimeters) between each plant.
How should I prepare the soil for transplanting the nipple beehive cactus?
Nipple beehive cactus prefers well-drained soil. Before relocating, blend compost or organic material into your soil to enhance its fertility and water-holding capacity.
What kind of care does nipple beehive cactus need immediately following transplantation?
Water nipple beehive cactus thoroughly after transplanting to help it settle. However, allow the soil to dry out between watering sessions. Over-watering can cause root problems.
How deep should I plant the nipple beehive cactus in its new location?
The nipple beehive cactus should be planted at the same depth as it was in its original spot. The top of the root ball should be level with the soil surface.
What if the nipple beehive cactus appears to wilt after transplantation?
Slight wilting is normal after transplanting. Ensure nipple beehive cactus is adequately watered. If the condition continues, consider reducing sun exposure during the hottest part of the day.
Can nipple beehive cactus thrive in partial shade after transplantation?
Nipple beehive cactus can still survive in partial shade, but it may not flower as profusely. It prefers full sunlight for optimal blooming and growth.
Should I use a specific type of fertilizer after transplanting nipple beehive cactus?
Utilize a balanced, slow-release fertilizer to encourage healthy growth of nipple beehive cactus. Avoid high-nitrogen fertilizers as they can stimulate excessive leaf development at the expense of flowers.
How should I protect my transplanted nipple beehive cactus in winter?
Nipple beehive cactus is frost-resistant but extreme cold can be detrimental. Cover with an insulating fabric during heavy frosts to shield the plant.
What should be the ideal pot size for transplanting nipple beehive cactus?
Choose a pot 2-3 inches (5-7.6 cm) larger in diameter than the current one. It provides ample space for growth and better tolerance to the relocation process.


