How to Transplant Virgin’s bower?
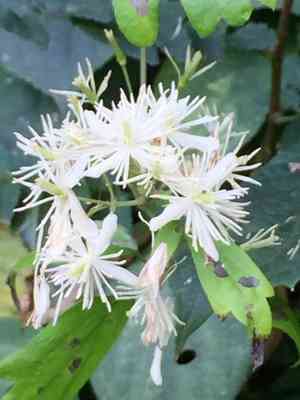
The ideal period for relocating virginâs bower is from early spring's awakening until its full bloom, allowing roots to settle prior to the summer's warmth. Select a location receiving filtered sunlight and possessing adequately draining earth to foster robust development.
Essential Preparations Before Relocating Virginâs Bower
Optimal Period for Moving Virginâs Bower?
For virginâs bower, the prime relocation window spans from early to late spring. This timing promotes robust root growth prior to summer's heat. Moving virginâs bower during this interval leverages milder temperatures and ample spring moisture, fostering ideal root establishment and recovery from stress. Choosing this season encourages vigorous development, ensuring your virginâs bower thrives in its new spot with vitality.
Required Spacing Between Virginâs Bower Plants?
Allow your virginâs bower ample room to flourish! Aim for a separation of 24-36 inches (61-91 cm). This provides each plant with the necessary space for air circulation and development, creating a healthy and happy garden area.
Ideal Soil Blend for Virginâs Bower Relocation?
To provide a welcoming environment for virginâs bower, incorporate well-draining soil along with some compost or a balanced, slow-release fertilizer. A pH close to neutral is perfect, so aim for that sweet spot. This will give your plants the boost they need to prosper!
Where to Replant Your Virginâs Bower?
Your virginâs bower will thrive in a sunny to partially shaded garden location. Select a spot where it can receive at least 6 hours of sunlight daily, but is also shielded from intense midday sun. This balance will help your virginâs bower grow strong and produce beautiful blooms.
Tools Required Before Moving Virginâs Bower
Gardening Gloves
To safeguard your hands while handling soil and the plant.
Spade or Shovel
For digging around and lifting the virginâs bower's root ball.
Watering Can or Hose
To hydrate the plant before extraction and after replanting.
Garden Fork
To loosen the soil surrounding the plant's roots prior to lifting.
Measuring Tape
To ensure correct spacing when planting in the new site.
Trellis or Support Structure
Virginâs bower may need a structure to climb as it matures.
Pruning Shears
For trimming dead or excessive growth before and after relocation.
How to Extract Virginâs Bower from the Ground
How to Extract Virginâs Bower from the Soil?
From Ground: First, moisten the virginâs bower plant to dampen the soil. Next, use a garden fork to gently loosen the soil around the plant. Dig a wide circle around the plant with a spade or shovel, and carefully lift the root ball from the ground with minimal root disturbance.From Pot: Begin by watering virginâs bower to facilitate removal. Tilt the pot and gently tap its sides to loosen the soil. Carefully slide the plant out, supporting the root ball to prevent damage.From Seedling Tray: Ensure the seedlings are well-hydrated. Use a spoon or small tool to gently lift each individual virginâs bower from its cell, taking care not to harm the roots.
Step-by-Step Guide for Relocating Virginâs Bower
Soil Preparation
Aerate the soil in the planting area to a depth of 12 - 18 inches, removing any debris or stones.
Hole Excavation
Dig a hole twice the width of the virginâs bower's root ball and of equal depth to prevent burying it too deeply.
Positioning
Place virginâs bower in the center of the hole with the top of the root ball level with the soil surface.
Soil Backfill
Gently refill the hole with soil, firming it around the root ball to eliminate air pockets.
Watering
Water thoroughly after planting to settle the soil around the roots and provide essential hydration.
Support Installation
Install a trellis or other support structure if needed, being careful not to harm the roots.
Mulching
Apply a layer of mulch around the base to retain moisture and regulate soil temperature.
Post-Transplant Care for Virginâs Bower
Monitoring
Regularly check on the virginâs bower to ensure it's adjusting to its new environment.
Feeding
Apply a balanced, slow-release fertilizer once virginâs bower is established to encourage growth.
Pruning
Trim any damaged or dead stems to promote healthy new development.
Supporting
Guide the vines onto the support structure as they grow for adequate stability.
Pest and Disease Management
Watch for signs of pests or disease and take appropriate action if necessary.
Addressing Common Issues with Virginâs Bower Relocation.
Why is my virginâs bower drooping after being moved?
Drooping could be due to transplant shock. Ensure adequate watering after relocation, keep soil moist, and provide shade if needed. It should recover within a few days.
How much space is required between each virginâs bower plant?
Ideally, allow each virginâs bower approximately 24-36 inches (61-91 cm) of space. This permits proper growth and airflow, reducing disease risk.
What is the optimal time to move virginâs bower?
Relocate virginâs bower in early to late spring, which allows the plant time to establish before hotter temperatures.
How deep should I plant virginâs bower when relocating?
Dig a hole as deep as the root ball and twice as wide. Planting at the same depth as its previous location encourages proper rooting.
Can I move virginâs bower during summer or fall?
It's possible, but not ideal. Relocating during the optimal spring timeframe gives virginâs bower the best chance to thrive.
What are indicators of overwatering after moving virginâs bower?
Soggy soil, yellowing leaves, and limp stems can signal overwatering. Ensure good drainage and prevent plants from sitting in water.
How do I know if my virginâs bower is receiving sufficient light after relocation?
Observe your virginâs bower's growth. If it appears leggy or pale, it might need a sunnier spot. Otherwise, dappled light is usually adequate.
Why are my virginâs bower's leaves browning at the edges after relocation?
Brown edges could indicate a watering issueâeither too much or too little. Adjust your routine and verify that the soil drains well.
What should I do if the virginâs bower doesn't bloom after relocation?
Be patient; virginâs bower may not flower the first year as it prioritizes root establishment. Ensure proper care and await the next season.
Is it necessary to fertilize virginâs bower after relocation?
Delay fertilizing to avoid damaging new roots. Once the plant is established, a balanced fertilizer can promote growth and blooms.



