How to Transplant Cocoplum?
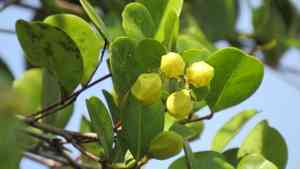
For cocoplum, the ideal period for relocation is during the balmy days of late spring through mid-summer, fostering robust development. Select a location that receives full sun to partial shade and possesses good drainage. Should it be necessary, amend the area with compost to prepare cocoplum for its new environment!
What Preparations are Necessary Before Relocating Cocoplum?
When is the Best Time to Move Cocoplum?
Choose the pleasant period from late spring to early summer for moving cocoplum. This timeframe offers a balanced mix of mild temperatures and increasing daylight, creating an ideal setting for root development. Relocating cocoplum now takes advantage of the growing season, promoting strong growth and reducing transplant shock, leading to a flourishing display in your garden.
How Much Space Should Be Allotted Between Cocoplum Plants?
For cocoplum to thrive, they require adequate room! When relocating, ensure they are spaced approximately 4-6 feet (1.2-1.8 meters) apart. This provides each plant sufficient area to expand and flourish.
What is the Optimal Soil Blend for Cocoplum Relocation?
The soil for your cocoplum should drain effectively. Incorporate organic matter or compost for an added nutritional boost, but a loamy soil base will work exceptionally well. A slow-release granular fertilizer should be mixed into the soil during preparation to nourish your new plant!
Where Should You Replant Your Cocoplum?
Cocoplum enjoys ample sunlight but prefers some shade during the hottest parts of the day. A spot with full morning sun and partial afternoon shade is perfect for this plant. Happy planting!
What Equipment Should You Prepare Before Relocating Cocoplum?
Shovel
Used for excavating holes in the ground to position your cocoplum. It can also be utilized for extracting your plant from its original spot.
Gardening Gloves
To safeguard your hands while handling soil and plants.
Hand Trowel
For digging small holes, removing unwanted plants, and blending soil.
Pruning shears
To trim any overgrown roots of your cocoplum plant prior to relocation.
Watering Can or Hose
To moisten the ground and hydrate your plant after relocation.
Organic Mulch
To cover the topsoil after moving cocoplum, aiding in soil moisture retention.
Wheelbarrow
A convenient method for transporting your plant to the new planting site.
How Do You Extract Cocoplum from the Soil?
How Do You Extract Cocoplum from the Soil?
From Ground: Hydrate the cocoplum plant to moisten the soil before you begin. Use a shovel to dig around the plant's root zone, far enough to avoid harming the root system, typically about 1.5 times the size of the plant's root ball. Then, carefully work the shovel beneath the root ball and lift the plant, keeping as much soil as possible attached to the roots.From Pot: Ensure the plant is well-watered beforehand. Turn the pot on its side and gently tap it to release the plant. If this fails, you might need to cut the pot away. Hold the cocoplum plant by the base of its stem, and carefully pull it out.From Seedling Tray: Water the soil first. Lift each cocoplum seedling by the leaves, not the stem, to prevent crushing it. Slide a thin spatula or spoon under the soil and roots, then lift the seedling out of the tray.
Step-by-Step Guide for Relocating Cocoplum
Preparation
Submerge the roots of your cocoplum plant in a bucket of water for a few hours before relocation. Concurrently, prepare the planting hole, which should be twice as wide and slightly deeper than the plant's root ball.
Relocation
Position the cocoplum plant in the hole. Ensure the top of the root ball is level with the soil surface. Return the soil to the hole, gently firming it around the roots.
Finishing Touches
Water the plant thoroughly immediately after relocation. Spread a layer of organic mulch around the plant's base, but be sure to keep it away from the stem to prevent rot.
How Do You Care For Cocoplum After Relocation?
Watering
Ensure the soil remains moist, especially during the initial weeks. This will help the cocoplum establish stronger roots after relocation. Avoid over-saturating the soil as this may harm the plant.
Feeding
After 4-6 weeks, the plant should have started to settle into its new environment, and you can begin feeding it with a general-purpose garden fertilizer to encourage healthy growth.
Protection
Monitor for pests and conduct regular inspections. If you observe any diseased or damaged parts, pruning shears may be useful.
Patience
Remember, plants typically don't exhibit new top growth until they've developed fresh roots, so don't worry if you don't see immediate changes. Be patient and provide your plant with the necessary care to thrive.
Troubleshooting Common Issues with Cocoplum Relocation.
What's the optimal time to relocate cocoplum?
The best time for relocating cocoplum is between late summer to early fall (S3-S5). This ensures better adaptation to new surroundings.
What's the ideal spacing between two cocoplum during relocation?
To ensure healthy growth of cocoplum, maintain a distance of approximately 4 to 6 feet (1.2 to 1.8 meters) between each plant during relocation.
How should I prepare the soil before relocating cocoplum?
Begin by loosening the soil to about 12 inches (30 cm) deep. Ideally, the soil should be well-drained with a rich organic matter content.
How deep should I plant cocoplum during relocation?
The hole for cocoplum should be twice the width of the root ball and equally deep, ensuring that the top of the root ball is level with the ground.
What care should I take while removing cocoplum for relocation?
When extracting cocoplum for relocation, be careful not to harm the root ball. Keep as much soil as possible around the roots to ease the transition.
How often should I water cocoplum after relocation?
Initially, you should water cocoplum daily. After about a week, you can gradually reduce watering to once or twice a week, depending on weather conditions.
What signs indicate successful cocoplum relocation?
After successful relocation, cocoplum should display new growth and healthy, vibrant leaves. If the plant wilts or appears stressed, it may require additional care.
Can relocating cocoplum cause yellowing of leaves?
Yes, due to transplant shock, the leaves of cocoplum might turn yellow initially. But with proper care, it should recover quickly.
How to protect relocated cocoplum plants from cold weather?
Mulch the base of cocoplum with organic matter to provide insulation against freezing conditions, and consider using a plant cover for extreme cold spells.
Should I prune cocoplum before relocating?
Except for removing any dead or damaged branches, extensive pruning of cocoplum is not necessary before relocating as it could put more stress on the plant.



